把 Android 设备屏幕截图并保存

4
我是一名新手安卓开发人员,对Java有基本的了解。我正在进行一个大型项目,但遇到了无法解决的问题。
我的问题基本上包含三个不同的部分:
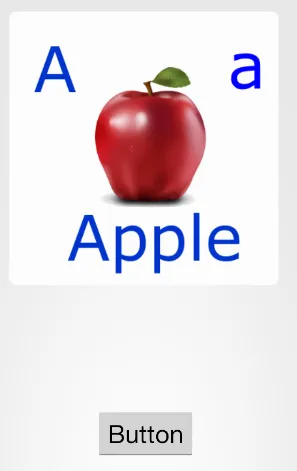
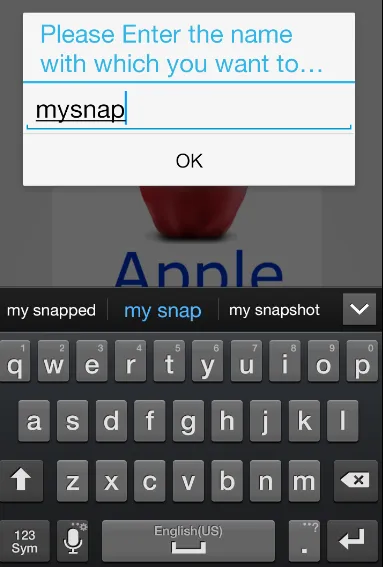
1. 我需要截取布局的屏幕截图。我不能只使用内置的屏幕截图功能,需要在按下按钮时完成。 2. 然后,我需要裁剪图片,使图片仅包含ImageView和位于其上方的TextView。(除非有更简单的方法?) 3. 最后,我需要将裁剪后的图片保存到某种存储器中,无论是SD卡、设备内存还是相册(不建议)。
非常感谢您的帮助!
<RelativeLayout xmlns:android="http://schemas.android.com/apk/res/android"
    xmlns:tools="http://schemas.android.com/tools"
    android:layout_width="match_parent"
    android:layout_height="match_parent"
    android:id="@+id/rl"
    tools:context=".Preview" >

    <ImageView
        android:id="@+id/imageView1"
        android:layout_width="fill_parent"
        android:layout_height="80dp"
        android:layout_alignParentBottom="true"
        android:layout_alignParentLeft="true"
        android:scaleType="centerCrop"
        android:src="@drawable/bottom_black" />

    <Button
        android:id="@+id/button1"
        style="?android:attr/buttonStyleSmall"
        android:layout_width="wrap_content"
        android:layout_height="30dp"
        android:layout_alignParentLeft="true"
        android:layout_alignParentTop="true"
        android:layout_marginLeft="20dp"
        android:layout_marginTop="3dp"
        android:background="@android:color/transparent"
        android:onClick="bold"
        android:text="Edit" />

    <ImageView
        android:id="@+id/imageView2"
        android:layout_width="300dp"
        android:layout_height="300dp"
        android:layout_alignParentLeft="true"
        android:layout_below="@+id/button1"
        android:src="@drawable/block" />

    <ImageView
        android:id="@+id/imageView7"
        android:layout_width="80dp"
        android:layout_height="20dp"
        android:layout_alignParentTop="true"
        android:layout_alignTop="@+id/button1"
        android:layout_centerHorizontal="true"
        android:layout_marginTop="6dp"
        android:src="@drawable/logo_black" />

    <ImageView
        android:id="@+id/imageView6"
        android:layout_width="40dp"
        android:layout_height="40dp"
        android:layout_alignParentRight="true"
        android:layout_alignTop="@+id/imageView2"
        android:layout_marginRight="10dp"
        android:src="@drawable/icon_fb_sel" />

    <ImageView
        android:id="@+id/imageView5"
        android:layout_width="40dp"
        android:layout_height="40dp"
        android:layout_alignParentRight="true"
        android:layout_below="@+id/imageView6"
        android:layout_marginRight="10dp"
        android:layout_marginTop="10dp"
        android:src="@drawable/icon_twit_sel" />

    <ImageView
        android:id="@+id/imageView4"
        android:layout_width="40dp"
        android:layout_height="40dp"
        android:layout_alignParentRight="true"
        android:layout_below="@+id/imageView5"
        android:layout_marginRight="10dp"
        android:layout_marginTop="10dp"
        android:src="@drawable/save" />

    <ImageView
        android:id="@+id/imageView3"
        android:layout_width="40dp"
        android:layout_height="40dp"
        android:layout_alignBottom="@+id/imageView2"
        android:layout_alignParentRight="true"
        android:layout_marginRight="10dp"
        android:src="@drawable/icon_trash" />

    <ImageButton
        android:id="@+id/imageButton1"
        android:layout_width="55dip"
        android:layout_height="44dip"
        android:layout_alignParentBottom="true"
        android:layout_alignParentLeft="true"
        android:layout_marginBottom="14dp"
        android:layout_marginLeft="35dp"
        android:layout_marginRight="50dp"
        android:layout_toLeftOf="@+id/imageView7"
        android:onClick="sendMessage"
        android:src="@drawable/icon_album" />

    <ImageButton
        android:id="@+id/imageButton2"
        android:layout_width="55dip"
        android:layout_height="44dip"
        android:layout_alignTop="@+id/imageButton1"
        android:layout_marginLeft="-30dp"
        android:layout_toRightOf="@+id/imageButton1"
        android:maxHeight="44dp"
        android:maxWidth="55dp"
        android:src="@drawable/icon_new" />

    <ImageButton
        android:id="@+id/imageButton4"
        android:layout_width="55dp"
        android:layout_height="44dp"
        android:layout_alignParentRight="true"
        android:layout_alignTop="@+id/imageButton2"
        android:layout_marginLeft="50dp"
        android:layout_marginRight="35dp"
        android:layout_toRightOf="@+id/imageView7"
        android:src="@drawable/icon_options" />

    <ImageButton
        android:id="@+id/imageButton3"
        android:layout_width="55dip"
        android:layout_height="44dip"
        android:layout_alignTop="@+id/imageButton2"
        android:layout_marginRight="-30dp"
        android:layout_toLeftOf="@+id/imageButton4"
        android:maxHeight="44dp"
        android:maxWidth="55dp"
        android:minHeight="44dp"
        android:minWidth="55dp"
        android:src="@drawable/icon_edit" />

    <TextView
        android:id="@+id/textView1"
        android:layout_width="297dp"
        android:layout_height="297dp"
        android:layout_alignBottom="@+id/imageView2"
        android:layout_alignParentLeft="true"
        android:layout_alignParentTop="true"
        android:layout_marginBottom="5dp"
        android:layout_marginLeft="3dp"
        android:layout_marginTop="30dp"
        android:text="text"
        android:textSize="65dp" />

</RelativeLayout>

这是我的 XML 代码。

那么变量的名称是“file”还是“name”? - James
我正在忙着回答一个问题。我已经在这里发布了它。我会在我的设备上测试它并让你知道。 - Raghunandan
@Raghunandan 我的意思是你在回答中发布的代码。我基本上只是复制粘贴了它。但我在我的相册中没有看到这张图片。 - James
我已经测试过它并且成功地存储在SD卡中,同时也在我的相册中显示出来了。您可以在下面的截图中看到,还带有相册图标。 - Raghunandan
那是在模拟器里吗?我以为那是在实际设备上? - James
显示剩余8条评论
2个回答

3
<uses-permission android:name="android.permission.WRITE_EXTERNAL_STORAGE"/>

我的布局

<RelativeLayout xmlns:android="http://schemas.android.com/apk/res/android"
xmlns:tools="http://schemas.android.com/tools"
android:layout_width="match_parent"
android:layout_height="match_parent"
android:id="@+id/rl"
tools:context=".MainActivity" >

<Button
    android:id="@+id/button1"
    android:layout_width="wrap_content"
    android:layout_height="wrap_content"
    android:layout_alignParentBottom="true"
    android:layout_centerHorizontal="true"
    android:layout_marginBottom="70dp"
    android:text="Button" />

<ImageView
    android:id="@+id/imageView1"
    android:layout_width="wrap_content"
    android:layout_height="wrap_content"
    android:layout_alignParentTop="true"
    android:layout_centerHorizontal="true"
    android:layout_marginTop="72dp"
    android:src="@drawable/afor" />

    </RelativeLayout>

我的活动类

public class MainActivity extends Activity {

RelativeLayout rl; 
final int PIC_CROP = 1;
ImageView iv;
 File file;
@Override
protected void onCreate(Bundle savedInstanceState) {
    super.onCreate(savedInstanceState);
    setContentView(R.layout.activity_main);
    rl = (RelativeLayout) findViewById(R.id.rl);
     Button b= (Button) findViewById(R.id.button1); 
     iv= (ImageView) findViewById(R.id.imageView1);
     b.setOnClickListener(new OnClickListener()
     {

      @Override
      public void onClick(View v) {
          save();
     }
     });
}

   public void save()
   {
       AlertDialog.Builder editalert = new AlertDialog.Builder(MainActivity.this);
       editalert.setTitle("Please Enter the name with which you want to Save");
       final EditText input = new EditText(MainActivity.this);
       LinearLayout.LayoutParams lp = new LinearLayout.LayoutParams(
               LinearLayout.LayoutParams.FILL_PARENT,
               LinearLayout.LayoutParams.FILL_PARENT);
       input.setLayoutParams(lp);
       editalert.setView(input);
       editalert.setPositiveButton("OK", new DialogInterface.OnClickListener() {
           public void onClick(DialogInterface dialog, int whichButton) {
               rl.setDrawingCacheEnabled(true);
               String name= input.getText().toString();
               Bitmap bitmap =rl.getDrawingCache();
               String root = Environment.getExternalStorageDirectory().toString();
               File myDir = new File(root + "/MyDraw");    
               myDir.mkdirs();
               file = new File (myDir, name+".png");
               if (file.exists ()) file.delete ();         
               try 
               {
                   if(!file.exists())
               {
                   file.createNewFile();
               }
                   FileOutputStream ostream = new FileOutputStream(file);
                   bitmap.compress(CompressFormat.PNG, 10, ostream);
                   ostream.close();
                   Uri uri = Uri.fromFile(new File(file.getAbsolutePath()));
                   performCrop(uri);                          
               } 
               catch (Exception e) 
               {
                   e.printStackTrace();
               }
           }
       });
       editalert.show(); 
   }


   private void performCrop(Uri picUri) {
    try {

   Intent cropIntent = new Intent("com.android.camera.action.CROP");
   // indicate image type and Uri
   cropIntent.setDataAndType(picUri, "image/*");
   // set crop properties
   cropIntent.putExtra("crop", "true");
   // indicate aspect of desired crop
   cropIntent.putExtra("aspectX", 1);
   cropIntent.putExtra("aspectY", 1);
   // indicate output X and Y
   cropIntent.putExtra("outputX", 128);
   cropIntent.putExtra("outputY", 128);
   // retrieve data on return
   cropIntent.putExtra("return-data", true);
   // start the activity - we handle returning in onActivityResult
   startActivityForResult(cropIntent, PIC_CROP);
 }
 // respond to users whose devices do not support the crop action
 catch (ActivityNotFoundException anfe) {
  // display an error message
  String errorMessage = "Whoops - your device doesn't support the crop action!";
  Toast toast = Toast.makeText(MainActivity.this, errorMessage, Toast.LENGTH_SHORT);
  toast.show();
  }
 }


 @Override
 protected void onActivityResult(int requestCode, int resultCode, Intent data) {
 super.onActivityResult(requestCode, resultCode, data);

 if (requestCode == PIC_CROP) {
  if (data != null) {
      // get the returned data
      Bundle extras = data.getExtras();
      // get the cropped bitmap
      Bitmap selectedBitmap = extras.getParcelable("data");
      FileOutputStream ostream;
    try {
        ostream = new FileOutputStream(file);
        selectedBitmap.compress(CompressFormat.PNG, 10, ostream);
         ostream.close(); 
    } catch (Exception e) {
        // TODO Auto-generated catch block
        e.printStackTrace();
    }

      iv.setImageBitmap(selectedBitmap);
  }
  }
  }  

快照

我的布局快照

输入图像描述

在按钮点击时提示用户输入保存名称

输入图像描述

裁剪并保存的图像打开在图库中

输入图像描述

注:我已将裁剪后的图像保存在SD卡中。快照的大小会有所不同。 这对我的设备有效。 我已发布了相同的内容。 如果有更好的想法,请编辑上面的帖子。

清单文件

<?xml version="1.0" encoding="utf-8"?>
<manifest xmlns:android="http://schemas.android.com/apk/res/android"
package="com.example.cropimagefromsdcard"
android:versionCode="1"
android:versionName="1.0" >

<uses-sdk
    android:minSdkVersion="8"
    android:targetSdkVersion="17" />
<uses-permission android:name="android.permission.WRITE_EXTERNAL_STORAGE"/>

<application
    android:allowBackup="true"
    android:icon="@drawable/ic_launcher"
    android:label="@string/app_name"
    android:theme="@style/AppTheme" >
    <activity
        android:name="com.example.cropimagefromsdcard.MainActivity"
        android:label="@string/app_name" >
        <intent-filter>
            <action android:name="android.intent.action.MAIN" />

            <category android:name="android.intent.category.LAUNCHER" />
        </intent-filter>
    </activity>
</application>

@James,这比我通常发布的要多。请检查上面编辑过的答案。 - Raghunandan
我不知道你想做什么。是的,它应该可以工作。为了对你想要截屏的布局启用此rl.setDrawingCacheEnabled(true)。在上面的例子中,它是相对布局。 - Raghunandan
尝试将内容复制到另一个xml文件中,例如test.xml,并将内容设置为setContentView(R.layout.test)。 - Raghunandan
我该如何在模拟器中打开它并在画廊中查看? - James
请问您如何将用户输入的名称附加到字符串中? - James
显示剩余19条评论

0
嘿,你可以使用以下代码在安卓中捕获屏幕截图并将其保存在SD卡中,然后稍后可以使用它。
// image naming and path  to include sd card  appending name you choose for file
String mPath = Environment.getExternalStorageDirectory().toString() + "/" + ACCUWX.IMAGE_APPEND;   

// create bitmap screen capture
Bitmap bitmap;
View v1 = mCurrentUrlMask.getRootView();
v1.setDrawingCacheEnabled(true);
bitmap = Bitmap.createBitmap(v1.getDrawingCache());
v1.setDrawingCacheEnabled(false);

OutputStream fout = null;
imageFile = new File(mPath);

try {
    fout = new FileOutputStream(imageFile);
    bitmap.compress(Bitmap.CompressFormat.JPEG, 90, fout);
    fout.flush();
    fout.close();

} catch (FileNotFoundException e) {
    // TODO Auto-generated catch block
    e.printStackTrace();
} catch (IOException e) {
    // TODO Auto-generated catch block
    e.printStackTrace();
}

那么,当您需要访问时,请使用以下内容:

Uri uri = Uri.fromFile(new File(mPath));

我的应用程序最终将保存多张图片,我需要能够从另一个活动中单独访问每个图片。是否有一种方法可以为保存的每张图片更改文件名? - James
您可以使用当前的“时间”和“日期”保存图像。以上代码在您的情况下是否有效? - Ayush
@James 在按钮点击时提示用户弹出一个窗口输入名称,然后保存。您想要这个作为解决方案吗?我可以发布相同的保存部分。 - Raghunandan
@Ayush 这是我需要的答案的一部分,谢谢你。不过我还需要另外两个部分。 - James
@James 你可以尝试我的回答。 - Raghunandan
显示剩余3条评论

网页内容由stack overflow 提供, 点击上面的
可以查看英文原文,
原文链接