如何在安卓中制作带有圆角的自定义对话框

219

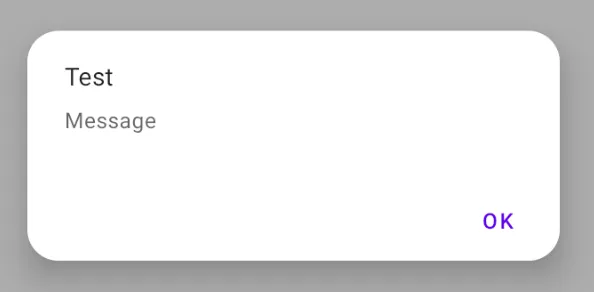
我想要做什么:我正在尝试在Android中制作一个带有圆角的自定义对话框。

目前的情况:我能够制作自定义对话框,但它没有圆角。我尝试添加选择器,但仍然无法实现圆角。

以下是我的代码:


Java代码:

private void launchDismissDlg() {

        dialog = new Dialog(getActivity(), android.R.style.Theme_Dialog);
        dialog.requestWindowFeature(Window.FEATURE_NO_TITLE);
        dialog.setContentView(R.layout.dlg_dismiss);
        dialog.setCanceledOnTouchOutside(true);

        Button btnReopenId = (Button) dialog.findViewById(R.id.btnReopenId);
        Button btnCancelId = (Button) dialog.findViewById(R.id.btnCancelId);

        btnReopenId.setOnClickListener(new OnClickListener() {
            @Override
            public void onClick(View v) {


            }
        });


        btnCancelId.setOnClickListener(new OnClickListener() {
            @Override
            public void onClick(View v) {


            }
        });
        dialog.setCanceledOnTouchOutside(false);
        dialog.getWindow().setSoftInputMode(WindowManager.LayoutParams.SOFT_INPUT_STATE_ALWAYS_HIDDEN);
        dialog.getWindow().setLayout(LayoutParams.MATCH_PARENT,LayoutParams.WRAP_CONTENT);
        dialog.show();

    }

XML代码:

<?xml version="1.0" encoding="utf-8"?>
<LinearLayout xmlns:android="http://schemas.android.com/apk/res/android"
    android:layout_width="match_parent"
    android:layout_height="match_parent"
    android:background="@android:color/white"
    android:orientation="vertical" >

    <TableLayout
        android:layout_width="match_parent"
        android:layout_height="wrap_content" >

        <TableRow
            android:id="@+id/tableRow1"
            android:layout_width="match_parent"
            android:layout_height="wrap_content"
            android:layout_marginTop="20dp"
            android:gravity="center" >

            <TextView
                android:id="@+id/textView1"
                android:layout_width="wrap_content"
                android:layout_height="wrap_content"
                android:gravity="center"
                android:text="&quot;I WOULD LIKE TO DISMISS THE VENDOR&quot;"
                android:textColor="@color/col_dlg_blue_light"
                android:textSize="14sp"
                android:textStyle="bold" />
        </TableRow>

        <TableRow
            android:id="@+id/tableRow2"
            android:layout_width="match_parent"
            android:layout_height="wrap_content"
            android:layout_marginTop="5dp"
            android:gravity="center" >

            <TextView
                android:id="@+id/textView2"
                android:layout_width="wrap_content"
                android:layout_height="wrap_content"
                android:gravity="center"
                android:text="BECAUSE"
                android:textColor="@android:color/black"
                android:textStyle="bold" />
        </TableRow>


        <TableRow
            android:id="@+id/tableRow4"
            android:layout_width="match_parent"
            android:layout_height="wrap_content" >

            <Button
                android:id="@+id/btnReopenId"
                android:layout_width="0dp"
                android:layout_height="wrap_content"
                android:layout_weight="1"
                android:background="@color/col_dlg_green_light"
                android:text="REOPEN"
                android:padding="5dp"
                android:textSize="14sp"
                android:textColor="@android:color/white"
                android:textStyle="bold" />

            <Button
                android:id="@+id/btnCancelId"
                android:layout_width="0dp"
                android:layout_height="wrap_content"
                android:layout_weight="1"
                android:background="@color/col_dlg_pink_light"
                android:text="CANCEL"
                android:padding="5dp"
                android:textSize="14sp"
                android:textColor="@android:color/white"
                android:textStyle="bold" />
        </TableRow>
    </TableLayout>

</LinearLayout>

你是在说浮动菜单吗? - Apurva
@Apurva...我没有使用浮动菜单...但是我正在谈论一个自定义的警告对话框。 - Devrath
我问关于浮动菜单,因为我只在那里看到了圆角弹出。从未见过带有圆角的对话框。 - Apurva
2
https://dev59.com/9uo6XIcBkEYKwwoYPR_f - M D
20个回答

512
在drawable文件夹中创建一个XML文件,命名为dialog_bg.xml:
<?xml version="1.0" encoding="utf-8"?>
<shape xmlns:android="http://schemas.android.com/apk/res/android">
    <solid
        android:color="@color/white"/>
    <corners
        android:radius="30dp" />
    <padding
        android:left="10dp"
        android:top="10dp"
        android:right="10dp"
        android:bottom="10dp" />
</shape>

将其设置为您的布局XML中的背景:

android:background="@drawable/dialog_bg"

将对话框的根视图背景设置为透明,因为Android会将你的对话框布局放在一个根视图内,该根视图会隐藏自定义布局中的角落。

Java:

dialog.getWindow().setBackgroundDrawable(new ColorDrawable(Color.TRANSPARENT));

Kotlin:

dialog.window?.setBackgroundDrawable(ColorDrawable(Color.TRANSPARENT))

72
大部分其他SO线程中缺少的是dialog.getWindow().setBackgroundDrawable(new ColorDrawable(Color.TRANSPARENT));!+1 - Randika Vishman
4
setBackgroundDrawable 似乎已经被弃用了...有什么替代方法吗? - DarkCygnus
4
在调用setContentView之前添加 dialog.getWindow().setBackgroundDrawable(new ColorDrawable(Color.TRANSPARENT)); - Ravi Vaniya
1
这个代码可以运行,但是对话框按钮显示的部分是透明的 :/ - Spikatrix
1
不要使用@color/white,而是将白色保存在colors.xml中,然后使用@android:color/white。 - maxwellnewage
显示剩余9条评论

59

使用 Androidx 库和 Material Components 主题,您可以覆盖 getTheme() 方法:

import androidx.fragment.app.DialogFragment

class RoundedDialog: DialogFragment() {

    override fun getTheme() = R.style.RoundedCornersDialog

    //....

}

与:

<style name="RoundedCornersDialog" parent="@style/Theme.MaterialComponents.Dialog">
    <item name="dialogCornerRadius">16dp</item>
</style>

或者您可以使用包含在Material Components库中的MaterialAlertDialogBuilder

import androidx.fragment.app.DialogFragment
import com.google.android.material.dialog.MaterialAlertDialogBuilder

class RoundedAlertDialog : DialogFragment() {

    //...

    override fun onCreateDialog(savedInstanceState: Bundle?): Dialog {
        return MaterialAlertDialogBuilder(requireActivity(), R.style.MaterialAlertDialog_rounded)
                .setTitle("Test")
                .setMessage("Message")
                .setPositiveButton("OK", null)
                .create()
    }

}

使用:

<style name="MaterialAlertDialog_rounded" parent="@style/ThemeOverlay.MaterialComponents.MaterialAlertDialog">
    <item name="shapeAppearanceOverlay">@style/DialogCorners</item>
</style>

<style name="DialogCorners">
    <item name="cornerFamily">rounded</item>
    <item name="cornerSize">16dp</item>
</style>

输入图片说明

如果您不需要 DialogFragment,只需使用 MaterialAlertDialogBuilder


1
这个对我有用。你节省了我很多时间。谢谢 :) - Arun K Babu
1
非常棒的答案,完美运作! - Matan Dahan
可能只能在API级别28及以上的版本中运行... - arkascha
@arkascha 为什么它只能在API 28+上工作? - Gabriele Mariotti
仍然在API 32上运行非常良好。 - Thái Quốc Toàn
显示剩余2条评论

36

您需要执行以下操作:

  • 为对话框的背景创建圆角背景:

<?xml version="1.0" encoding="utf-8"?>
<shape xmlns:android="http://schemas.android.com/apk/res/android"
android:shape="rectangle" >

    <solid android:color="#fff" />

    <corners
        android:bottomLeftRadius="8dp"
        android:bottomRightRadius="8dp"
        android:topLeftRadius="8dp"
        android:topRightRadius="8dp" />

</shape>
  • 现在在您的对话框的XML文件中,在根布局中使用具有所需边距的背景:

  • android:layout_marginLeft="20dip"
    android:layout_marginRight="20dip"
    android:background="@drawable/dialog_background"
    
  • 最后在Java部分,您需要执行以下操作:

  • dialog.requestWindowFeature(Window.FEATURE_NO_TITLE);
    dialog.setContentView(layoutResId);
    View v = getWindow().getDecorView();
    v.setBackgroundResource(android.R.color.transparent);
    

    这对我来说完美地运作。


    1
    如果您想为所有角落使用相同的值,则应使用<corners android:radius="8dp"/>,否则您将遇到渲染问题。 - Mehran
    1
    @Mehran 很好的观点。感谢您指出这一点。您能分享一下这个信息的来源吗? - SMR
    @SMR 如果您在布局中使用具有相同值的形状,则通常会收到“Path.isConvex不受支持”的警告。 https://dev59.com/1FsW5IYBdhLWcg3woYni - Mehran

    31

    dialog.getWindow().setBackgroundDrawable(new ColorDrawable(Color.TRANSPARENT));

    这个对我很有效。


    对我来说也有效 - Maruf Alam
    对我来说也有效 - undefined

    24

    设置

    dialog.getWindow().setBackgroundDrawable(new ColorDrawable(Color.TRANSPARENT));
    

    使用此方法可以防止对话框产生阴影。

    解决方案是使用:

    dialog.getWindow().setBackgroundDrawableResource(R.drawable.dialog_rounded_background);
    

    R.drawable.dialog_rounded_background在哪里?

    <?xml version="1.0" encoding="utf-8"?>
    <layer-list xmlns:android="http://schemas.android.com/apk/res/android" >
        <item>
            <shape android:shape="rectangle" android:padding="10dp">
                <solid
                    android:color="@color/dialog_bg_color"/>
                <corners
                    android:radius="30dp" />
            </shape>
        </item>
    
    </layer-list>
    

    2
    最优雅和简单的解决方案,适用于API 27,Android 8.1 Oreo。 - ManuelTS
    2
    如果您仍然被Theme.AppCompat困扰,那么这就是2020年的正确答案。 - barnacle.m
    1
    我不明白为什么这不是被接受的答案... - Greelings
    完美运作。这应该是被接受的答案。 - Parthi

    17

    如果您使用材料组件

    CustomDialog.kt

    class CustomDialog: DialogFragment() {
    
        override fun getTheme() = R.style.RoundedCornersDialog
    
    }
    

    样式.xml

    <style name="RoundedCornersDialog" parent="Theme.MaterialComponents.Dialog">
        <item name="dialogCornerRadius">dimen</item>
    </style>
    

    1
    这对我来说是个解决方案,谢谢!在我的情况下,我添加了文本和背景颜色:<style name="RoundedCornersDialog" parent="Theme.MaterialComponents.Dialog"> <item name="dialogCornerRadius">15dp</item> <item name="android:background">@color/white</item> <item name="android:textColor">@color/black</item> </style> - fvaldivia

    15

    dimen.xml

    <?xml version="1.0" encoding="utf-8"?>
    <resources>
    
        <integer name="weight">1</integer>
    
        <dimen name="dialog_top_radius">21dp</dimen>
    
        <dimen name="textview_dialog_head_min_height">50dp</dimen>
        <dimen name="textview_dialog_drawable_padding">5dp</dimen>
    
        <dimen name="button_dialog_layout_margin">3dp</dimen>
    
    
    </resources>
    

    样式表.xml

    <style name="TextView.Dialog">
            <item name="android:paddingLeft">@dimen/dimen_size</item>
            <item name="android:paddingRight">@dimen/dimen_size</item>
            <item name="android:gravity">center_vertical</item>
            <item name="android:textColor">@color/black</item>
        </style>
    
        <style name="TextView.Dialog.Head">
            <item name="android:minHeight">@dimen/textview_dialog_head_min_height</item>
            <item name="android:textColor">@color/white</item>
            <item name="android:background">@drawable/dialog_title_style</item>
            <item name="android:drawablePadding">@dimen/textview_dialog_drawable_padding</item>
        </style>
    
        <style name="TextView.Dialog.Text">
            <item name="android:textAppearance">@style/Font.Medium.16</item>
        </style>
    
        <style name="Button" parent="Base.Widget.AppCompat.Button">
            <item name="android:layout_height">@dimen/button_min_height</item>
            <item name="android:layout_width">match_parent</item>
            <item name="android:textColor">@color/white</item>
            <item name="android:gravity">center</item>
            <item name="android:textAppearance">@style/Font.Medium.20</item>
        </style>
    
     <style name="Button.Dialog">
            <item name="android:layout_weight">@integer/weight</item>
            <item name="android:layout_margin">@dimen/button_dialog_layout_margin</item>
        </style>
    
        <style name="Button.Dialog.Middle">
            <item name="android:background">@drawable/button_primary_selector</item>
        </style>
    

    dialog_title_style.xml

    <?xml version="1.0" encoding="utf-8"?>
    <shape xmlns:android="http://schemas.android.com/apk/res/android"
        android:shape="rectangle">
    
        <gradient
            android:angle="270"
            android:endColor="@color/primaryDark"
            android:startColor="@color/primaryDark" />
    
        <corners
            android:topLeftRadius="@dimen/dialog_top_radius"
            android:topRightRadius="@dimen/dialog_top_radius" />
    
    </shape>
    

    对话框背景.xml

    <?xml version="1.0" encoding="utf-8"?>
    <shape xmlns:android="http://schemas.android.com/apk/res/android">
        <solid android:color="@color/backgroundDialog" />
        <corners
            android:topLeftRadius="@dimen/dialog_top_radius"
            android:topRightRadius="@dimen/dialog_top_radius" />
        <padding />
    </shape>
    

    对话框_one_button.xml

    <?xml version="1.0" encoding="utf-8"?>
    <LinearLayout xmlns:android="http://schemas.android.com/apk/res/android"
        android:layout_width="match_parent"
        android:layout_height="wrap_content"
        android:background="@drawable/dailog_background"
        android:orientation="vertical">
    
        <TextView
            android:id="@+id/dialogOneButtonTitle"
            style="@style/TextView.Dialog.Head"
            android:text="Process Completed" />
    
        <LinearLayout
            android:layout_width="match_parent"
            android:layout_height="wrap_content"
            android:layout_marginBottom="16dp"
            android:layout_marginLeft="16dp"
            android:layout_marginRight="16dp"
            android:orientation="vertical">
    
            <TextView
                android:id="@+id/dialogOneButtonText"
                style="@style/TextView.Dialog.Text"
                android:text="Return the main menu" />
    
            <LinearLayout
                android:layout_width="match_parent"
                android:layout_height="wrap_content"
                android:orientation="horizontal">
    
                <Button
                    android:id="@+id/dialogOneButtonOkButton"
                    style="@style/Button.Dialog.Middle"
                    android:text="Ok" />
    
            </LinearLayout>
    
        </LinearLayout>
    
    </LinearLayout>
    

    OneButtonDialog.java

    package com.example.sametoztoprak.concept.dialogs;
    
    import android.app.Dialog;
    import android.graphics.Color;
    import android.graphics.drawable.ColorDrawable;
    import android.os.Bundle;
    import android.support.v7.app.AppCompatActivity;
    import android.view.View;
    import android.view.Window;
    import android.widget.Button;
    import android.widget.TextView;
    
    import com.example.sametoztoprak.concept.R;
    import com.example.sametoztoprak.concept.models.DialogFields;
    
    /**
     * Created by sametoztoprak on 26/09/2017.
     */
    
    public class OneButtonDialog extends Dialog implements View.OnClickListener {
    
        private static OneButtonDialog oneButtonDialog;
        private static DialogFields dialogFields;
    
        private Button dialogOneButtonOkButton;
        private TextView dialogOneButtonText;
        private TextView dialogOneButtonTitle;
    
        public OneButtonDialog(AppCompatActivity activity) {
            super(activity);
        }
    
        public static OneButtonDialog getInstance(AppCompatActivity activity, DialogFields dialogFields) {
            OneButtonDialog.dialogFields = dialogFields;
            return oneButtonDialog = (oneButtonDialog == null) ? new OneButtonDialog(activity) : oneButtonDialog;
        }
    
        @Override
        protected void onCreate(Bundle savedInstanceState) {
            super.onCreate(savedInstanceState);
            requestWindowFeature(Window.FEATURE_NO_TITLE);
            setContentView(R.layout.dialog_one_button);
            getWindow().setBackgroundDrawable(new ColorDrawable(Color.TRANSPARENT));
    
            dialogOneButtonTitle = (TextView) findViewById(R.id.dialogOneButtonTitle);
            dialogOneButtonText = (TextView) findViewById(R.id.dialogOneButtonText);
            dialogOneButtonOkButton = (Button) findViewById(R.id.dialogOneButtonOkButton);
    
            dialogOneButtonOkButton.setOnClickListener(this);
        }
    
        @Override
        protected void onStart() {
            super.onStart();
            dialogOneButtonTitle.setText(dialogFields.getTitle());
            dialogOneButtonText.setText(dialogFields.getText());
            dialogOneButtonOkButton.setText(dialogFields.getOneButton());
        }
    
        @Override
        public void onClick(View v) {
            switch (v.getId()) {
                case R.id.dialogOneButtonOkButton:
    
                    break;
                default:
                    break;
            }
            dismiss();
        }
    }
    

    enter image description here


    14

    我创造了一种新的方法,无需背景drawable,只需要将其作为CardView的子视图,然后使用app:cardCornerRadius="20dp"来设置圆角半径,并在java类中添加以下代码:dialog.getWindow().setBackgroundDrawable(new ColorDrawable(Color.TRANSPARENT));

    这是另一种实现它的方式。


    13

    你可以简单地使用MaterialAlertDialogBuilder创建具有圆角的自定义对话框。

    首先像这样为材料对话框创建样式:

    <style name="MyRounded.MaterialComponents.MaterialAlertDialog" parent="@style/ThemeOverlay.MaterialComponents.MaterialAlertDialog">
        <item name="shapeAppearanceOverlay">@style/ShapeAppearanceOverlay.App.CustomDialog.Rounded
        </item>
        <item name="colorSurface">@color/YOUR_COLOR</item>
    </style>
    
    <style name="ShapeAppearanceOverlay.App.CustomDialog.Rounded" parent="">
        <item name="cornerFamily">rounded</item>
        <item name="cornerSize">10dp</item>
    </style>
    

    然后在Java类中创建一个警报对话框对象,如下:

    AlertDialog alertDialog =  new MaterialAlertDialogBuilder(this,R.style.MyRounded_MaterialComponents_MaterialAlertDialog)  // for fragment you can use getActivity() instead of this 
                        .setView(R.layout.custom_layout) // custom layout is here 
                        .show();
    
                final EditText editText = alertDialog.findViewById(R.id.custom_layout_text);   // access to text view of custom layout         
                Button btn = alertDialog.findViewById(R.id.custom_layout_btn);
    
                btn.setOnClickListener(new View.OnClickListener() {
                    @Override
                    public void onClick(View v) {
    
                        Log.d(TAG, "onClick: " + editText.getText().toString());
                    }
                });
    

    这就是你需要做的全部。


    最正确的方式是不要忘记使用MaterialAlertDialogBuilder而不是AlertDialog.Builder。 - Zakhar Rodionov
    太好了,谢谢。 - Gilian Marques
    所有其他回答都已过时和模糊不清,而这是最简单和准确的!谢谢 - Hamza Khan

    8

    对于那些喜欢使用XML进行操作的人,特别是在使用导航架构组件动作来导航到对话框的情况下,您可以使用以下方法:

    <style name="DialogStyle" parent="ThemeOverlay.MaterialComponents.Dialog.Alert">
    
        <!-- dialog_background is drawable shape with corner radius -->
        <item name="android:background">@drawable/dialog_background</item>
    
        <item name="android:windowBackground">@android:color/transparent</item>
    </style>
    

    网页内容由stack overflow 提供, 点击上面的
    可以查看英文原文,
    原文链接