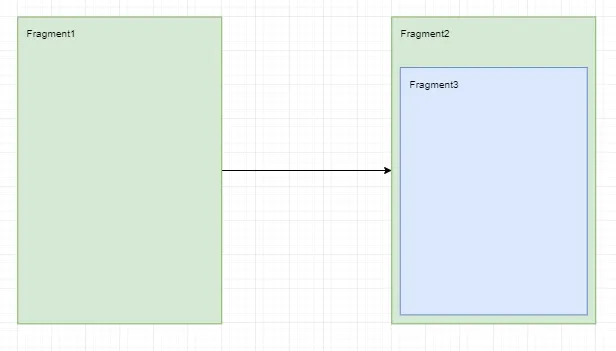
我正在创建一个需要嵌套导航图的应用程序,并且想要从子片段关闭父片段。
我可以通过调用
编辑:
我使用以下代码打开Fragment2:
我可以通过调用
getActivity().getSupportFragmentManager().popBackStack();来关闭片段,但这只能关闭后退堆栈中当前顶部的片段。
编辑:
我使用以下代码打开Fragment2:
Navigation.findNavController(getView()).navigate(R.id.action_fragment1_to_fragment2);
Fragment1:public class Fragment1 extends Fragment {
@Nullable
@Override
public View onCreateView(@NonNull LayoutInflater inflater, @Nullable ViewGroup container, @Nullable Bundle savedInstanceState) {
return inflater.inflate(R.layout.fragment1, container, false);
}
@Override
public void onActivityCreated(@Nullable Bundle savedInstanceState) {
super.onActivityCreated(savedInstanceState);
getView().findViewById(R.id.button).setOnClickListener(new View.OnClickListener() {
@Override
public void onClick(View v) {
Navigation.findNavController(v).navigate(R.id.action_fragment1_to_fragment2);
}
});
}
}
片段1布局:
<?xml version="1.0" encoding="utf-8"?>
<androidx.constraintlayout.widget.ConstraintLayout
    xmlns:android="http://schemas.android.com/apk/res/android"
    xmlns:app="http://schemas.android.com/apk/res-auto"
    xmlns:tools="http://schemas.android.com/tools"
    android:layout_width="match_parent"
    android:layout_height="match_parent"
    android:background="@color/colorPrimaryDark">

    <Button
        android:id="@+id/button"
        android:layout_width="wrap_content"
        android:layout_height="wrap_content"
        android:text="Button"
        app:layout_constraintStart_toStartOf="parent"
        app:layout_constraintTop_toTopOf="parent" />
    </androidx.constraintlayout.widget.ConstraintLayout>
片段2:
public class Fragment2 extends Fragment {

    @Nullable
    @Override
    public View onCreateView(@NonNull LayoutInflater inflater, @Nullable ViewGroup container, @Nullable Bundle savedInstanceState) {
        return inflater.inflate(R.layout.fragment2, container, false);
    }

    @Override
    public void onActivityCreated(@Nullable Bundle savedInstanceState) {
        super.onActivityCreated(savedInstanceState);
    }

    public void close () {
        getActivity().getSupportFragmentManager().popBackStack();
    }
}
在Fragment2中,我有另一个图表,Fragment2的布局如下:
<?xml version="1.0" encoding="utf-8"?>
<android.support.constraint.ConstraintLayout
    xmlns:android="http://schemas.android.com/apk/res/android"
    xmlns:app="http://schemas.android.com/apk/res-auto"
    xmlns:tools="http://schemas.android.com/tools"
    android:layout_width="match_parent"
    android:layout_height="match_parent"
    app:layout_constraintBottom_toBottomOf="parent"
    app:layout_constraintEnd_toEndOf="parent"
    app:layout_constraintStart_toStartOf="parent"
    app:layout_constraintTop_toTopOf="parent">

    <fragment
        android:id="@+id/child_graph_base"
        android:name="androidx.navigation.fragment.NavHostFragment"
        android:layout_width="0dp"
        android:layout_height="0dp"
        app:layout_constraintBottom_toBottomOf="parent"
        app:layout_constraintEnd_toEndOf="parent"
        app:layout_constraintStart_toStartOf="parent"
        app:layout_constraintTop_toTopOf="parent"
        app:defaultNavHost="true"
        app:navGraph="@navigation/child_graph" />
</android.support.constraint.ConstraintLayout>
碎片3:
public class Fragment3 extends Fragment {

    @Nullable
    @Override
    public View onCreateView(@NonNull LayoutInflater inflater, @Nullable ViewGroup container, @Nullable Bundle savedInstanceState) {
        return inflater.inflate(R.layout.fragment3, container, false);
    }

    @Override
    public void onActivityCreated(@Nullable Bundle savedInstanceState) {
        super.onActivityCreated(savedInstanceState);
        getView().findViewById(R.id.button).setOnClickListener(new View.OnClickListener() {
            @Override
            public void onClick(View v) {
                NavHostFragment navHostFragment = (NavHostFragment) getParentFragment();
                Fragment2 fragment2 = (Fragment2) navHostFragment.getParentFragment();
                fragment2.close();
            }
        });
    }
}
Fragment3布局:
<?xml version="1.0" encoding="utf-8"?>
<androidx.constraintlayout.widget.ConstraintLayout
    xmlns:android="http://schemas.android.com/apk/res/android"
    xmlns:app="http://schemas.android.com/apk/res-auto"
    xmlns:tools="http://schemas.android.com/tools"
    android:layout_width="match_parent"
    android:layout_height="match_parent"
    android:background="@color/colorPrimaryDark">

    <Button
        android:id="@+id/button"
        android:layout_width="wrap_content"
        android:layout_height="wrap_content"
        android:text="Button"
        app:layout_constraintStart_toStartOf="parent"
        app:layout_constraintTop_toTopOf="parent" />
</androidx.constraintlayout.widget.ConstraintLayout>
主图表(MainActivity):
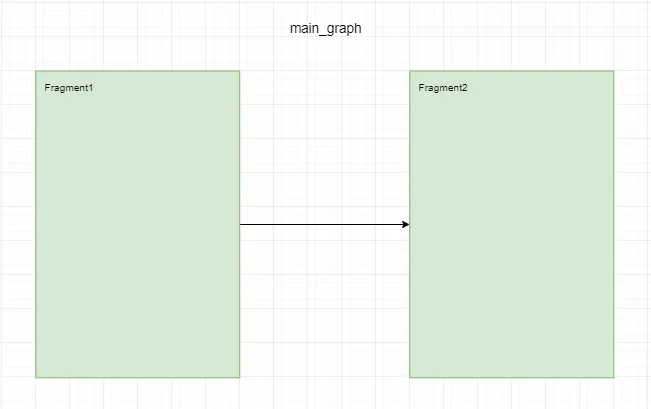
<?xml version="1.0" encoding="utf-8"?>
<navigation xmlns:android="http://schemas.android.com/apk/res/android"
    xmlns:app="http://schemas.android.com/apk/res-auto"
    xmlns:tools="http://schemas.android.com/tools"
    android:id="@+id/main_graph"
    app:startDestination="@id/fragment1">

    <fragment
        android:id="@+id/fragment1"
        android:name="alistar.navigation.fragments.Fragment1"
        android:label="fragment1"
        tools:layout="@layout/fragment1" >
        <action
            android:id="@+id/action_fragment1_to_fragment2"
            app:destination="@id/fragment2" />
    </fragment>
    <fragment
        android:id="@+id/fragment2"
        android:name="alistar.navigation.fragments.Fragment2"
        android:label="fragment2"
        tools:layout="@layout/fragment2" />
</navigation>
子图(在Fragment2中)
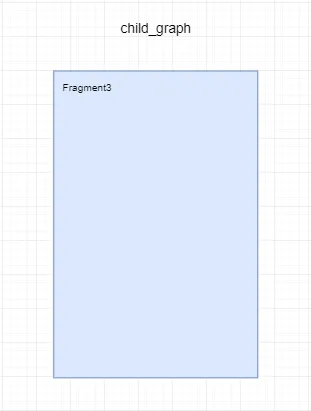
<?xml version="1.0" encoding="utf-8"?>
<navigation xmlns:android="http://schemas.android.com/apk/res/android"
    xmlns:app="http://schemas.android.com/apk/res-auto"
    xmlns:tools="http://schemas.android.com/tools"
    android:id="@+id/child_graph"
    app:startDestination="@id/fragment3">

    <fragment
        android:id="@+id/fragment3"
        android:name="alistar.navigation.fragments.Fragment3"
        android:label="fragment3"
        tools:layout="@layout/fragment3" />
</navigation>