我正在使用XIB文件设计UITableView中的单元格。我还使用dequeue机制,例如:
在我的UITableViewCell中,我使用许多动态高度的标签(行数= 0)。布局如下:
问题在于设置标签文本时会导致延迟。
如果我删除所有标签设置代码,则单元格将显示默认标签文本,tableview滚动非常平滑,并且高度也正确。每当我设置标签文本时,就会发生延迟。
我正在我的iPhone 6s上运行应用程序。在6s模拟器上,完全没有任何延迟,非常流畅。
有什么想法吗?也许是因为我使用UIStackView嵌入了我的标签?我这样做是因为当标签为空时隐藏标签更容易,因此其他元素向上移动,以避免空标签处的间距。
我尝试了很多事情,但无法使tableview平稳滚动,任何帮助都将不胜感激。
let cell = tableView.dequeueReusableCellWithIdentifier("articleCell", forIndexPath: indexPath) as! ArticleTableViewCell。我在我的ViewController的viewDidLoad中预先计算所有行高,所以func tableView(tableView: UITableView, heightForRowAtIndexPath indexPath: NSIndexPath) -> CGFloat方法可以立即返回正确的值。这一切都有效。在我的UITableViewCell中,我使用许多动态高度的标签(行数= 0)。布局如下:
我不使用透明背景,所有的子视图都是不透明的,并且有指定的背景颜色。我使用了 Color Blended Layers(一切都是绿色)和 Color Misaligned Images(没有黄色)。
这是我的cellForRowAtIndexPath方法:
func tableView(tableView: UITableView, cellForRowAtIndexPath indexPath: NSIndexPath) -> UITableViewCell {
    let tableViewSection = tableViewSectionAtIndex(indexPath.section)
    let tableViewRow = tableViewSection.rows.objectAtIndex(indexPath.row) as! TableViewRow

    switch tableViewRow.type! {

    case TableViewRowType.Article :
        let article = tableViewRow.article!

        if article.type == TypeArticle.Article {

            let cell = tableView.dequeueReusableCellWithIdentifier("articleCell", forIndexPath: indexPath) as! ArticleTableViewCell
            return cell

        } else {

            let cell = tableView.dequeueReusableCellWithIdentifier("chroniqueCell", forIndexPath: indexPath) as! ChroniqueTableViewCell
            return cell

        }

    default:
        return UITableViewCell()

    }
}
然后,在willDisplayCell方法中:
func tableView(tableView: UITableView, willDisplayCell cell: UITableViewCell, forRowAtIndexPath indexPath: NSIndexPath) {
    let tableViewSection = tableViewSectionAtIndex(indexPath.section)
    let tableViewRow = tableViewSection.rows.objectAtIndex(indexPath.row) as! TableViewRow
    let article = tableViewRow.article!

    if cell.isKindOfClass(ArticleTableViewCell) {
        let cell = cell as! ArticleTableViewCell
        cell.delegate = self
        cell.article = article

        if let imageView = articleImageCache[article.id] {
            cell.articleImage.image = imageView
            cell.shareControl.image = imageView
        } else {
            loadArticleImage(article, articleCell: cell)
        }
    } else {
        let cell = cell as! ChroniqueTableViewCell
        cell.delegate = self
        cell.article = article

        if let chroniqueur = article.getChroniqueur() {
            if let imageView = chroniqueurImageCache[chroniqueur.id] {
                cell.chroniqueurImage.image = imageView
            } else {
                loadChroniqueurImage(article, articleCell: cell)
            }
        }
    }
}
所有图片都是在后台线程中下载的,因此滚动时不会有图片加载。
当我设置“article”属性时,我的ArticleTableViewCell中的布局会被修改:cell.article = article:
var article: Article? {
    didSet {
        updateUI()
    }
}
我的updateUI函数:
func updateUI() -> Void {
if let article = article {
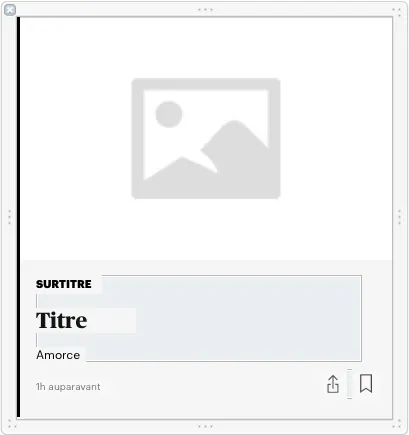
if let surtitre = article.surtitre {
self.surtitre.text = surtitre.uppercaseString
self.surtitre.setLineHeight(3)
} else {
self.surtitre.hidden = true
}
self.titre.text = article.titre
self.titre.setLineHeight(3)
if let amorce = article.amorce {
self.amorce.text = amorce
self.amorce.setLineHeight(3)
} else {
self.amorce.hidden = true
}
if let section = article.sectionSource {
if section.couleurFoncee != "" {
self.bordureSection.backgroundColor = UIColor(hexString: section.couleurFoncee)
self.surtitre.textColor = UIColor(hexString: section.couleurFoncee)
}
}
}
}
问题在于设置标签文本时会导致延迟。
setLineHeight 方法将标签文本转换为NSAttributedString以指定行高,但即使删除此代码并仅设置文本标签,显示新单元格时仍会出现轻微的滞后。如果我删除所有标签设置代码,则单元格将显示默认标签文本,tableview滚动非常平滑,并且高度也正确。每当我设置标签文本时,就会发生延迟。
我正在我的iPhone 6s上运行应用程序。在6s模拟器上,完全没有任何延迟,非常流畅。
有什么想法吗?也许是因为我使用UIStackView嵌入了我的标签?我这样做是因为当标签为空时隐藏标签更容易,因此其他元素向上移动,以避免空标签处的间距。
我尝试了很多事情,但无法使tableview平稳滚动,任何帮助都将不胜感激。
heightForRowAtIndexPath中返回了正确的高度,当表格加载时,它会调用3次“section 0,row 0”(cell#1)和4次“section 1,row 0”(cell#2)这个方法,这是在表格显示时可见的两个单元格。有2个nib被实例化(我在我的UITableViewCell的awakeFromNib中打印一个字符串)。我的单元格以正确的高度正确显示。 - Tiois