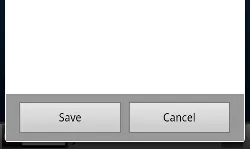
另一个选项
Resources\Values\styles.xml
<style name="MessageDialog" parent="android:Theme.Holo.Light.Dialog">
   <item name="android:windowBackground">@android:color/transparent</item>
</style>
在哪里
AlertDialog.Builder builder = new AlertDialog.Builder(Activity, Resource.Style.MessageDialog)
这些语句摘自以下代码片段:
public class MessageAlertDialog : DialogFragment, IDialogInterfaceOnClickListener
{
private const string DIALOG_TITLE = "dialogTitle";
private const string MESSAGE_TEXT = "messageText";
private const string MESSAGE_RESOURCE_ID = "messageResourceId";
private string _dialogTitle;
private string _messageText;
private int _messageResourceId;
public EventHandler OkClickEventHandler { get; set; }
public static MessageAlertDialog NewInstance(string messageText)
{
MessageAlertDialog dialogFragment = new MessageAlertDialog();
Bundle args = new Bundle();
args.PutString(MESSAGE_TEXT, messageText);
dialogFragment.Arguments = args;
return dialogFragment;
}
public static MessageAlertDialog NewInstance(string dialogTitle, string messageText)
{
MessageAlertDialog dialogFragment = new MessageAlertDialog();
Bundle args = new Bundle();
args.PutString(DIALOG_TITLE, dialogTitle);
args.PutString(MESSAGE_TEXT, messageText);
dialogFragment.Arguments = args;
return dialogFragment;
}
public static MessageAlertDialog NewInstance(int messageResourceId)
{
MessageAlertDialog dialogFragment = new MessageAlertDialog();
Bundle args = new Bundle();
args.PutInt(MESSAGE_RESOURCE_ID, messageResourceId);
dialogFragment.Arguments = args;
return dialogFragment;
}
public override void OnCreate(Bundle savedInstanceState)
{
base.OnCreate(savedInstanceState);
_dialogTitle = Arguments.GetString(DIALOG_TITLE);
_messageText = Arguments.GetString(MESSAGE_TEXT);
_messageResourceId = Arguments.GetInt(MESSAGE_RESOURCE_ID);
}
public override Dialog OnCreateDialog(Bundle savedInstanceState)
{
base.OnCreateDialog(savedInstanceState);
AlertDialog.Builder builder = new AlertDialog.Builder(Activity, Resource.Style.MessageDialog);
if (_dialogTitle != null)
{
builder.SetTitle(_dialogTitle);
}
if (_messageText != null)
{
builder.SetMessage(_messageText);
}
else
{
View messageView = GetMessageView();
if (messageView != null)
{
builder.SetView(messageView);
}
}
builder.SetPositiveButton("OK", this);
this.Cancelable = false;
AlertDialog dialog = builder.Create();
dialog.SetCanceledOnTouchOutside(false);
return dialog;
}
private View GetMessageView()
{
if (_messageResourceId != 0)
{
View messageView = Activity.LayoutInflater.Inflate(_messageResourceId, null);
return messageView;
}
return null;
}
void IDialogInterfaceOnClickListener.OnClick(IDialogInterface di, int i)
{
OkClickEventHandler?.Invoke(this, null);
}
}
使用方法
public static void ShowMessageAlertDialog(FragmentManager fragmentManager, string dialogTitle, string messageText, EventHandler okClickEventHandler)
{
    MessageAlertDialog msgAlertDialog = MessageAlertDialog.NewInstance(dialogTitle, messageText);
    msgAlertDialog.OkClickEventHandler += okClickEventHandler;

    msgAlertDialog.Show(fragmentManager, "message_alert_dialog");
}

