所以,我刚刚将我的代码库更新为Lollipop版本,但现在在使用Action Bar时遇到了问题。我正在使用AppCompat和ActionBarActivity,并填充自定义视图。似乎自定义视图不再占据整个屏幕的宽度,左侧留下一个薄条。
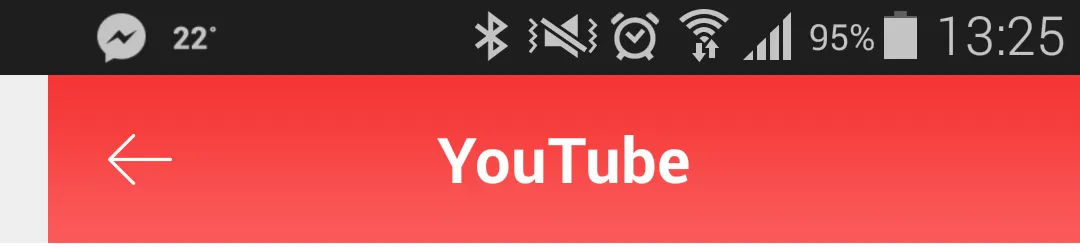
 之前的样子
之前的样子
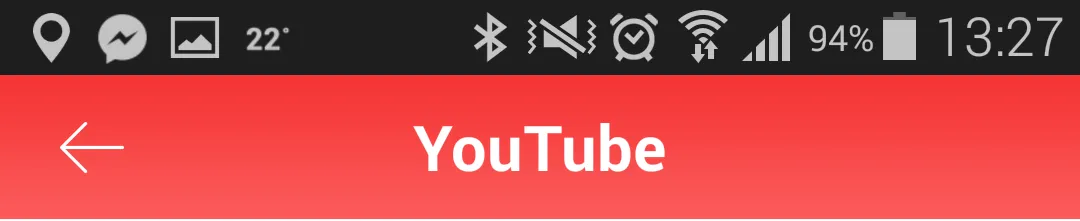
 现在的样子
现在的样子
以下是我用来设置Action Bar的代码。有没有人有任何想法?
final ActionBar actionBar = getSupportActionBar();
if(actionBar != null) {
    actionBar.setDisplayHomeAsUpEnabled(false);
    actionBar.setDisplayShowHomeEnabled(false);
    actionBar.setDisplayShowTitleEnabled(false);
    actionBar.setDisplayShowCustomEnabled(true);
    actionBar.setNavigationMode(ActionBar.NAVIGATION_MODE_STANDARD);
    actionBar.setCustomView(R.layout.action_bar_content_search_custom_view);
    actionBar.setBackgroundDrawable(null);
    // actionBar.setStackedBackgroundDrawable(null);
    TextView title = (TextView) actionBar.getCustomView().findViewById(R.id.action_bar_title);
    title.setText(R.string.youtube);
    ImageView back = (ImageView) actionBar.getCustomView().findViewById(R.id.action_bar_back);
    back.setOnClickListener(new OnClickListener() {
        @Override
        public void onClick(View v) {
            finish();
        }
    });
}
编辑
移除自定义视图并更改背景后,现在占据了整个宽度。那么问题是,我们如何使CustomView占据ActionBar的整个宽度?
appcompat-v7中的一个错误。 - CommonsWareImageView预留的。试试先把它禁用看看。 - Nikola Despotoski