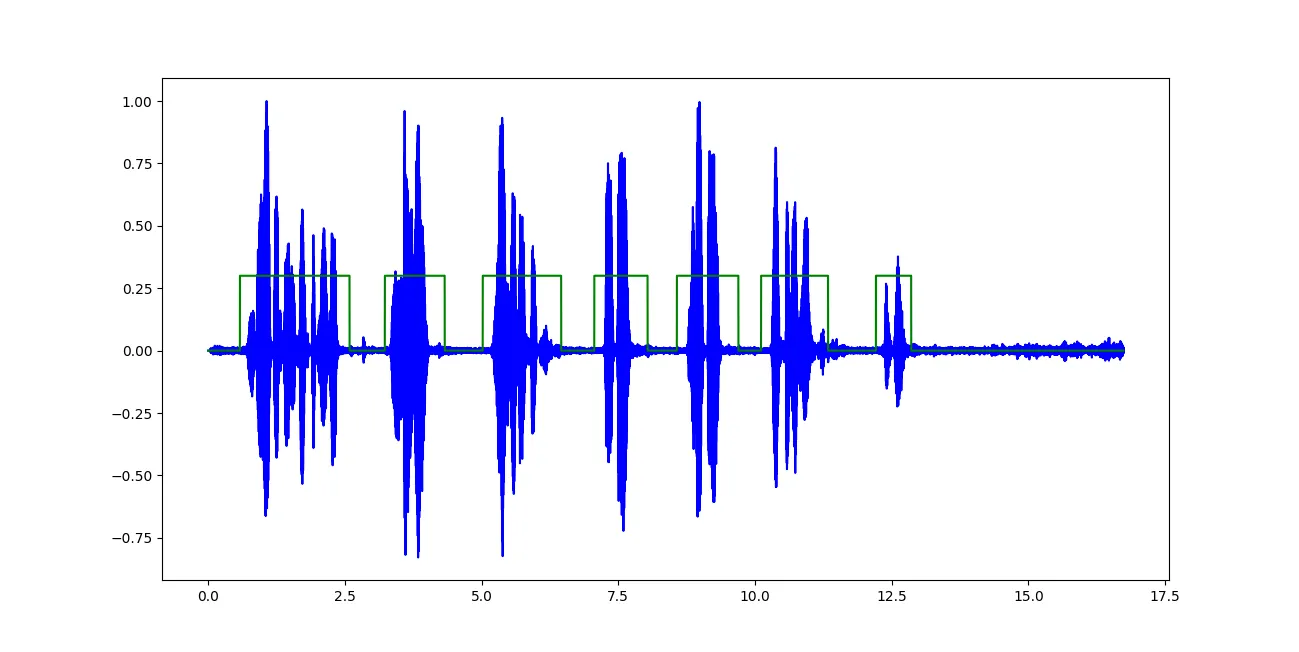
如何在Python中进行实时语音活动检测?
1
你应该尝试使用来自Google的webRTC VAD的Python绑定。它很轻便、快速,并且基于GMM模型提供了非常合理的结果。由于决策是每帧提供的,所以延迟最小。
# Run the VAD on 10 ms of silence. The result should be False.
import webrtcvad
vad = webrtcvad.Vad(2)

sample_rate = 16000
frame_duration = 10  # ms
frame = b'\x00\x00' * int(sample_rate * frame_duration / 1000)
print('Contains speech: %s' % (vad.is_speech(frame, sample_rate))
此外,这篇文章可能对您有用。
2022年12月更新
由于该主题仍引起关注,我想更新我的答案。 SileroVAD 是最近发布的速度非常快、准确性非常高且遵循 MIT 许可证的 VAD。
4
Auditok。我之前不知道它的存在。 - igrinis我发现LibROSA可以是你问题的解决方案之一。在Medium上有一个简单的教程,介绍如何使用麦克风流进行实时预测。
让我们使用短时傅里叶变换(STFT)作为特征提取器,作者解释道:
为了计算STFT,快速傅里叶变换窗口大小(n_fft)被设为512。根据公式 n_stft = n_fft/2 + 1,在512个时间窗口内计算出257个频率bin(n_stft)。移动窗口长度为256,以更好地重叠计算STFT。
stft = np.abs(librosa.stft(trimmed, n_fft=512, hop_length=256, win_length=512))
# Plot audio with zoomed in y axis
def plotAudio(output):
    fig, ax = plt.subplots(nrows=1,ncols=1, figsize=(20,10))
    plt.plot(output, color='blue')
    ax.set_xlim((0, len(output)))
    ax.margins(2, -0.1)
    plt.show()

# Plot audio
def plotAudio2(output):
    fig, ax = plt.subplots(nrows=1,ncols=1, figsize=(20,4))
    plt.plot(output, color='blue')
    ax.set_xlim((0, len(output)))
    plt.show()

def minMaxNormalize(arr):
    mn = np.min(arr)
    mx = np.max(arr)
    return (arr-mn)/(mx-mn)

def predictSound(X):
    clip, index = librosa.effects.trim(X, top_db=20, frame_length=512, hop_length=64) # Empherically select top_db for every sample
    stfts = np.abs(librosa.stft(clip, n_fft=512, hop_length=256, win_length=512))
    stfts = np.mean(stfts,axis=1)
    stfts = minMaxNormalize(stfts)
    result = model.predict(np.array([stfts]))
    predictions = [np.argmax(y) for y in result]
    print(lb.inverse_transform([predictions[0]])[0])
    plotAudio2(clip)

CHUNKSIZE = 22050 # fixed chunk size
RATE = 22050

p = pyaudio.PyAudio()
stream = p.open(format=pyaudio.paFloat32, channels=1,
rate=RATE, input=True, frames_per_buffer=CHUNKSIZE)

#preprocessing the noise around
#noise window
data = stream.read(10000)
noise_sample = np.frombuffer(data, dtype=np.float32)
print("Noise Sample")
plotAudio2(noise_sample)
loud_threshold = np.mean(np.abs(noise_sample)) * 10
print("Loud threshold", loud_threshold)
audio_buffer = []
near = 0

while(True):
    # Read chunk and load it into numpy array.
    data = stream.read(CHUNKSIZE)
    current_window = np.frombuffer(data, dtype=np.float32)

    #Reduce noise real-time
    current_window = nr.reduce_noise(audio_clip=current_window, noise_clip=noise_sample, verbose=False)

    if(audio_buffer==[]):
        audio_buffer = current_window
    else:
        if(np.mean(np.abs(current_window))<loud_threshold):
            print("Inside silence reign")
            if(near<10):
                audio_buffer = np.concatenate((audio_buffer,current_window))
                near += 1
            else:
                predictSound(np.array(audio_buffer))
                audio_buffer = []
                near
        else:
            print("Inside loud reign")
            near = 0
            audio_buffer = np.concatenate((audio_buffer,current_window))

# close stream
stream.stop_stream()
stream.close()
p.terminate()
代码作者:Chathuranga Siriwardhana
完整代码可以在这里找到。
numpy 和 python 来编写您的代码,如果您需要访问低级数组,则可以考虑 numba。同时,您也可以使用 line_profiler 对代码进行分析。此外,还可以使用 scipy.signal 进行更高级别的信号处理。
通常情况下,音频处理是针对样本进行的。因此,您需要为您的过程定义一个样本大小,然后运行一种方法来判断该样本是否包含语音。
import numpy as np

def main_loop():
    stream = <create stream with your audio library>
    while True:
        sample = stream.readframes(<define number of samples / time to read>)
        print(is_speech(sample))

def is_speech(sample):
    audio = np.array(sample)

    < do you processing >

    # e.g. simple loudness test
    return np.any(audio > 0.8):
那应该能帮你解决大部分问题。
1
我认为这里有两种方法,
- 阈值方法
- 小型、可部署的神经网络方法
第一种方法快速、可行,并且可以非常快速地实现和测试。而第二个方法稍微难以实现。我想你对第二个选项已经有点熟悉了。
在第二种方法的情况下,您需要一组按二进制分类序列标记的演讲数据集,如 00000000111111110000000011110000。神经网络应该很小,并针对移动设备(如手机)进行优化。
您可以查看 TensorFlow 的这个链接。
这个是语音活动检测器。我认为它适合您的目的。
另外,请查看以下内容。
https://github.com/eesungkim/Voice_Activity_Detector
https://github.com/pyannote/pyannote-audio
当然,您应该比较所提到的工具包和模型的性能以及在移动设备上实现的可行性。
我最近在寻找同样问题的答案时发现了这个问题,感谢所有的建议。我找到了3个更好的探测器。picovoice远比webrtc好。speechbrain和nvidia不支持实时,有点糟糕。
-picovoice cobra: https://picovoice.ai/docs/cobra/ -speechbrain: https://speechbrain.readthedocs.io/en/latest/API/speechbrain.pretrained.interfaces.html#speechbrain.pretrained.interfaces.VAD -nvidia: https://docs.nvidia.com/deeplearning/nemo/user-guide/docs/en/stable/asr/speech_classification/models.html
2
原文链接
