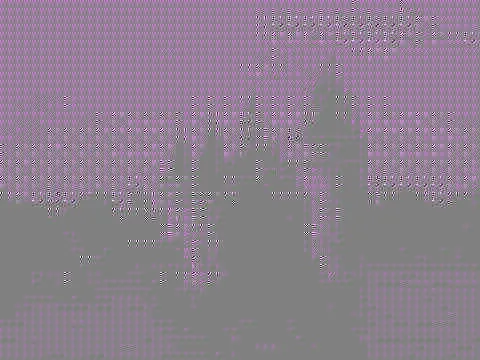
我正在尝试使用OpenCV执行基本的JPEG压缩(DCT + 量化 + IDCT),而不是使用熵编码/霍夫曼编码。问题是,当我解压缩压缩后的图像时,它的外观与原始图像相差甚远。我正在按照这些教程进行操作:基本JPEG压缩/解压模拟,使用OpenCV进行基本JPEG压缩。以下是3个图像(原始、压缩和解压缩图像):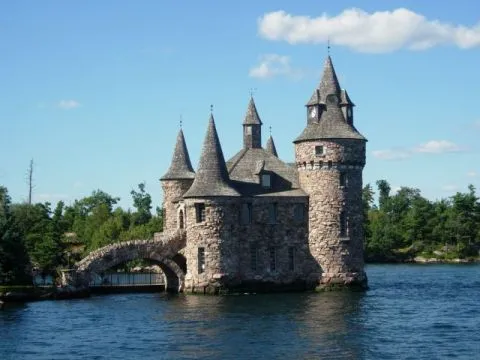 。
。
// EDIT 1: @Micka提到了使用imread / imwrite存在的问题,因此我编辑了我的代码,直接从程序中使用压缩图像。
。

double dataLuminance[8][8] = {
    {16, 11, 10, 16, 24, 40, 51, 61},
    {12, 12, 14, 19, 26, 58, 60, 55},
    {14, 13, 16, 24, 40, 57, 69, 56},
    {14, 17, 22, 29, 51, 87, 80, 62},
    {18, 22, 37, 56, 68, 109, 103, 77},
    {24, 35, 55, 64, 81, 104, 113, 92},
    {49, 64, 78, 87, 103, 121, 120, 101},
    {72, 92, 95, 98, 112, 100, 103, 99}
};

double dataChrominance[8][8] = {
    {17, 18, 24, 27, 99, 99, 99, 99},
    {18, 21, 26, 66, 99, 99, 99, 99},
    {24, 26, 56, 99, 99, 99, 99, 99},
    {47, 66, 99, 99, 99, 99, 99, 99},
    {99, 99, 99, 99, 99, 99, 99, 99},
    {99, 99, 99, 99, 99, 99, 99, 99},
    {99, 99, 99, 99, 99, 99, 99, 99},
    {99, 99, 99, 99, 99, 99, 99, 99}
};
// EDIT 1: @Micka提到了使用imread / imwrite存在的问题,因此我编辑了我的代码,直接从程序中使用压缩图像。
压缩方法是:
void ImageCompression::compression(){
// Getting original image size
int height = imgOriginal.size().height;
int width = imgOriginal.size().width;

// Converting image color
Mat imgColorConverted;
cvtColor(imgOriginal, imgColorConverted, CV_BGR2YCrCb);

// Transforming 2D Array in Image Matrix
Mat luminance = Mat(8,8, CV_64FC1, &dataLuminance);
Mat chrominance = Mat(8,8, CV_64FC1, &dataChrominance);

cout << "Luminance: " << luminance << endl << endl;
cout << "Chrominance" << chrominance << endl << endl;

// Splitting the image into 3 planes
vector<Mat> planes;
split(imgColorConverted, planes);

// Downsampling chrominance
// Resizing to 1/4 of original image
resize(planes[1], planes[1], Size(width/2, height/2));
resize(planes[2], planes[2], Size(width/2, height/2));

// Resizing to original image size
resize(planes[1], planes[1], Size(width, height));
resize(planes[2], planes[2], Size(width, height));

// Dividing image in blocks 8x8
for ( int i = 0; i < height; i+=8 ){
    for( int j = 0; j < width; j+=8 ){
        // For each plane
        for( int plane = 0; plane < imgColorConverted.channels(); plane++ ){

            // Creating a block
            Mat block = planes[plane](Rect(j, i, 8, 8));

            // Converting the block to float
            block.convertTo( block, CV_64FC1 );

            // Subtracting the block by 128
            subtract( block, 128.0, block );

            // DCT
            dct( block, block );

            // Applying quantization
            if( plane == 0 ){
                divide( block, luminance, block );
            }
            else {
                divide( block, chrominance, block );
            }

            // Converting it back to unsigned int
            block.convertTo( block, CV_8UC1 );

            // Copying the block to the original image
            block.copyTo( planes[plane](Rect(j, i, 8, 8)) );
        }
    }
}

merge( planes, finalImage );
}
我的解压方法:
ImageCompression::decompression{
// Getting the size of the image
int height = finalImage.size().height;
int width = finalImage.size().width;

// Transforming 2D Array in Image Matrix
Mat luminance = Mat(8,8, CV_64FC1, &dataLuminance);
Mat chrominance = Mat(8,8, CV_64FC1, &dataChrominance);

// Splitting the image into 3 planes
vector<Mat> planes;
split(finalImage, planes);

// Dividing the image in blocks 8x8
for ( int i = 0; i < height; i+=8 ){
    for( int j = 0; j < width; j+=8 ){
        // For each plane
        for( int plane = 0; plane < finalImage.channels(); plane++ ){

            // Creating a block
            Mat block = planes[plane](Rect(j, i, 8, 8));

            // Converting the block to float
            block.convertTo( block, CV_64FC1 );

            // Applying dequantization
            if( plane == 0 ){
                multiply( block, luminance, block );
            }
            else {
                multiply( block, chrominance, block );
            }

            // IDCT
            idct( block, block );

            // Adding 128 to the block
            add( block, 128.0, block );

            // Converting it back to unsigned int
            block.convertTo( block, CV_8UC1 );

            // Copying the block to the original image
            block.copyTo( planes[plane](Rect(j, i, 8, 8)) );
        }
    }
}

merge(planes, finalImage);
cvtColor( finalImage, finalImage, CV_YCrCb2BGR );

imshow("Decompressed image", finalImage);
waitKey(0);
imwrite(".../finalResult.jpg", finalImage);
}
有人知道为什么我得到了这张结果图片吗?
谢谢。
imwrite(".../result.jpg", finalImage);可能会自己进行一些 JPEG 压缩,并且可能将您现有的图像通道解释为 BGR 图像。请尝试避免使用 imwrite/imread 进行保存和加载,而是直接使用压缩后的图像进行测试解压缩(无需从文件保存/加载)。Mat finalImage = imread(".../result.jpg");将生成一个 BGR 图像,无论您尝试保存什么。 - Micka