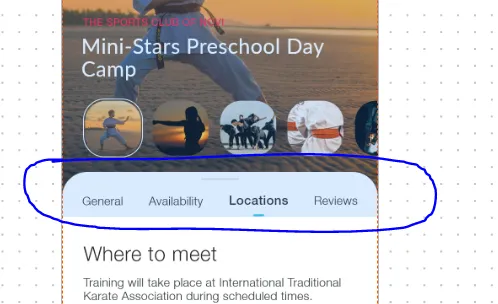
解决方案
截至撰写本文时,没有任何小部件能支持该功能。完成此操作的方法是使用Stack小部件和您自己的SliveWidget。
之前:
 这是您的默认代码:
import 'package:flutter/material.dart';
void main() {
runApp(MyApp());
}
class MyApp extends StatelessWidget {
@override
Widget build(BuildContext context) {
return MaterialApp(
title: 'Flexible space title',
home: MyHomePage(),
);
}
}
class MyHomePage extends StatelessWidget {
@override
Widget build(BuildContext context) {
return DefaultTabController(
length: 2,
child: Scaffold(
body: CustomScrollView(
slivers: <Widget>[
SliverAppBar(
backgroundColor: Colors.transparent,
brightness: Brightness.dark,
actions: <Widget>[IconButton(icon: Icon(Icons.favorite), onPressed: () {}), IconButton(icon: Icon(Icons.share), onPressed: () {})],
floating: false,
pinned: false,
expandedHeight: 250 - MediaQuery.of(context).padding.top,
flexibleSpace: Container(
height: 550,
width: double.infinity,
decoration: BoxDecoration(
image: DecorationImage(
fit: BoxFit.cover,
image: NetworkImage(
'https://images.unsplash.com/photo-1561752888-21eb3b67eb4e?ixlib=rb-1.2.1&ixid=eyJhcHBfaWQiOjEyMDd9&auto=format&fit=crop&w=967&q=80'))),
),
),
SliverList(
delegate: SliverChildListDelegate(_listview(50)),
),
],
),
),
);
}
}
List _listview(int count) {
List<Widget> listItems = List();
listItems.add(Container(
color: Colors.black,
height: 50,
child: TabBar(
tabs: [FlutterLogo(), FlutterLogo()],
),
));
for (int i = 0; i < count; i++) {
listItems.add(new Padding(padding: new EdgeInsets.all(20.0), child: new Text('Item ${i.toString()}', style: new TextStyle(fontSize: 25.0))));
}
return listItems;
}
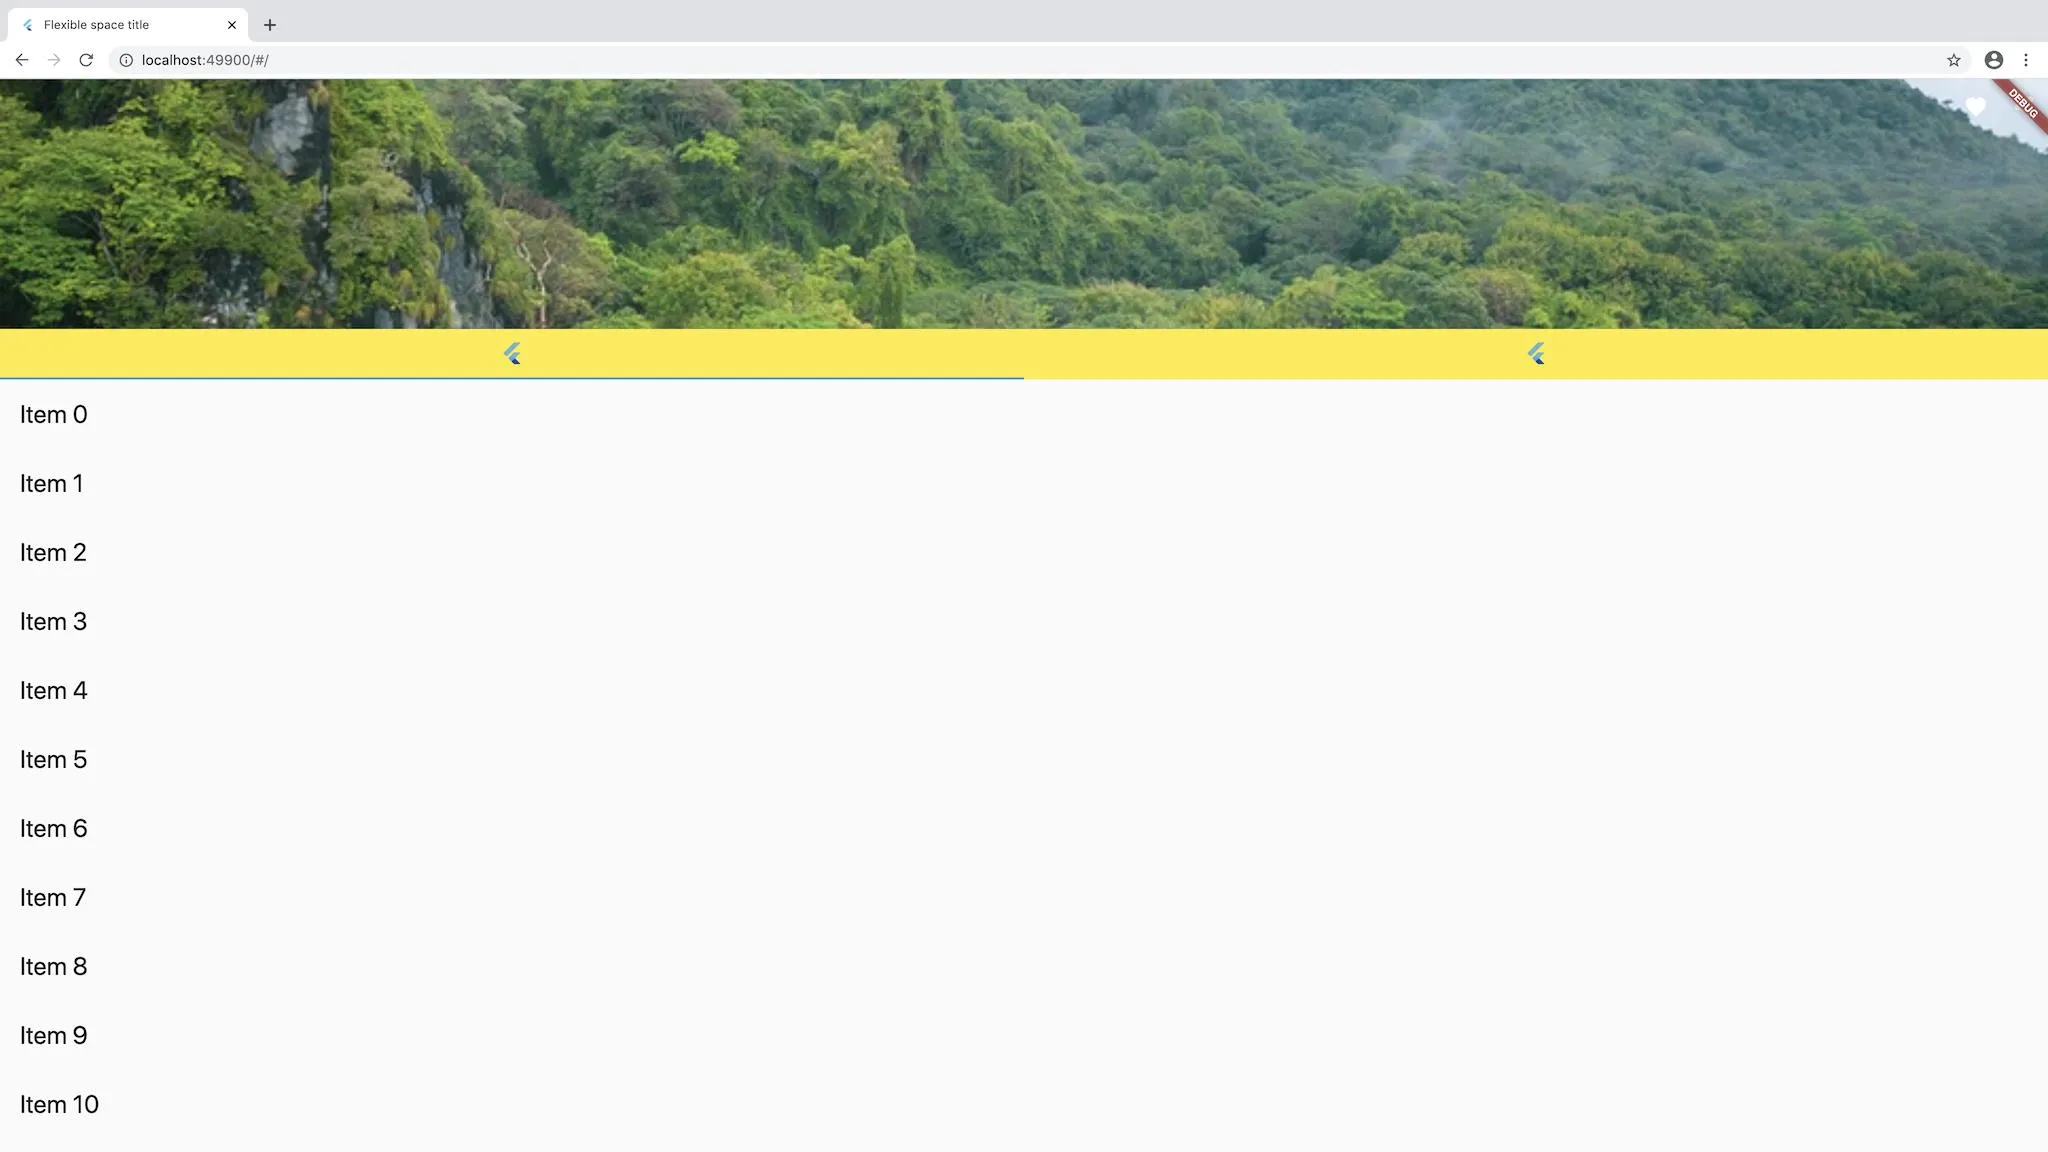
之后

以下是使用 Stack 和 SliveWidget 小部件完成的代码:
import 'package:flutter/material.dart';
import 'package:flutter/rendering.dart';
void main() {
runApp(MyApp());
}
class MyApp extends StatelessWidget {
@override
Widget build(BuildContext context) {
return MaterialApp(
title: 'Flexible space title',
home: MyHomePage(),
);
}
}
class MyHomePage extends StatelessWidget {
@override
Widget build(BuildContext context) {
return DefaultTabController(
length: 2,
child: Scaffold(
body: Stack(
children: [
Container(
height: 550,
width: double.infinity,
decoration: BoxDecoration(
image: DecorationImage(
fit: BoxFit.cover,
image: NetworkImage(
'https://images.unsplash.com/photo-1561752888-21eb3b67eb4e?ixlib=rb-1.2.1&ixid=eyJhcHBfaWQiOjEyMDd9&auto=format&fit=crop&w=967&q=80'))),
),
CustomScrollView(
anchor: 0.4,
slivers: <Widget>[
SliverWidget(
child: Container(
width: double.infinity,
height: 100,
decoration: BoxDecoration(
color: Colors.yellow, borderRadius: BorderRadius.only(topLeft: Radius.circular(30), topRight: Radius.circular(30))),
child: TabBar(
tabs: [FlutterLogo(), FlutterLogo()],
),
),
),
SliverList(
delegate: SliverChildListDelegate(_listview(50)),
),
],
),
],
),
),
);
}
}
List _listview(int count) {
List<Widget> listItems = List();
for (int i = 0; i < count; i++) {
listItems.add(
Container(
decoration: BoxDecoration(
color: Colors.white,
border: Border.all(
width: 2.0,
color: Colors.white)),
child: Container(
padding: EdgeInsets.all(20),
color: Colors.white,
child: new Text(
'Item ${i.toString()}',
style: new TextStyle(fontSize: 25.0),
),
),
),
);
}
return listItems;
}
class SliverWidget extends SingleChildRenderObjectWidget {
SliverWidget({Widget child, Key key}) : super(child: child, key: key);
@override
RenderObject createRenderObject(BuildContext context) {
return RenderSliverWidget();
}
}
class RenderSliverWidget extends RenderSliverToBoxAdapter {
RenderSliverWidget({
RenderBox child,
}) : super(child: child);
@override
void performResize() {}
@override
void performLayout() {
if (child == null) {
geometry = SliverGeometry.zero;
return;
}
final SliverConstraints constraints = this.constraints;
child.layout(constraints.asBoxConstraints(), parentUsesSize: true);
double childExtent;
switch (constraints.axis) {
case Axis.horizontal:
childExtent = child.size.width;
break;
case Axis.vertical:
childExtent = child.size.height;
break;
}
assert(childExtent != null);
final double paintedChildSize = calculatePaintOffset(constraints, from: 0.0, to: childExtent);
final double cacheExtent = calculateCacheOffset(constraints, from: 0.0, to: childExtent);
assert(paintedChildSize.isFinite);
assert(paintedChildSize >= 0.0);
geometry = SliverGeometry(
scrollExtent: childExtent,
paintExtent: 100,
paintOrigin: constraints.scrollOffset,
cacheExtent: cacheExtent,
maxPaintExtent: childExtent,
hitTestExtent: paintedChildSize,
);
setChildParentData(child, constraints, geometry);
}
}
 能否建议其他方法来实现这种设计...
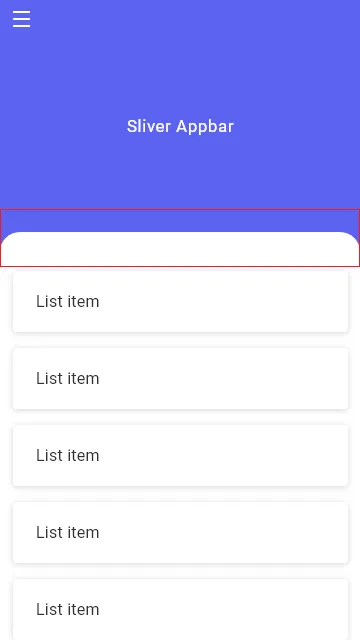
