React Native操作栏和React Native菜单

4

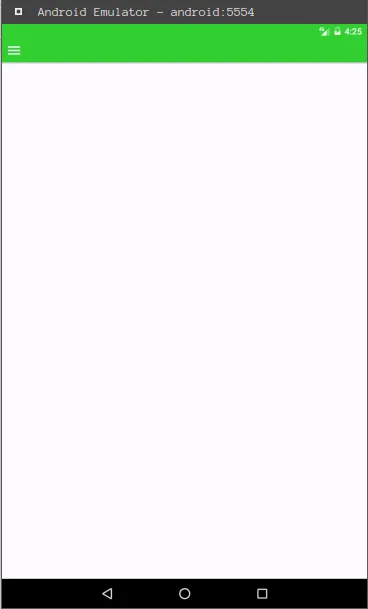
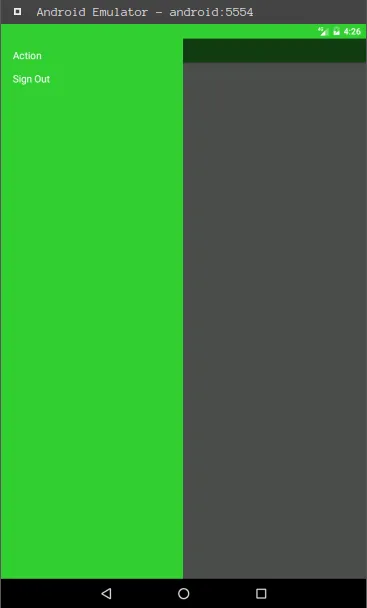
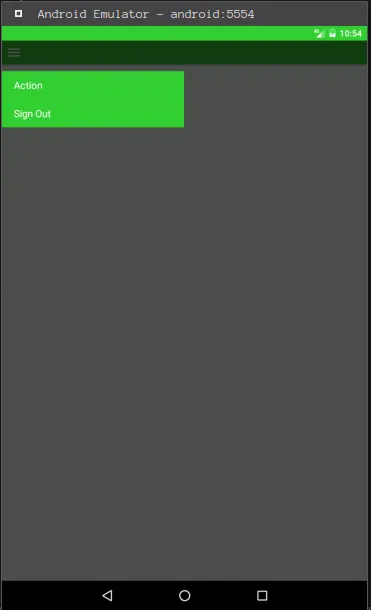
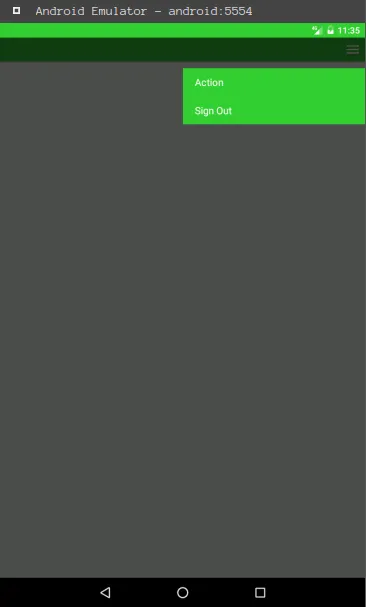
我是React-Native的新手并且非常喜欢它。我正在尝试创建一个屏幕(用于跨平台应用程序),在右上角放置一个菜单图标,当点击它时,希望使用react-native-menu打开一个菜单,以显示“退出登录”和“账户”菜单选项。但是我很难弄清楚如何在此之后调用菜单。感谢任何帮助。

 import React, { Component } from 'react';
 import {
       AppRegistry,
       StyleSheet,
       View, 
 } from 'react-native';
 import ActionBar from 'react-native-action-bar';


export test class Main extends Component {

render() {

    return (
            <View style={styles.screen}>
            <ActionBar
            containerStyle={styles.bar}
            backgroundColor='#33cc33'
            rightIcons={[
                         {
                         name: 'menu',
                         onPress: () => console.log('menu clicked'),
                         },
                         ]}
             />
            </View>


                               );
   }
   }


 const styles = StyleSheet.create({
                             screen: {
                             backgroundColor: '#33cc33',
                             flex: 1,
                             paddingTop: 10,
                             alignItems: 'center',
                             //padding: 10
                             },

                             });

AppRegistry.registerComponent('Main', () => Main);

嗨,我在ReactNative中使用了这个库(https://github.com/react-native-community/react-native-drawer-layout)来创建组件菜单。也许你也可以试试看。 - manggaraaaa
3个回答

8
I try to complete with your case, i add library react-native-drawer-layout for create menu drawer layout. You can find in this for installation. Step 1 - Create menu list (I created a separate to make it easier when I want to add another menu), It's content only ArrayList. I called that file Constants, and you can write in Constants.js like :

export const MENU_LIST = [
  { index: 1, name: 'Action' },
  { index: 2, name: 'Sign Out' },
]

步骤 2 - 我创建了菜单组件来展示菜单列表。在 Menu.js 中,您可以编写如下内容:

import React, { Component } from 'react';
import { View, ScrollView, Text, TouchableOpacity } from 'react-native';

const menuList = require('./Constants.js');

export default class Menu extends Component {
  render() {
    return (
      <View style={{ flex:1, backgroundColor: '#33cc33'}}>
        <ScrollView>
          {menuList.MENU_LIST.map(item => (
            <TouchableOpacity
              key={item.index}
              onPress={() => console.log('entered menu')}
            >
              <Text style={{color: 'white', fontSize: 16, paddingLeft: 20, paddingTop: 16}}>{item.name}</Text>
            </TouchableOpacity>
          ))}
        </ScrollView>
      </View>
    );
  }
}

步骤 3 - 重构主组件如下:

import React, { Component } from 'react';
import { AppRegistry, StyleSheet, View } from 'react-native';
import ActionBar from 'react-native-action-bar';
import DrawerLayout from 'react-native-drawer-layout';

import Menu from './Menu';

export default class App extends Component {
  constructor(props) {
    super(props);
    this.state = {
      drawerClosed: true,
    };
    this.toggleDrawer = this.toggleDrawer.bind(this);
    this.setDrawerState = this.setDrawerState.bind(this);
  }

  setDrawerState() {
    this.setState({
      drawerClosed: !this.state.drawerClosed,
    });
  }

  toggleDrawer = () => {
    if (this.state.drawerClosed) {
      this.DRAWER.openDrawer();
    } else {
      this.DRAWER.closeDrawer();
    }
  }

  render() {
    return (
      <DrawerLayout
        drawerWidth={300}
        ref={drawerElement => {
          this.DRAWER = drawerElement;
        }}
        drawerPosition={DrawerLayout.positions.left}
        onDrawerOpen={this.setDrawerState}
        onDrawerClose={this.setDrawerState}
        renderNavigationView={() => <Menu />}
      >
        <ActionBar
          containerStyle={styles.bar}
          backgroundColor="#33cc33"
          leftIconName={'menu'}
          onLeftPress={this.toggleDrawer}/>

      </DrawerLayout>
    );
  }
}

const styles = StyleSheet.create({
  screen: {
    backgroundColor: '#33cc33',
    flex: 1,
    paddingTop: 10,
    alignItems: 'center',
    //padding: 10
  },
});

AppRegistry.registerComponent('Main', () => App);

在我的模拟器中,它会显示为:

enter image description here

当我点击菜单图标时,它会显示如下:

enter image description here

更新-1: :

如果您想让组件抽屉菜单不填充到底部,您可以在组件<Menu />中进行样式调整,例如给包装器添加边距:

const styles = StyleSheet.create({
  wrapper: {
    backgroundColor: '#33cc33',
    marginTop: 50,

  },

  listMenu: {
    color: 'white', 
    fontSize: 16, 
    paddingLeft: 20, 
    paddingTop: 12,
    paddingBottom: 12,
  }

});

<Menu />组件中添加样式,如下:

export default class Menu extends Component {
  render() {
    return (
      <View style={styles.wrapper}> //add style wrapper
        <ScrollView>
          {menuList.MENU_LIST.map(item => (
            <TouchableOpacity
              key={item.index}
              onPress={() => console.log('entered menu')}
            >
              <Text style={styles.listMenu}>{item.name}</Text> //add style menu
            </TouchableOpacity>
          ))}
        </ScrollView>
      </View>
    );
  }
}

完整的代码在Menu.js中,类似于:

import React, { Component, PropTypes } from 'react';
import { View, ScrollView, Text, TouchableOpacity, Image, StyleSheet } from 'react-native';
import Icon from 'react-native-vector-icons/MaterialIcons';

const menuList = require('./Constants.js');

export default class Menu extends Component {
  render() {
    return (
      <View style={styles.wrapper}>
        <ScrollView>
          {menuList.MENU_LIST.map(item => (
            <TouchableOpacity
              key={item.index}
              onPress={() => console.log('entered menu')}
            >
              <Text style={styles.listMenu}>{item.name}</Text>
            </TouchableOpacity>
          ))}
        </ScrollView>
      </View>
    );
  }
}

const styles = StyleSheet.create({
  wrapper: {
    backgroundColor: '#33cc33',
    marginTop: 50,

  },

  listMenu: {
    color: 'white', 
    fontSize: 16, 
    paddingLeft: 20, 
    paddingTop: 12,
    paddingBottom: 12,
  }

});

而且结果像:

enter image description here


更新-2: :

根据您在评论中提到的情况,如果您想将位置menu更改为右侧,则必须先更改抽屉的位置。

实际上:

  • 我将抽屉设置为半屏幕并将其位置设置在左侧。您可以在main文件中看到:

 render() {
    return (
      <DrawerLayout
       
        /* This for set width drawer */
        
        drawerWidth={300}

        /* end */

        ref={drawerElement => {
          this.DRAWER = drawerElement;
        }}

        /* This for set position drawer */

        drawerPosition={DrawerLayout.positions.left}

        /* end */

        onDrawerOpen={this.setDrawerState}
        onDrawerClose={this.setDrawerState}
        renderNavigationView={() => <Menu />}
      >
        <ActionBar
          containerStyle={styles.bar}
          backgroundColor="#33cc33"
          leftIconName={'menu'}
          onLeftPress={this.toggleDrawer}
          
        />

      </DrawerLayout>
    );
  }

希望:

  • 我将菜单选项设置在右侧。你只需要像这样改变抽屉的位置:

 render() {
    return (
      <DrawerLayout
        drawerWidth={300}
        ref={drawerElement => {
          this.DRAWER = drawerElement;
        }}
        
        // i change the position to the right.
        drawerPosition={DrawerLayout.positions.Right}
        
        onDrawerOpen={this.setDrawerState}
        onDrawerClose={this.setDrawerState}
        renderNavigationView={() => <Menu />}
      >
        <ActionBar
          containerStyle={styles.bar}
          backgroundColor="#33cc33"
          rightIcons={[
            {
              name: 'menu',
              onPress: this.toggleDrawer,
            },
          ]}
        />

      </DrawerLayout>
    );
  }

如果你想学习如何在Android上使用DrawerLayout,可以阅读文档。

例如,我的模拟器显示如下:

enter image description here


我希望我的回答能够帮助你,并给你开发应用程序的另一个想法。加油... ;))


非常感谢。很好的例子!由于抽屉从上到下填充,看起来不像菜单,是否可以使用类似漂亮菜单的react-native-menu。感激任何帮助。 - CNK2343
可能性是存在的...但是你也可以使用react-native-drawer-layout。你只需为抽屉菜单组件添加样式即可。请查看我的答案,我已经更新了它。 - manggaraaaa
再次感谢。但是为什么我不能把“菜单”放在右边?当我改成右边时,它就消失了。对于菜单,我能否使用TouchableHighlight并仍然从Constants中提取文本? - CNK2343
yaapz.. 因为你需要设置抽屉。对于第一个情况,我将其设置为屏幕的一半,并在左侧位置。如果您想更改为右侧,则可以通过右侧位置进行设置。我更新了我的答案,向您展示 react-native-drawer-layout 可用于创建菜单选项。;) - manggaraaaa
这看起来很棒!感谢您的帮助!是否可以在菜单中显示图标而不是文本?如果单击图标,是否可以触发例程? - CNK2343
可以的。我建议您使用库react-native-vector-icons来使用图标。 - manggaraaaa

1

我使用 native-base 库创建菜单,这是文档。您可以尝试搜索所需的组件。

https://docs.nativebase.io/Components.html#Components

我尝试制作一个菜单的示例

/** * React Native 应用示例 * https://github.com/facebook/react-native * @flow */

import React, { Component } from 'react';
import { AppRegistry } from 'react-native';
import { Container, Content, Header, Body, Right, Button, Icon, Title, Drawer, Text } from 'native-base';

class SideBar extends Component {
  render(){
    return(
      <Content style={{ backgroundColor: '#FFF' }} >
          <Text>Account</Text>
          <Text>SignOut</Text>
      </Content>
    )
  }
}

export default class App extends Component {
  closeDrawer = () => {
    this.drawer._root.close()
  }
  openDrawer = () => {
    this.drawer._root.open()
  }
  render(){
    return(
      <Drawer
        ref={(ref) => { this.drawer = ref; }}
        content={<SideBar navigator={this.navigator} />}
        onClose={() => this.closeDrawer()} >
          <Container>
            <Header>
              <Body>
                <Title>Header</Title>
              </Body>
              <Right>
                <Button transparent onPress={this.openDrawer} >
                  <Icon name='menu' />
                </Button>
              </Right>
            </Header>
          </Container>
      </Drawer>
    )
  }
}

AppRegistry.registerComponent('Main', () => App);

你可以自定义菜单样式。也许这会对你有所帮助,谢谢 :)


0

react-native-modal-dropdown 实现这些功能

+import ModalDropdown from 'react-native-modal-dropdown';
class FooBar extends PureComponent {
     constructor(props) {
         super(props);
+        this.dropdownOptions = [{
+            text: 'Scan',
+            icon: require('../images/scan.png'),
+            onPress: this.toScan,
+        }, {
+            text: 'Share',
+            icon: require('../images/share.png'),
+            onPress: this.toShare,
+        }];


+    adjustDropdownStyle = style => {
+        return {
+            width: 110,
+            height: 96, // calculated from margin and height of renderDropdownItem bellow
+            right: 0,
+            top: style.top,
+        };
+    }
+
+    renderDropdownItem = (item, index, highlighted) => {
+        return (
+            <View style={{alignItems: 'center', flexDirection: 'row'}}>
+                <Image source={item.icon} style={{margin: 10, width: 28, height: 28 }}/>
+                <Text style={{fontSize: 15}}>
+                    {item.text}
+                </Text>
+            </View>
+        );
+    }
+
+    onDropdownSelect = (index, item) => item.onPress()
+
     render() {
        let navs = {
            Center: {
                text: 'Home',
            },
            Right: {
                image: require('../images/more.png'),
+                onPress: () => this.dropdown && this.dropdown.show(),
            },
        };

                  <Header navs={navs}/>
+                <ModalDropdown
+                    ref={view => {this.dropdown = view;}}
+                    style={{height: 0}}
+                    adjustFrame={this.adjustDropdownStyle}
+                    options={this.dropdownOptions}
+                    renderRow={this.renderDropdownItem.bind(this)}
+                    onSelect={this.onDropdownSelect.bind(this)}
+                />

网页内容由stack overflow 提供, 点击上面的
可以查看英文原文,
原文链接