在SwiftUI的TabView中添加阴影效果

10

我正在尝试在SwiftUI中实现TabView,使其与屏幕背景颜色相同,但同时在其上方具有像这张图片中那样的阴影

enter image description here

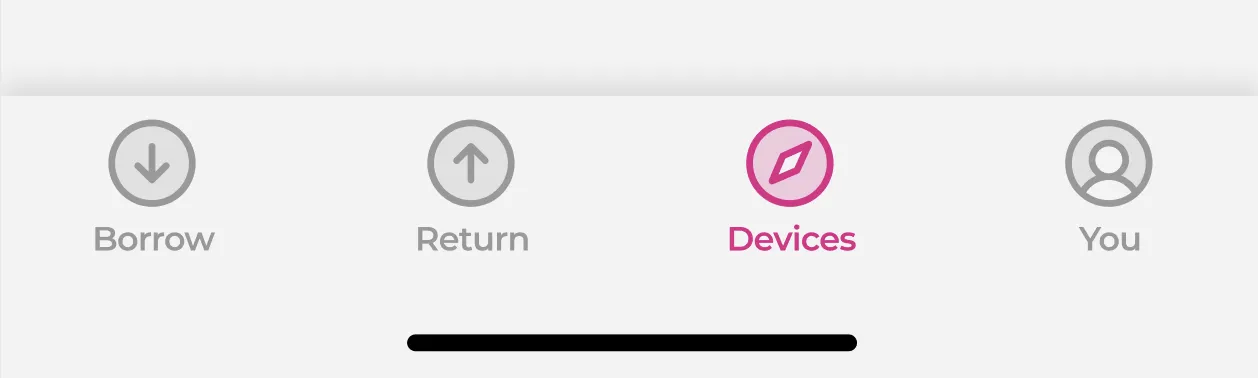
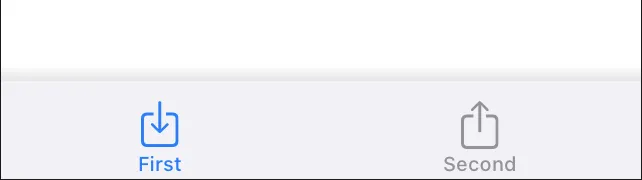
到目前为止,我已经成功显示了颜色,但我不知道如何添加阴影。这是我的代码:

struct ContentView: View {
    
    init() {
        let appearance = UITabBarAppearance()
        appearance.configureWithTransparentBackground()

        UITabBar.appearance().standardAppearance = appearance
    }
    
    var body: some View {
        TabView {
            Text("First View")
                .tabItem {
                    Image(systemName: "square.and.arrow.down")
                    Text("First")
                }
            Text("Second View")
                .tabItem {
                    Image(systemName: "square.and.arrow.up")
                    Text("Second")
                }
        }
    
    }
}

有人知道如何做到这一点吗?我将感激您的帮助 :)

2个回答

14

简短回答

我找到了一个解决方案。您可以创建自己的阴影图像,并像这样将其添加到UITabBar外观中:

// load your custom shadow image
let shadowImage: UIImage = ...

//you also need to set backgroundImage, without it shadowImage is ignored
UITabBar.appearance().backgroundImage = UIImage()
UITabBar.appearance().shadowImage = shadowImage

更详细的回答

设置背景图片

请注意,通过设置 "backgroundImage" 属性来将背景图片应用到元素上:

UITabBar.appearance().backgroundImage = UIImage()

如果您让TabView变得透明,那么如果有内容可以在其下滚动,则并不理想。为了克服这个问题,您可以设置TabView的颜色。

let appearance = UITabBarAppearance()
appearance.configureWithTransparentBackground()
appearance.backgroundColor = UIColor.systemGray6
UITabBar.appearance().standardAppearance = appearance

设置shadowImage

我希望能够通过编程方式生成阴影图像。为此,我创建了UIImage的扩展。(参考代码在这里

extension UIImage {
    static func gradientImageWithBounds(bounds: CGRect, colors: [CGColor]) -> UIImage {
        let gradientLayer = CAGradientLayer()
        gradientLayer.frame = bounds
        gradientLayer.colors = colors
        
        UIGraphicsBeginImageContext(gradientLayer.bounds.size)
        gradientLayer.render(in: UIGraphicsGetCurrentContext()!)
        let image = UIGraphicsGetImageFromCurrentImageContext()
        UIGraphicsEndImageContext()
        return image!
    }
}

最后,我将我的TabView样式设置为如下:

let image = UIImage.gradientImageWithBounds(
    bounds: CGRect( x: 0, y: 0, width: UIScreen.main.scale, height: 8),
    colors: [ 
        UIColor.clear.cgColor, 
        UIColor.black.withAlphaComponent(0.1).cgColor
    ]
)

let appearance = UITabBarAppearance()
appearance.configureWithTransparentBackground()
appearance.backgroundColor = UIColor.systemGray6
        
appearance.backgroundImage = UIImage()
appearance.shadowImage = image

UITabBar.appearance().standardAppearance = appearance

结果

这里输入图片描述


2
非常好,你提出了这个SwiftUI解决方案。的确,你的方法使你能够在不创建自己的TabView的情况下实现你想要的效果。我个人发现,在某些时候,我几乎总是需要做一些需要自己的TabView的事情(例如:隐藏它,截至目前,在SwiftUI中无法像在UIKit中使用UITabBar.appearance().isHidden = true那样隐藏子视图的TabView),最终我发现只拥有自己的TabView更加灵活,并且最终编写的代码更少,但这是一个偏好问题。 - BiOS
在iOS 15上无法工作 :|,在较早的版本中运行良好 - Abhishek Thapliyal
1
嗨@AbhishekThapliyal,我可以确认,在iOS 15上,这个解决方案对我不起作用。阴影显示正确,但标签栏是透明的。我会在接下来的几周内更新答案。 - Ella Gogo
@EllaGogo:我的错,它正在工作,如果不行的话你可以尝试一下这个:if #available(iOS 15.0, *) { UITabBar.appearance().scrollEdgeAppearance = appearance } else { // Fallback on earlier versions } - Abhishek Thapliyal
iOS 15+有什么新的解决方案? - Van Du Tran

2

如果您想实现自己的需求,最好的方法是创建一个自定义的TabView

事实上,在SwiftUI中,您可以使用UITabBarAppearance().shadowColor,但这只会在TabView本身顶部绘制一条2像素的线,效果不太明显。

相反,使用以下代码,您可以创建一个自定义的TabView并实现所需的图形效果。

import SwiftUI


enum Tab {
    case borrow,ret,device,you
}

struct TabView: View {
    @Binding var tabIdx: Tab
    
    var body: some View {
        HStack {
            Group {
                Spacer()
                
                Button (action: {
                    self.tabIdx = .borrow
                }) {
                    VStack{
                        Image(systemName: "arrow.down.circle")
                        Text("Borrow")
                            .font(.system(size: 10))
                        
                    }
                }
                .foregroundColor(self.tabIdx == .borrow ? .purple : .secondary)
                
                Spacer()
                
                Button (action: {
                    self.tabIdx = .ret
                }) {
                    VStack{
                        Image(systemName: "arrow.up.circle")
                        Text("Return")
                            .font(.system(size: 10))
                        
                    }
                }
                .foregroundColor(self.tabIdx == .ret ? .purple : .secondary)
                
                Spacer()
                
                Button (action: {
                    self.tabIdx = .device
                }) {
                    VStack{
                        Image(systemName: "safari")
                        Text("Device")
                            .font(.system(size: 10))
                        
                    }
                }
                .foregroundColor(self.tabIdx == .device ? .purple : .secondary)
                
                Spacer()
                
                Button (action: {
                    self.tabIdx = .you
                }) {
                    VStack{
                        Image(systemName: "person.circle")
                        Text("You")
                            .font(.system(size: 10))
                        
                    }
                }
                .foregroundColor(self.tabIdx == .you ? .purple : .secondary)
                
                Spacer()
            }
        }
        .padding(.bottom, 30)
        .padding(.top, 10)
        .background(Color(red: 0.95, green: 0.95, blue: 0.95))
        .font(.system(size: 30))
        .frame(height: 80)
    }
}


struct ContentView: View {
    @State var tabIdx: Tab = .borrow
    
    var body: some View {
        NavigationView {
            VStack(spacing: 20) {
                Spacer()
                
                if tabIdx == .borrow {
                    Text("Borrow")
                } else if tabIdx == .ret {
                    Text("Return")
                } else if tabIdx == .device {
                    Text("Device")
                } else if tabIdx == .you {
                    Text("You")
                }
                Spacer(minLength: 0)
                TabView(tabIdx: self.$tabIdx)
                    .shadow(radius: 10)
            }
            .ignoresSafeArea()
            
        }
    }
    
}

请记住,当您这样做时,所有选项卡都被指定为enum Tab {}中的案例,并且TabView()包含一些Button元素,这些元素将使用@State var tabIdx更改选项卡。因此,您可以通过修改self.tabIdx = <yourtab>语句来调整您的操作。

每个按钮后面都使用此语句设置活动颜色:

.foregroundColor(self.tabIdx == .borrow ? .purple : .secondary)

在这里,您只需将.purple更改为适合您的任何内容。

您可以看到,在ContentView上,if-else if块捕获了SubView。我在这里放置了一些Text()元素,比如Text("Borrow"),因此您可以通过调用诸如BorrowView()等内容来替换它们。

当我从ContentView中调用TabView时,我添加了阴影,但是您甚至可以在TabView本身的HStack之后添加.shadow(radius: 10)

这将是最终输出

enter image description here


网页内容由stack overflow 提供, 点击上面的
可以查看英文原文,
原文链接