将 networkx 的二维图转换为三维交互式图

6

我在 networkx 中有以下图形:

import matplotlib.pyplot as plt
import networkx as nx

G = nx.Graph()
G.add_edge(1, 2, weight = 1)
G.add_edge(2, 3, weight = 3)
G.add_edge(4, 5, weight = 2)
G.add_edge(6, 3, weight = 4)
G.add_edge(6, 4, weight = 6)


plt.figure(figsize=(12,12))
edges = G.edges()
pos = nx.spring_layout(G, k = 0.5) # k regulates the distance between nodes
weights = [G[u][v]['weight'] for u,v in edges]
nx.draw(G, with_labels=True, node_color='skyblue', font_weight='bold',  width=weights, pos=pos)

有没有办法将这个二维图转换为三维图?坐标并不重要,我只对作图具有交互性能感兴趣(即旋转图表的功能)。我知道 plotly 可以制作这样的作图,但我不确定如何将我的二维 networkx 图与 plotly 结合起来。

1个回答

5
免责声明:我并不是networkx方面的专家,因此这篇文章对于回答你的问题非常有用。我已经根据你的示例尽力调整了代码。
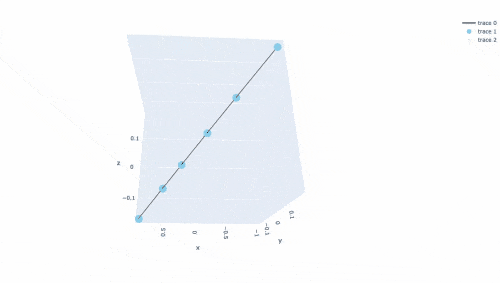
我们首先需要在调用nx.spring_layout时设置参数dim=3,以确保您的坐标在三维空间中。然后我们提取所有节点和边的x、y、z坐标,并通过跟踪将它们传递给Plotly中的go.Scatter3d方法。
更新:要在悬停文本中添加权重,我们可以将它们锚定在边缘之间的中点上,如此处所述。
# import matplotlib.pyplot as plt
import plotly.graph_objects as go
import networkx as nx

G = nx.Graph()
G.add_edge(1, 2, weight = 1)
G.add_edge(2, 3, weight = 3)
G.add_edge(4, 5, weight = 2)
G.add_edge(6, 3, weight = 4)
G.add_edge(6, 4, weight = 6)

edge_weights =[1,3,2,4,6]

Num_nodes = len(G.nodes)

# plt.figure(figsize=(5,5))
edges = G.edges()

# ## update to 3d dimension
spring_3D = nx.spring_layout(G, dim = 3, k = 0.5) # k regulates the distance between nodes
# weights = [G[u][v]['weight'] for u,v in edges]
# nx.draw(G, with_labels=True, node_color='skyblue', font_weight='bold',  width=weights, pos=pos)

# we need to seperate the X,Y,Z coordinates for Plotly
# NOTE: spring_3D is a dictionary where the keys are 1,...,6
x_nodes= [spring_3D[key][0] for key in spring_3D.keys()] # x-coordinates of nodes
y_nodes = [spring_3D[key][1] for key in spring_3D.keys()] # y-coordinates
z_nodes = [spring_3D[key][2] for key in spring_3D.keys()] # z-coordinates

#we need to create lists that contain the starting and ending coordinates of each edge.
x_edges=[]
y_edges=[]
z_edges=[]

#create lists holding midpoints that we will use to anchor text
xtp = []
ytp = []
ztp = []

#need to fill these with all of the coordinates
for edge in edges:
    #format: [beginning,ending,None]
    x_coords = [spring_3D[edge[0]][0],spring_3D[edge[1]][0],None]
    x_edges += x_coords
    xtp.append(0.5*(spring_3D[edge[0]][0]+ spring_3D[edge[1]][0]))

    y_coords = [spring_3D[edge[0]][1],spring_3D[edge[1]][1],None]
    y_edges += y_coords
    ytp.append(0.5*(spring_3D[edge[0]][1]+ spring_3D[edge[1]][1]))

    z_coords = [spring_3D[edge[0]][2],spring_3D[edge[1]][2],None]
    z_edges += z_coords
    ztp.append(0.5*(spring_3D[edge[0]][2]+ spring_3D[edge[1]][2])) 


etext = [f'weight={w}' for w in edge_weights]

trace_weights = go.Scatter3d(x=xtp, y=ytp, z=ztp,
    mode='markers',
    marker =dict(color='rgb(125,125,125)', size=1), #set the same color as for the edge lines
    text = etext, hoverinfo='text')

#create a trace for the edges
trace_edges = go.Scatter3d(
    x=x_edges,
    y=y_edges,
    z=z_edges,
    mode='lines',
    line=dict(color='black', width=2),
    hoverinfo='none')

#create a trace for the nodes
trace_nodes = go.Scatter3d(
    x=x_nodes,
    y=y_nodes,
    z=z_nodes,
    mode='markers',
    marker=dict(symbol='circle',
            size=10,
            color='skyblue')
    )

#Include the traces we want to plot and create a figure
data = [trace_edges, trace_nodes, trace_weights]
fig = go.Figure(data=data)

fig.show()

enter image description here


看起来很棒!!唯一缺失的部分是边的权重。 - Penguin
谢谢您的反馈!我不确定在 Plotly 中是否可以显式设置该参数...但是看起来您可以将权重显示为悬停文本。详见链接:https://community.plotly.com/t/show-edge-weight-in-network-graph/26733 - Derek O
2
当然!首先非常感谢您的帮助。可能比那更简单。看起来您只需要在trace_edges下为每个边设置width=edge_weight即可。我正在尝试弄清楚如何做到这一点。 - Penguin
1
看起来我需要添加标签。在你的代码中,我错过了这一点。我修改了这一行 x_nodesx_nodes= [spring_3D[key][0] for key in spring_3D.keys()],以允许任何标签(否则它只适用于1-6)。 - Penguin
看起来链接的评论中使用的方法将悬停文本锚定在边缘之间的中点。我已经更新了我的答案,希望这更接近您所寻找的内容。 - Derek O
我认为我更想要的是类似于networkx在文本中所做的事情(即它在圆圈内),或者这个 - Penguin

网页内容由stack overflow 提供, 点击上面的
可以查看英文原文,
原文链接