这意味着你只是认为你已经成功安装了osmnx或者它的某个依赖库。
当然,很大程度上取决于你安装osmnx的方式——当我尝试在虚拟环境中使用pip安装时,它出现了错误:
Collecting OSMnx
  Downloading osmnx-0.5.3-py2.py3-none-any.whl (54kB)
    100% |████████████████████████████████| 61kB 183kB/s
Collecting shapely>=1.5 (from OSMnx)
  Downloading Shapely-1.6.0.tar.gz (214kB)
    100% |████████████████████████████████| 215kB 2.0MB/s
    Complete output from command python setup.py egg_info:
    Traceback (most recent call last):
      File "<string>", line 1, in <module>
      File "C:\Users\STEVE-~1\AppData\Local\Temp\pip-build-9uqvlpcm\shapely\setup.py", line 80, in <module>
        from shapely._buildcfg import geos_version_string, geos_version, \
      File "C:\Users\STEVE-~1\AppData\Local\Temp\pip-build-9uqvlpcm\shapely\shapely\_buildcfg.py", line 200, in <module>
        lgeos = CDLL("geos_c.dll")
      File "C:\Python36_64\lib\ctypes\__init__.py", line 344, in __init__
        self._handle = _dlopen(self._name, mode)
    OSError: [WinError 126] The specified module could not be found

    ----------------------------------------
Command "python setup.py egg_info" failed with error code 1 in C:\Users\STEVE-~1\AppData\Local\Temp\pip-build-9uqvlpcm\shapely\
我去http://www.lfd.uci.edu/~gohlke/pythonlibs/#shapely下载了一个适用于我正在使用的python版本3.6(64位),然后通过在下载的文件上使用pip进行安装。
重新运行pip install OSMnx,我的下一个问题是编译fiona时出现问题,所以我再次求助于Chris Gohlke,在http://www.lfd.uci.edu/~gohlke/pythonlibs/#fiona中他写了一条注释“需要gdal”,所以我顺便去http://www.lfd.uci.edu/~gohlke/pythonlibs/#gdal那里先安装了它。
在运行你的第一个导入时,我得到了:
>>> import osmnx as ox
Traceback (most recent call last):
  File "F:\toolbuild\test_OSMnx\lib\site-packages\numpy\core\__init__.py", line 16, in <module>
    from . import multiarray
ImportError: DLL load failed: The specified procedure could not be found.

During handling of the above exception, another exception occurred:

Traceback (most recent call last):
  File "<stdin>", line 1, in <module>
  File "F:\toolbuild\test_OSMnx\lib\site-packages\osmnx\__init__.py", line 8, in <module>
    from .buildings import *
  File "F:\toolbuild\test_OSMnx\lib\site-packages\osmnx\buildings.py", line 9, in <module>
    import geopandas as gpd
  File "F:\toolbuild\test_OSMnx\lib\site-packages\geopandas\__init__.py", line 1, in <module>
    from geopandas.geoseries import GeoSeries
  File "F:\toolbuild\test_OSMnx\lib\site-packages\geopandas\geoseries.py", line 5, in <module>
    import numpy as np
  File "F:\toolbuild\test_OSMnx\lib\site-packages\numpy\__init__.py", line 142, in <module>
    from . import add_newdocs
  File "F:\toolbuild\test_OSMnx\lib\site-packages\numpy\add_newdocs.py", line 13, in <module>
    from numpy.lib import add_newdoc
  File "F:\toolbuild\test_OSMnx\lib\site-packages\numpy\lib\__init__.py", line 8, in <module>
    from .type_check import *
  File "F:\toolbuild\test_OSMnx\lib\site-packages\numpy\lib\type_check.py", line 11, in <module>
    import numpy.core.numeric as _nx
  File "F:\toolbuild\test_OSMnx\lib\site-packages\numpy\core\__init__.py", line 26, in <module>
    raise ImportError(msg)
ImportError:
Importing the multiarray numpy extension module failed.  Most
likely you are trying to import a failed build of numpy.
If you're working with a numpy git repo, try `git clean -xdf` (removes all
files not under version control).  Otherwise reinstall numpy.

Original error was: DLL load failed: The specified procedure could not be found.
我注意到numpy似乎已经安装正确,但我知道可能会出现问题,所以我去了
http://www.lfd.uci.edu/~gohlke/pythonlibs/#numpy,在那里我们发现一条注释:“Numpy+MKL链接到Intel® Math Kernel Library,并在numpy.core目录中包含所需的DLL文件。”因此我再次下载并安装。
现在我处于您的阶段:
> import osmnx as ox
Traceback (most recent call last):
  File "<stdin>", line 1, in <module>
  File "F:\toolbuild\test_OSMnx\lib\site-packages\osmnx\__init__.py", line 8, in <module>
    from .buildings import *
  File "F:\toolbuild\test_OSMnx\lib\site-packages\osmnx\buildings.py", line 9, in <module>
    import geopandas as gpd
  File "F:\toolbuild\test_OSMnx\lib\site-packages\geopandas\__init__.py", line 1, in <module>
    from geopandas.geoseries import GeoSeries
  File "F:\toolbuild\test_OSMnx\lib\site-packages\geopandas\geoseries.py", line 16, in <module>
    from geopandas.base import GeoPandasBase
  File "F:\toolbuild\test_OSMnx\lib\site-packages\geopandas\base.py", line 15, in <module>
    from rtree.core import RTreeError
  File "F:\toolbuild\test_OSMnx\lib\site-packages\rtree\__init__.py", line 1, in <module>
    from .index import Rtree
  File "F:\toolbuild\test_OSMnx\lib\site-packages\rtree\index.py", line 5, in <module>
    from . import core
  File "F:\toolbuild\test_OSMnx\lib\site-packages\rtree\core.py", line 116, in <module>
    raise OSError("could not find or load spatialindex_c.dll")
OSError: could not find or load spatialindex_c.dll
看起来问题出在RTree上,所以我们去http://www.lfd.uci.edu/~gohlke/pythonlibs/#rtree (注意这次我们需要先运行pip uninstall rtree)
尝试您的代码,加了几个换行符后,我再次收到一个错误,即经纬度限制超过了范围,因此交换两个值以设置point=(31.22, 121.48),然后我得到了一张图片,如下所示: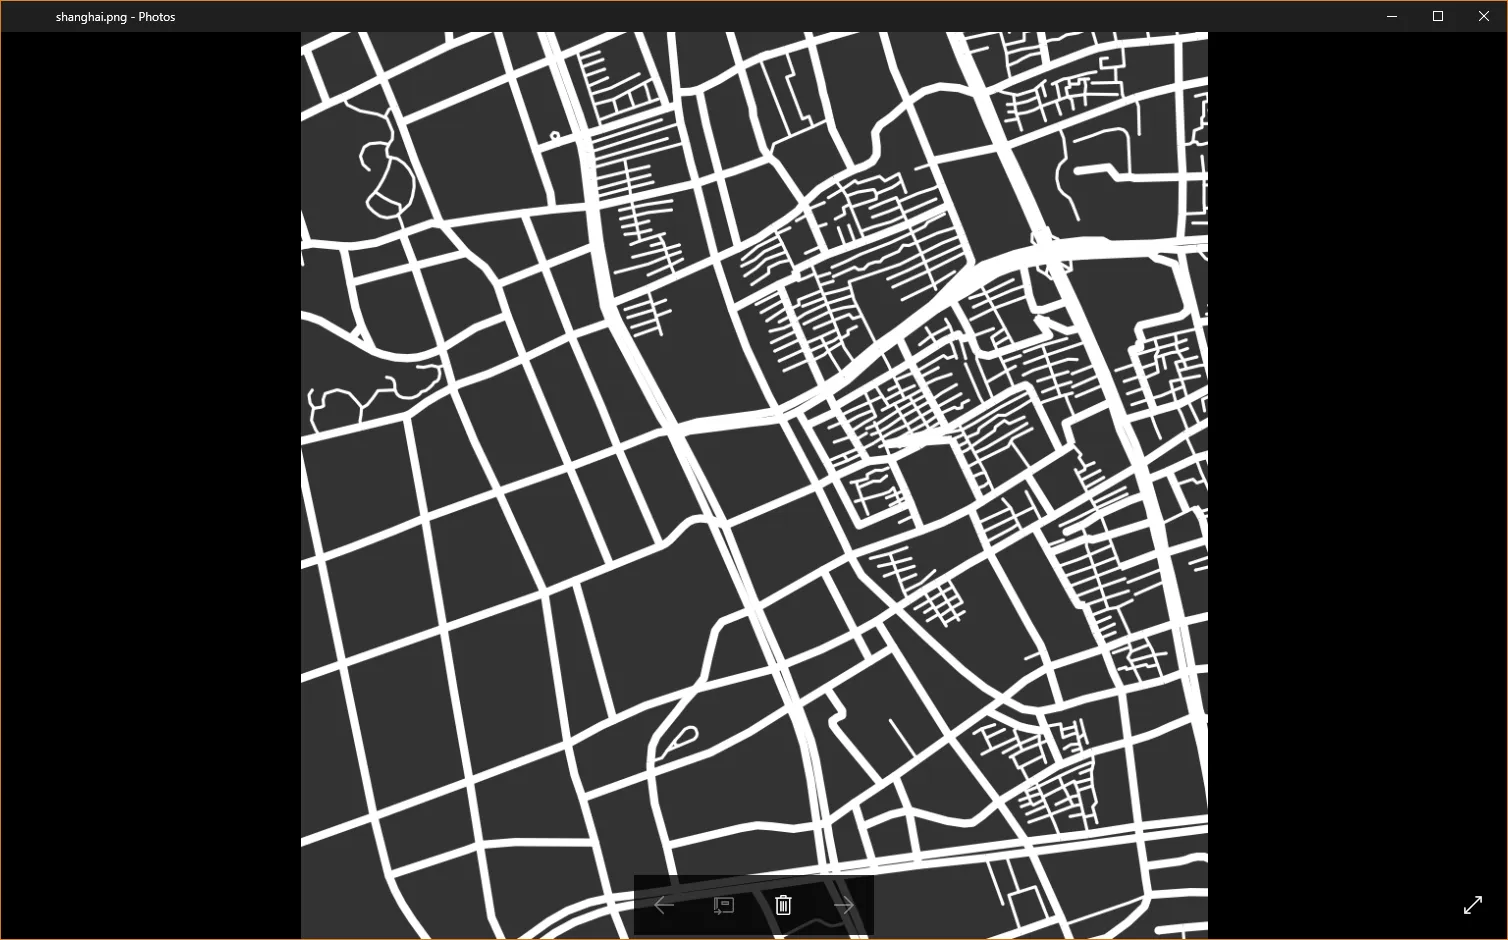
来自:
>>> fig,ax=ox.plot_figure_ground(point=point,filename=place,network_type='all',dpi=150)
Projected the GeoDataFrame "geometry to project" to UTM-51 in 0.00 seconds
Projected the GeoDataFrame "geometry to project" to EPSG 4326 in 0.00 seconds
Created bounding box 966.0 meters in each direction from (31.22, 121.48): 31.228713053594067,31.211286934028642,121.49013858668467,121.46986147388169
Projected the GeoDataFrame "geometry to project" to UTM-51 in 0.00 seconds
Projected the GeoDataFrame "geometry to project" to EPSG 4326 in 0.00 seconds
Requesting network data within bounding box from API in 1 request(s)
Pausing 0.00 seconds before making API POST request
Posting to http://www.overpass-api.de/api/interpreter with timeout=180, "{'data': '[out:json][timeout:180];(way["highway"]["area"!~"yes"]["highway"!~"proposed|construction|abandoned|platform|raceway"]["service"!~"private"]["access"!~"private"](31.21128693,121.46986147,31.22871305,121.49013859);>;);out;'}"
Downloaded 480.6KB from www.overpass-api.de in 2.13 seconds
Saved response to cache file "cache/8c99e35743a557d7234621c6d3fd7139.json"
Got all network data within bounding box from API in 1 request(s) and 2.99 seconds
Creating networkx graph from downloaded OSM data...
Graph was not connected, retained only the largest weakly connected component (3,366 of 3,540 total nodes) in 0.15 seconds
Created graph with 3,366 nodes and 6,926 edges in 0.19 seconds
Added edge lengths to graph in 0.05 seconds
Truncated graph by bounding box in 0.14 seconds
Removed 0 isolated nodes
Graph was not connected, retained only the largest weakly connected component (2,764 of 2,779 total nodes) in 0.13 seconds
graph_from_bbox() returning graph with 2,764 nodes and 5,892 edges
graph_from_point() returning graph with 2,764 nodes and 5,892 edges
Begin topologically simplifying the graph...
Identified 1,568 edge endpoints in 0.04 seconds
Constructed all paths to simplify in 0.01 seconds
Simplified graph (from 2,764 to 1,568 nodes and from 5,892 to 3,730 edges) in 0.15 seconds
Created a GeoDataFrame from graph in 0.10 seconds
Projected the GeoDataFrame "unnamed_nodes" to UTM-51 in 0.07 seconds
Projected the GeoDataFrame "unnamed_edges" to UTM-51 in 0.29 seconds
Extracted projected node geometries from GeoDataFrame in 0.04 seconds
Rebuilt projected graph in 1.53 seconds
Projected the GeoDataFrame "geometry to project" to UTM-51 in 0.00 seconds
Created bounding box 805 meters in each direction from (31.22, 121.48) and projected it: 3455784.445871858,3454174.445871858,356022.8750159489,354412.8750159489
Begin plotting the graph...
Drew the graph edges in 0.05 seconds
Saved the figure to disk in 0.11 seconds