Python Opencv - 无法更改图片的像素值

8
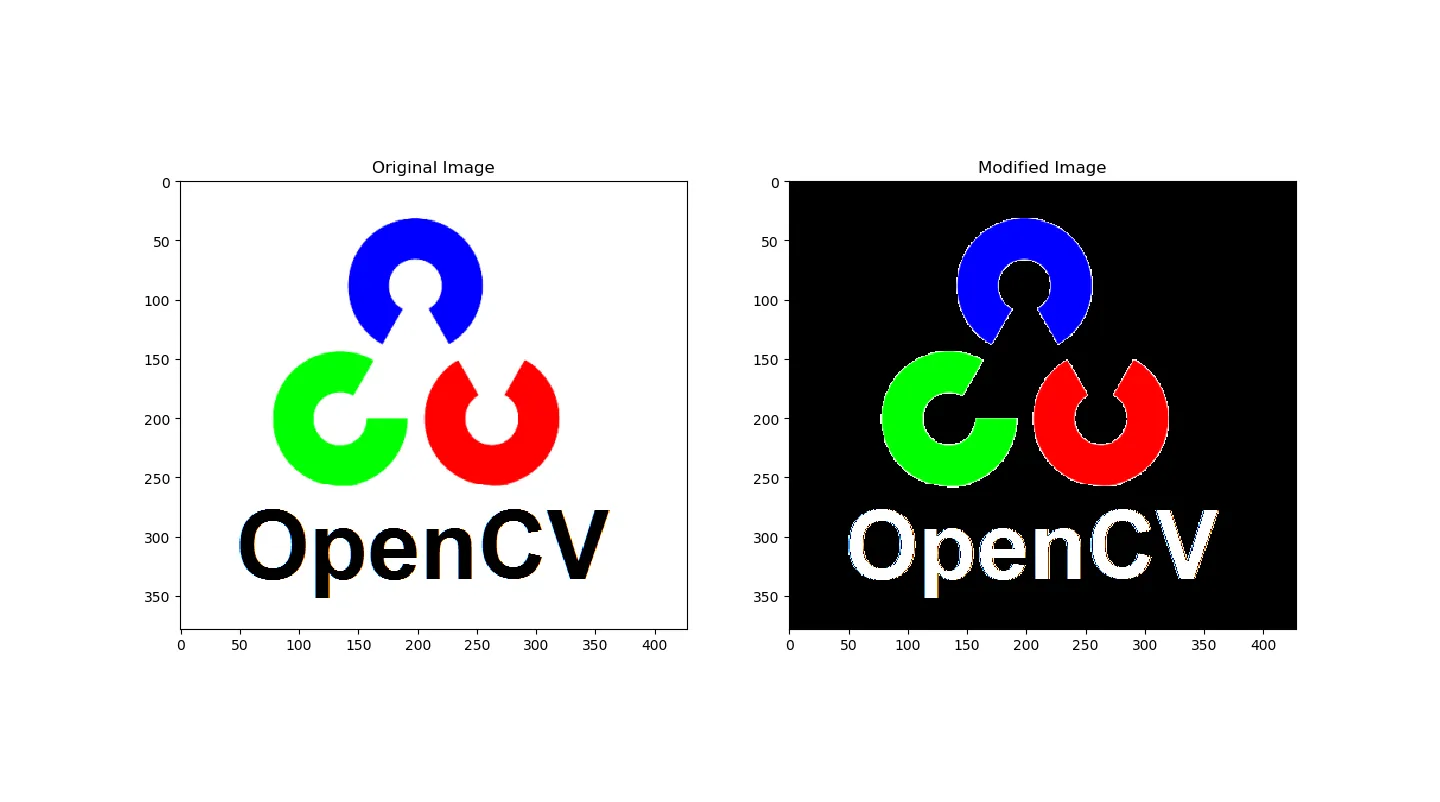
需要将下面给出的图片中的白色像素变成黑色,黑色像素变成白色。 enter image description here
    import cv2

    img=cv2.imread("cvlogo.png")

一个基本的OpenCV标志,白色背景并将图片调整为已知固定大小

    img=cv2.resize(img, (300,300))#(width,height)


    row,col=0,0
    i=0

现在使用for循环按行和列位置检查每个像素。

如果像素是白色,则将其更改为黑色,或者如果像素是黑色,则将其更改为白色。

    for row in range(0,300,1):
        print(row)
        for col in range(0,300,1):
            print(col)
            if img[row,col] is [255,255,255] : #I have used == instead of 'is'..but there is no change 
                img[row,col]=[0,0,0]
            elif img[row,col] is [0,0,0]:
                img[row,col]=[255,255,255]

执行时没有错误,但它没有将像素值分别更改为黑色或白色。此外,if语句也未执行。太多的混乱了。

    cv2.imshow('img',img)
    cv2.waitKey(0)
    cv2.destroyAllWindows()
4个回答

6

我经验不是很丰富,但我会使用numpy.where()进行操作,这比使用循环更快。

import cv2
import numpy as np
import matplotlib.pyplot as plt

# Read the image
original_image=cv2.imread("cvlogo.png")
# Not necessary. Make a copy to plot later
img=np.copy(original_image)

#Isolate the areas where the color is black(every channel=0) and white (every channel=255)
black=np.where((img[:,:,0]==0) & (img[:,:,1]==0) & (img[:,:,2]==0))
white=np.where((img[:,:,0]==255) & (img[:,:,1]==255) & (img[:,:,2]==255))

#Turn black pixels to white and vice versa
img[black]=(255,255,255)
img[white]=(0,0,0)

# Plot the images
fig=plt.figure()
ax1 = fig.add_subplot(1,2,1)
ax1.imshow(original_image)
ax1.set_title('Original Image')
ax2 = fig.add_subplot(1,2,2)
ax2.imshow(img)
ax2.set_title('Modified Image')
plt.show()

enter image description here


5

我认为这应该可以起作用。 :) (我只是使用numpy来获取宽度和高度值 - 您不需要这个)

import cv2

img=cv2.imread("cvlogo.png")
img=cv2.resize(img, (300,300))
height, width, channels = img.shape

white = [255,255,255]
black = [0,0,0]

for x in range(0,width):
    for y in range(0,height):
        channels_xy = img[y,x]
        if all(channels_xy == white):    
            img[y,x] = black

        elif all(channels_xy == black):
            img[y,x] = white

cv2.imshow('img',img)
cv2.waitKey(0)
cv2.destroyAllWindows()

1
我还不确定是否熟练掌握Python :D ,但您代码的问题在于您从未进入if条件。我认为您不能像您所做的那样测试相等性(例如:[x,y,z] == [255,255,255])。我会逐个通道检查相等性。希望这是正确答案。 - ajlaj25
1
img[x,y] 表示在 x,y 坐标处的三个通道值 - 全部为 [ch1,ch2,ch3]。img[x,y,0] 是 ch1 通道在 x,y 坐标处的值。 - ajlaj25
谢谢,但我真的无法理解分离通道的概念...如果您能解释一下会很有帮助,否则请分享任何相关链接。 - Sundaramoorthy Anandh
现在我可以理解了兄弟.. 谢谢!祝愿! - Sundaramoorthy Anandh
1
这里不需要Numpy,img.shape是cv2模块的一个类。@ajlaj25 - Sundaramoorthy Anandh
显示剩余5条评论

3
这也是解决这个问题的方法。 来源:ajlaj25
    import cv2


    img=cv2.imread("cvlogo.png")
    img=cv2.resize(img, (300,300))
    height, width, channels = img.shape

    print(height,width,channels)

    for x in range(0,width):
        for y in range(0,height):
            if img[x,y,0] == 255 and img[x,y,1] == 255 and img[x,y,2] == 255:            
                img[x,y,0] = 0
                img[x,y,1] = 0
                img[x,y,2] = 0

            elif img[x,y,0] == 0 and img[x,y,1] == 0 and img[x,y,2] == 0:
                img[x,y,0] = 255
                img[x,y,1] = 255
                img[x,y,2] = 255

img[x,y] 表示在 x,y 坐标处的三个通道值 [ch1,ch2,ch3]。img[x,y,0] 是 ch1 通道在 x,y 坐标处的值。

x 和 y 表示像素位置,而不是像素的 RGB 值。因此,img[x,y,0] 是 ch1 通道在 x,y 坐标处的值。

    cv2.imshow('Coverted Image',img)
    cv2.waitKey(0)
    cv2.destroyAllWindows()

1
有点晚了,但我想用另一种方法来解决这个问题。我的方法基于图像索引,比循环图像更快,这是接受答案中使用的方法。
我对两种代码进行了时间测量,以说明我刚才说的。看看下面的代码:
import cv2
from matplotlib import pyplot as plt

# Reading image to be used in the montage, this step is not important
original = cv2.imread('imgs/opencv.png')

# Starting time measurement
e1 = cv2.getTickCount()

# Reading the image
img = cv2.imread('imgs/opencv.png')

# Converting the image to grayscale
imgGray = cv2.cvtColor(img,cv2.COLOR_BGR2GRAY)

# Converting the grayscale image into a binary image to get the whole image
ret,imgBinAll = cv2.threshold(imgGray,175,255,cv2.THRESH_BINARY)

# Converting the grayscale image into a binary image to get the text
ret,imgBinText = cv2.threshold(imgGray,5,255,cv2.THRESH_BINARY)

# Changing white pixels from original image to black
img[imgBinAll == 255] = [0,0,0]

# Changing black pixels from original image to white
img[imgBinText == 0] = [255,255,255]

# Finishing time measurement
e2 = cv2.getTickCount()
t = (e2 - e1)/cv2.getTickFrequency()
print(f'Time spent in seconds: {t}')

此时我停止计时,因为下一步只是绘制蒙太奇图,代码如下:

# Plotting the image
plt.subplot(1,5,1),plt.imshow(original)
plt.title('original')
plt.xticks([]),plt.yticks([])
plt.subplot(1,5,2),plt.imshow(imgGray,'gray')
plt.title('grayscale')
plt.xticks([]),plt.yticks([])
plt.subplot(1,5,3),plt.imshow(imgBinAll,'gray')
plt.title('binary - all')
plt.xticks([]),plt.yticks([])
plt.subplot(1,5,4),plt.imshow(imgBinText,'gray')
plt.title('binary - text')
plt.xticks([]),plt.yticks([])
plt.subplot(1,5,5),plt.imshow(img,'gray')
plt.title('final result')
plt.xticks([]),plt.yticks([])
plt.show()

这是最终结果:

展示建议方法的所有步骤的蒙太奇

这是所消耗的时间(在控制台中打印):

Time spent in seconds: 0.008526025

为了比较这两种方法,我注释了调整图像大小的那行代码。同时,在imshow命令之前停止计时。以下是结果:
Time spent in seconds: 1.837972522

如果您检查两个图像,您会发现一些轮廓差异。有时候在处理图像时,效率至关重要。因此,在可能的情况下节省时间是一个好主意。这种方法可以适应不同的情况,请参阅阈值文档

循环方法的最终结果


网页内容由stack overflow 提供, 点击上面的
可以查看英文原文,
原文链接