我已经实现了PushKit。现在我想要接收推送通知。是否有任何方法可以在线获取推送通知,就像我们有许多在线APNS服务一样,这些服务接受设备令牌和.pem文件以发送远程通知?
2个回答
14
您可以创建自己的php文件。
来源 https://github.com/hasyapanchasara/PushKit_SilentPushNotification
使用以下结构来完成您的任务。

使用这个 simplepush.php 文件。
<?php

// Put your device token here (without spaces):


      $deviceToken = '1234567890123456789';
//


// Put your private key's passphrase here:
$passphrase = 'ProjectName';

// Put your alert message here:
$message = 'My first push notification!';


$ctx = stream_context_create();
stream_context_set_option($ctx, 'ssl', 'local_cert', 'PemFileName.pem');
stream_context_set_option($ctx, 'ssl', 'passphrase', $passphrase);

// Open a connection to the APNS server
$fp = stream_socket_client(
//  'ssl://gateway.push.apple.com:2195', $err,
    'ssl://gateway.sandbox.push.apple.com:2195', $err,
    $errstr, 60, STREAM_CLIENT_CONNECT|STREAM_CLIENT_PERSISTENT, $ctx);

if (!$fp)
    exit("Failed to connect: $err $errstr" . PHP_EOL);

echo 'Connected to APNS' . PHP_EOL;

// Create the payload body

$body['aps'] = array(
                     'content-available'=> 1,
                     'alert' => $message,
                     'sound' => 'default',
                     'badge' => 0,
                     );


// Encode the payload as JSON

$payload = json_encode($body);

// Build the binary notification
$msg = chr(0) . pack('n', 32) . pack('H*', $deviceToken) . pack('n', strlen($payload)) . $payload;

// Send it to the server
$result = fwrite($fp, $msg, strlen($msg));

if (!$result)
    echo 'Message not delivered' . PHP_EOL;
else
    echo 'Message successfully delivered' . PHP_EOL;

// Close the connection to the server
fclose($fp);
使用以下命令创建 pem 文件,并在上面的代码中使用它:
$ openssl x509 -in aps_development.cer -inform der -out PushCert.pem

# Convert .p12 to .pem. Enter your pass pharse which is the same pwd that you have given while creating the .p12 certificate. PEM pass phrase also same as .p12 cert.
$ openssl pkcs12 -nocerts -out PushKey1.pem -in pushkey.p12

Enter Import Password:

MAC verified OK

Enter PEM pass phrase:

Verifying - Enter PEM pass phrase:

# To remove passpharse for the key to access globally. This only solved my stream_socket_client() & certificate capath warnings.
$ openssl rsa -in PushKey1.pem -out PushKey1_Rmv.pem

Enter pass phrase for PushChatKey1.pem:

writing RSA key

# To join the two .pem file into one file:
$ cat PushCert.pem PushKey1_Rmv.pem > ApnsDev.pem
接下来,请前往simplepush.php位置并运行命令 -> php simplepush.php
这样您就可以测试推送套件通知设置架构。
https://zeropush.com/guide/guide-to-pushkit-and-voip
https://www.raywenderlich.com/123862/push-notifications-tutorial
已更新为Swift 4代码
import UIKit
import PushKit

@UIApplicationMain
class AppDelegate: UIResponder, UIApplicationDelegate,PKPushRegistryDelegate {

var window: UIWindow?

var isUserHasLoggedInWithApp: Bool = true
var checkForIncomingCall: Bool = true
var userIsHolding: Bool = true

func application(application: UIApplication, didFinishLaunchingWithOptions launchOptions: [NSObject: AnyObject]?) -> Bool {


    if #available(iOS 8.0, *){


        let viewAccept = UIMutableUserNotificationAction()
        viewAccept.identifier = "VIEW_ACCEPT"
        viewAccept.title = "Accept"
        viewAccept.activationMode = .Foreground
        viewAccept.destructive = false
        viewAccept.authenticationRequired =  false

        let viewDecline = UIMutableUserNotificationAction()
        viewDecline.identifier = "VIEW_DECLINE"
        viewDecline.title = "Decline"
        viewDecline.activationMode = .Background
        viewDecline.destructive = true
        viewDecline.authenticationRequired = false

        let INCOMINGCALL_CATEGORY = UIMutableUserNotificationCategory()
        INCOMINGCALL_CATEGORY.identifier = "INCOMINGCALL_CATEGORY"
        INCOMINGCALL_CATEGORY.setActions([viewAccept,viewDecline], forContext: .Default)

        if application.respondsToSelector("isRegisteredForRemoteNotifications")
        {
            let categories = NSSet(array: [INCOMINGCALL_CATEGORY])
            let types:UIUserNotificationType = ([.Alert, .Sound, .Badge])

            let settings:UIUserNotificationSettings = UIUserNotificationSettings(forTypes: types, categories: categories as? Set<UIUserNotificationCategory>)

            application.registerUserNotificationSettings(settings)
            application.registerForRemoteNotifications()
        }

    }
    else{
        let types: UIRemoteNotificationType = [.Alert, .Badge, .Sound]
        application.registerForRemoteNotificationTypes(types)
    }


    self.PushKitRegistration()

return true
}
//MARK: - PushKitRegistration

func PushKitRegistration()
{

    let mainQueue = dispatch_get_main_queue()
    // Create a push registry object
    if #available(iOS 8.0, *) {

    let voipRegistry: PKPushRegistry = PKPushRegistry(queue: mainQueue)

    // Set the registry's delegate to self

    voipRegistry.delegate = self

    // Set the push type to VoIP

    voipRegistry.desiredPushTypes = [PKPushTypeVoIP]

    } else {
    // Fallback on earlier versions
    }


}


@available(iOS 8.0, *)
func pushRegistry(registry: PKPushRegistry!, didUpdatePushCredentials credentials: PKPushCredentials!, forType type: String!) {
    // Register VoIP push token (a property of PKPushCredentials) with server

    let hexString : String = UnsafeBufferPointer<UInt8>(start: UnsafePointer(credentials.token.bytes),
    count: credentials.token.length).map { String(format: "%02x", $0) }.joinWithSeparator("")

    print(hexString)


}


@available(iOS 8.0, *)
func pushRegistry(registry: PKPushRegistry!, didReceiveIncomingPushWithPayload payload: PKPushPayload!, forType type: String!) {

    // Process the received push

    // Below process is specific to schedule local notification once pushkit payload received

    var arrTemp = [NSObject : AnyObject]()
    arrTemp = payload.dictionaryPayload

    let dict : Dictionary <String, AnyObject> = arrTemp["aps"] as! Dictionary<String, AnyObject>


    if isUserHasLoggedInWithApp // Check this flag then only proceed
    {

        if UIApplication.sharedApplication().applicationState == UIApplicationState.Background || UIApplication.sharedApplication().applicationState == UIApplicationState.Inactive
        {

            if checkForIncomingCall // Check this flag to know incoming call or something else
            {

                var strTitle : String = dict["alertTitle"] as? String ?? ""
                let strBody : String = dict["alertBody"] as? String ?? ""
                strTitle = strTitle + "\n" + strBody

                let notificationIncomingCall = UILocalNotification()

                notificationIncomingCall.fireDate = NSDate(timeIntervalSinceNow: 1)
                notificationIncomingCall.alertBody =  strTitle
                notificationIncomingCall.alertAction = "Open"
                notificationIncomingCall.soundName = "SoundFile.mp3"
                notificationIncomingCall.category = dict["category"] as? String ?? ""

                //"As per payload you receive"
                notificationIncomingCall.userInfo = ["key1": "Value1"  ,"key2": "Value2" ]


                UIApplication.sharedApplication().scheduleLocalNotification(notificationIncomingCall)

            }
            else
            {
                //  something else
            }

        }
    }


}

//MARK: - Local Notification Methods

func application(application: UIApplication, didReceiveLocalNotification notification: UILocalNotification){

    // Your interactive local notification events will be called at this place

}


}
- Hasya
5
我正在使用相同的 .php 文件发送远程通知。现在,我可以收到远程通知,但无法收到 PushKit 通知。 - Mak083
是的,我已经完成了iOS代码。我正在使用相同的脚本获取APNS远程通知,但无法获取PushKit通知。 - Mak083
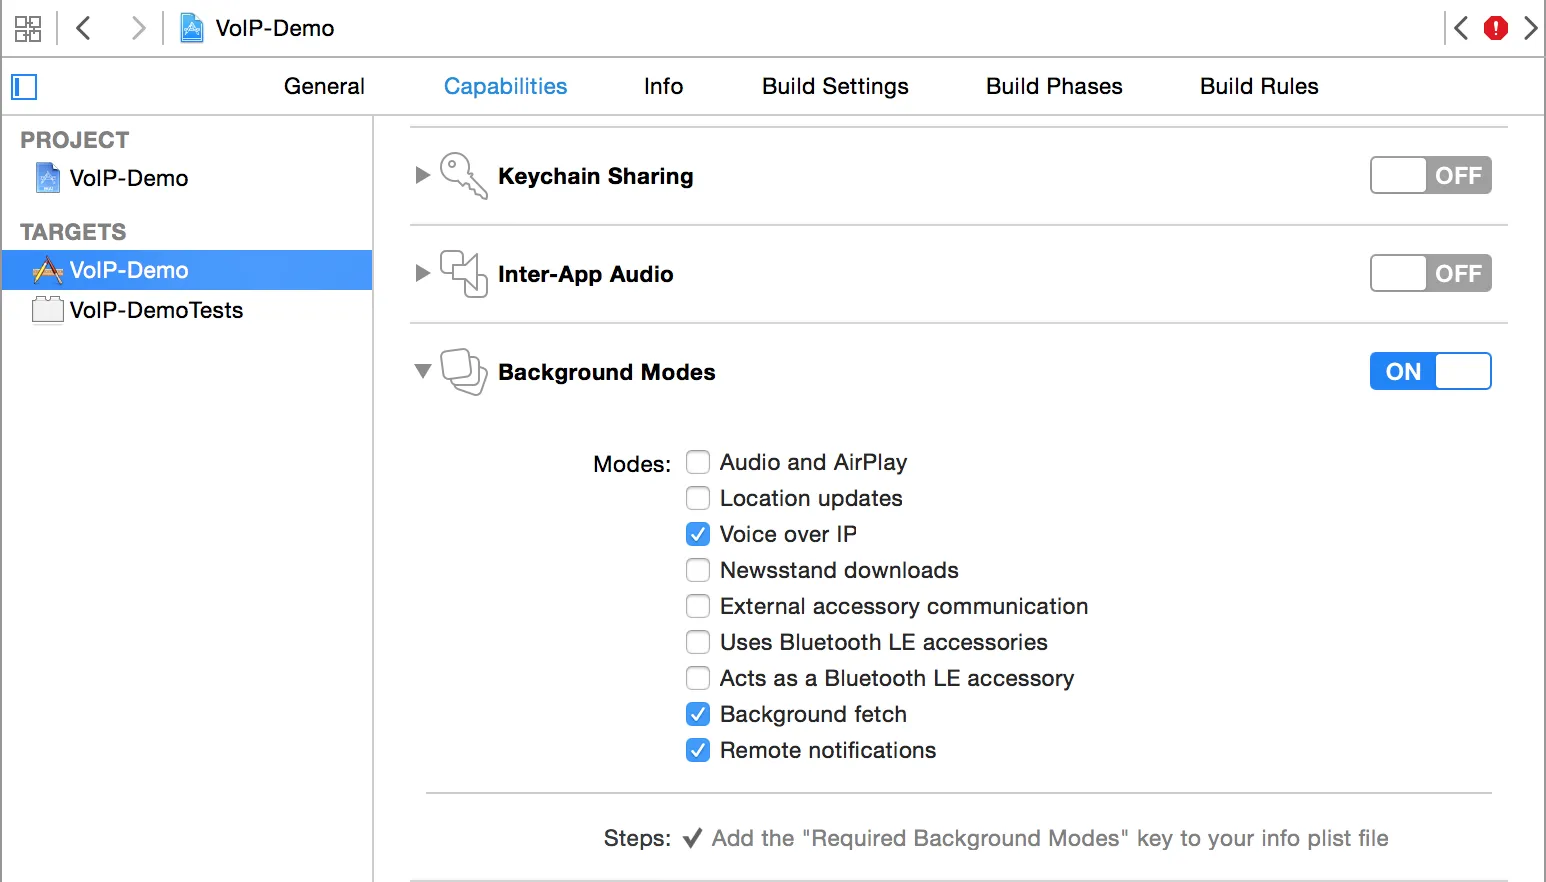
请检查我的更新答案,我希望对于PushKit,您已经按以下方式完成了iOS端的代码。与APNS相关的代码与PushKit相关的代码不起作用。 - Hasya
它是否有效?请检查带有图像的更新答案,如果有任何疑问,请告诉我。 - Hasya
是的,它起作用了。我选择了Apple Push通知服务(SSL),而不是VoIP服务。我重新创建了证书,并能够发送PushKit通知。非常感谢 :) - Mak083
13
对于我来说,最简单的方法是使用我在GitHub上找到的一个专用应用程序Pusher。它有macOS和iOS版本,易于使用并且非常可靠!
- Shebuka
3
这是一个非常简单的应用程序,可以发送推送通知。谢谢。 :) - Mak083
超级方便的应用程序!必备! - imike
1Pusher是一个很棒的工具,现在推送Voip Push非常好用。 - AndaluZ
网页内容由stack overflow 提供, 点击上面的可以查看英文原文,
原文链接
原文链接