如何将数量输入框移动到“加入购物车”按钮旁边 - WordPress

4

enter image description here

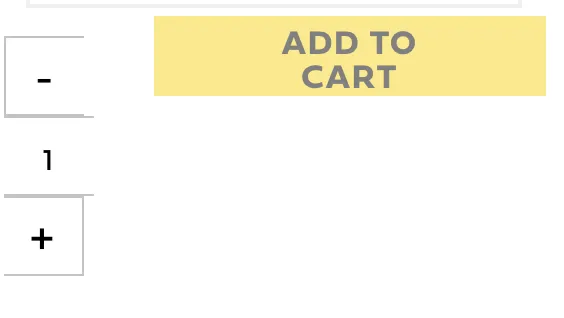
如何将输入框容器移动到按钮旁边,使它们在同一行且相互贴近?如下代码所示,我无法正确实现上述效果。

.archive .woocommerce-variation-add-to-cart{
        display:inline-flex;
}
.archive .qib-container, .archive .single_add_to_cart_button{
  float:left;
}
<div class="woocommerce-variation-add-to-cart variations_button woocommerce-variation-add-to-cart-enabled">
 <div class="qib-container">
   <button type="button" class="minus qib-button">-</button>
   <div class="quantity buttons_added">
    <label class="screen-reader-text" for="quantity_610094fe7a505">Espresso Taster Pack (x3 Bags) quantity</label>
    <input type="number" id="quantity_610094fe7a505" class="input-text qty text" step="1" min="1" max="" name="quantity" value="1" title="Qty" size="4" placeholder="" inputmode="numeric">
    <span class="q_inc"></span><span class="q_dec"></span></div>
    <button type="button" class="plus qib-button">+</button>
 </div>
        
 <button type="submit" class="single_add_to_cart_button button alt">Add to Cart</button>
</div>
4个回答

3

1
在您的情况下,您只需要将.qib-container.woocommerce-variation-add-to-cart设置为弹性盒容器,并调整输入框的width即可。
.woocommerce-variation-add-to-cart {
  display: flex;
}

.qib-container {
  display: flex;
}

input.qty {
  width: 30px;
}

这是一个完整的例子:

.woocommerce-variation-add-to-cart {
  display: flex;
}

.qib-container {
  display: flex;
}

input.qty {
  width: 30px;
}
<div class="woocommerce-variation-add-to-cart variations_button woocommerce-variation-add-to-cart-enabled">
  <div class="qib-container">
    <button type="button" class="minus qib-button">-</button>
    <div class="quantity buttons_added">
      <input type="number" id="quantity_610094fe7a505" class="input-text qty text" step="1" min="1" max="" name="quantity" value="1" title="Qty" size="4" placeholder="" inputmode="numeric">
      <span class="q_inc"></span><span class="q_dec"></span></div>
    <button type="button" class="plus qib-button">+</button>
  </div>

  <button type="submit" class="single_add_to_cart_button button alt">Add to Cart</button>
</div>


0

由于您只提供了HTML代码而没有CSS,我自己编写了CSS,可以帮助您将数量文本字段放置在“添加到购物车”按钮旁边,并稍微编辑了HTML文件。

编辑后的HTML:

<div class="woocommerce-variation-add-to-cart variations_button woocommerce-variation-add-to-cart-enabled">
    <div class="qib-container">
        <button type="button" class="minus qib-button">-</button>
        <div class="quantity buttons_added">
            <button class="screen-reader-text" for="quantity_610094fe7a505">Espresso Taster Pack (x3 Bags) quantity
                <input type="number" id="quantity_610094fe7a505" class="input-text qty text" step="1" min="1" max="" name="quantity" value="1" title="Qty" size="4" placeholder="" inputmode="numeric">
            </button>          
            <span class="q_inc"></span><span class="q_dec"></span>
        </div>
        <button type="button" class="plus qib-button">+</button>
        <button type="submit" class="single_add_to_cart_button button alt">Add to Cart</button>
    </div>
</div>

我在这里所做的只是将标签更改为按钮(尽管您发送的图像上没有标签文本),并将文本框放置在其中。我还在容器内添加了“添加到购物车”按钮。
至于样式:
<style>
.qib-container button {
        background-color: #04AA6D; /* Green background */
        border: 1px solid green; /* Green border */
        color: white; /* White text */
        padding: 10px 24px; /* Some padding */
        cursor: pointer; /* Pointer/hand icon */
        float: left; /* Float the buttons side by side */
    }

    .qib-container button:not(:last-child) {
        border-right: none; /* Prevent double borders */
    }

    /* Clear floats (clearfix hack) */
    .qib-container:after {
        content: "";
        clear: both;
        display: table;
    }

    /* Add a background color on hover */
    .qib-container button:hover {
        background-color: #3e8e41;
    }
</style>

我在容器中添加了一些功能,使所有内容都并排显示。假设您更改颜色和大小以适应您的需求,我认为这解决了按钮不并排出现的问题,但如果我错误地解释了您的问题,请告诉我。

这是它的样子: enter image description here


0

.qib-container {display: inline- 
block;}
.quantity {float: left;}
.single_add_to_cart_button 
{background-color: 
green; border-radius: 10px;
box-shadow: 0px 4px 6px rgba(0, 
0, 0, 0.5);}
input.qty {width: 30px;}
<div class="woocommerce- 
variation-add-to-cart 
variations_button 
woocommerce-variation-add-to- 
cart-enabled">
<div class="qib-container"><label 
class="screen-reader-text" 
for="quantity_610094fe7a505">
Espresso Taster Pack (x3 Bags) 
<br><br></label><button 
type="button" class="minus qib- 
button">- 
</button><button type="button" 
class="plus qib-button">+ 
</button>
<div class="quantity 
buttons_added">
<input type="number" 
id="quantity_610094fe7a505" 
class="input- 
text qty text" step="1" min="1" 
max="" name="quantity" value="1" 
title="Qty" size="4" 
placeholder="" 
inputmode="numeric">
<span class="q_inc"></span><span 
class="q_dec"></span></div>
</div><br>
<button type="submit" 
class="single_add_to_cart_button 
button 
alt">Add to Cart</button>
</div>


网页内容由stack overflow 提供, 点击上面的
可以查看英文原文,
原文链接