如何制作一个圆形按钮 tkinter?

19

我正在尝试使用tkinter脚本得到圆形按钮。

我在如何使用tkinter Canvas小部件制作按钮?的答案中找到了以下代码:

from tkinter import *
import tkinter as tk

class CustomButton(tk.Canvas):
    def __init__(self, parent, width, height, color, command=None):
        tk.Canvas.__init__(self, parent, borderwidth=1, 
            relief="raised", highlightthickness=0)
        self.command = command

        padding = 4
        id = self.create_oval((padding,padding,
            width+padding, height+padding), outline=color, fill=color)
        (x0,y0,x1,y1)  = self.bbox("all")
        width = (x1-x0) + padding
        height = (y1-y0) + padding
        self.configure(width=width, height=height)
        self.bind("<ButtonPress-1>", self._on_press)
        self.bind("<ButtonRelease-1>", self._on_release)

    def _on_press(self, event):
        self.configure(relief="sunken")

    def _on_release(self, event):
        self.configure(relief="raised")
        if self.command is not None:
            self.command()
app = CustomButton()
app.mainloop()

但是我遇到了以下错误:

TypeError: __init__() missing 4 required positional arguments: 'parent', 'width', 'height', and 'color'

有没有办法在这个按钮上添加文本? - Polydynamical
7个回答

19

在tkinter中制作圆形按钮的一种简单方法是使用图像。

首先创建一个您想要的按钮外观的图像,将其保存为 .png 文件,并删除外部背景,使其像下面这样成为圆形:

单击此处查看图像

接下来,使用PhotoImage将图像插入到按钮中,就像这样:

self.loadimage = tk.PhotoImage(file="rounded_button.png")
self.roundedbutton = tk.Button(self, image=self.loadimage)
self.roundedbutton["bg"] = "white"
self.roundedbutton["border"] = "0"
self.roundedbutton.pack(side="top")

确保使用border="0",按钮边框将被移除。

我添加了self.roundedborder["bg"] = "white"以便按钮的背景与Tkinter窗口相同。

最好的部分是您可以使用任何形状,而不仅仅是正常的按钮形状。


3
看起来不错,但在我的情况下无效。因为一旦你在按钮后面放置背景图片,你仍然会看到边框,因为按钮没有像图片一样被圆角化。 - Cedric
1
是的,它并不是万无一失的,对于这样的事情,你真的应该考虑切换到另一个库。PyQT看起来很好,编码也很容易,如果你想选择免费和开源的东西,那么WX widgets可能更适合你。对于任何非常独特的东西,你可能需要使用像PyOpenGL这样的工具来编写新的GUI。我听说这并不难,但很耗时间。 - Xantium
1
好的,谢谢,但我不会因此而得到报酬...所以我不会很快编写自己的用户界面^^ - Cedric

14

如果有人想要更接近苹果样式的按钮,我做了这个圆角矩形按钮。为方便起见,以下是相关参数:

RoundedButton(parent, width, height, cornerradius, padding, fillcolor, background, command)
注意:如果圆角半径大于宽度或高度的一半,终端会发送错误消息。如果将圆角半径设置为高度或宽度的恰好一半,则仍然可以制作药丸形状。
最后是代码:
from tkinter import *
import tkinter as tk

root = Tk()

class RoundedButton(tk.Canvas):
    def __init__(self, parent, width, height, cornerradius, padding, color, bg, command=None):
        tk.Canvas.__init__(self, parent, borderwidth=0, 
            relief="flat", highlightthickness=0, bg=bg)
        self.command = command

        if cornerradius > 0.5*width:
            print("Error: cornerradius is greater than width.")
            return None

        if cornerradius > 0.5*height:
            print("Error: cornerradius is greater than height.")
            return None

        rad = 2*cornerradius
        def shape():
            self.create_polygon((padding,height-cornerradius-padding,padding,cornerradius+padding,padding+cornerradius,padding,width-padding-cornerradius,padding,width-padding,cornerradius+padding,width-padding,height-cornerradius-padding,width-padding-cornerradius,height-padding,padding+cornerradius,height-padding), fill=color, outline=color)
            self.create_arc((padding,padding+rad,padding+rad,padding), start=90, extent=90, fill=color, outline=color)
            self.create_arc((width-padding-rad,padding,width-padding,padding+rad), start=0, extent=90, fill=color, outline=color)
            self.create_arc((width-padding,height-rad-padding,width-padding-rad,height-padding), start=270, extent=90, fill=color, outline=color)
            self.create_arc((padding,height-padding-rad,padding+rad,height-padding), start=180, extent=90, fill=color, outline=color)


        id = shape()
        (x0,y0,x1,y1)  = self.bbox("all")
        width = (x1-x0)
        height = (y1-y0)
        self.configure(width=width, height=height)
        self.bind("<ButtonPress-1>", self._on_press)
        self.bind("<ButtonRelease-1>", self._on_release)

    def _on_press(self, event):
        self.configure(relief="sunken")

    def _on_release(self, event):
        self.configure(relief="raised")
        if self.command is not None:
            self.command()

def test():
    print("Hello")

canvas = Canvas(root, height=300, width=500)
canvas.pack()

button = RoundedButton(root, 200, 100, 50, 2, 'red', 'white', command=test)
button.place(relx=.1, rely=.1)

root.mainloop()

7
有没有办法在这个按钮上添加文本? - Polydynamical
1
语句 id = shape() 有点神秘,因为我没有看到 id 在其他地方被引用。这是 tk.Canvas 类自动使用的东西吗?我对填充仍然很陌生,但 padding 不应该分成 padxpady 吗? - WinEunuuchs2Unix

6

不幸的是,当图片被调整大小时效果不佳。

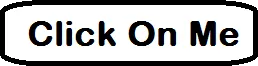
以下是一个使用canvas制作的圆角按钮示例,即使被调整大小也能正常显示。

import tkinter as tk


class RoundedButton(tk.Canvas):

    def __init__(self, master=None, text:str="", radius=25, btnforeground="#000000", btnbackground="#ffffff", clicked=None, *args, **kwargs):
        super(RoundedButton, self).__init__(master, *args, **kwargs)
        self.config(bg=self.master["bg"])
        self.btnbackground = btnbackground
        self.clicked = clicked

        self.radius = radius        
        
        self.rect = self.round_rectangle(0, 0, 0, 0, tags="button", radius=radius, fill=btnbackground)
        self.text = self.create_text(0, 0, text=text, tags="button", fill=btnforeground, font=("Times", 30), justify="center")

        self.tag_bind("button", "<ButtonPress>", self.border)
        self.tag_bind("button", "<ButtonRelease>", self.border)
        self.bind("<Configure>", self.resize)
        
        text_rect = self.bbox(self.text)
        if int(self["width"]) < text_rect[2]-text_rect[0]:
            self["width"] = (text_rect[2]-text_rect[0]) + 10
        
        if int(self["height"]) < text_rect[3]-text_rect[1]:
            self["height"] = (text_rect[3]-text_rect[1]) + 10
          
    def round_rectangle(self, x1, y1, x2, y2, radius=25, update=False, **kwargs): # if update is False a new rounded rectangle's id will be returned else updates existing rounded rect.
        # source: https://dev59.com/rlcP5IYBdhLWcg3worVh#44100075
        points = [x1+radius, y1,
                x1+radius, y1,
                x2-radius, y1,
                x2-radius, y1,
                x2, y1,
                x2, y1+radius,
                x2, y1+radius,
                x2, y2-radius,
                x2, y2-radius,
                x2, y2,
                x2-radius, y2,
                x2-radius, y2,
                x1+radius, y2,
                x1+radius, y2,
                x1, y2,
                x1, y2-radius,
                x1, y2-radius,
                x1, y1+radius,
                x1, y1+radius,
                x1, y1]

        if not update:
            return self.create_polygon(points, **kwargs, smooth=True)
        
        else:
            self.coords(self.rect, points)

    def resize(self, event):
        text_bbox = self.bbox(self.text)

        if self.radius > event.width or self.radius > event.height:
            radius = min((event.width, event.height))

        else:
            radius = self.radius

        width, height = event.width, event.height

        if event.width < text_bbox[2]-text_bbox[0]:
            width = text_bbox[2]-text_bbox[0] + 30
        
        if event.height < text_bbox[3]-text_bbox[1]:  
            height = text_bbox[3]-text_bbox[1] + 30
        
        self.round_rectangle(5, 5, width-5, height-5, radius, update=True)

        bbox = self.bbox(self.rect)

        x = ((bbox[2]-bbox[0])/2) - ((text_bbox[2]-text_bbox[0])/2)
        y = ((bbox[3]-bbox[1])/2) - ((text_bbox[3]-text_bbox[1])/2)

        self.moveto(self.text, x, y)

    def border(self, event):
        if event.type == "4":
            self.itemconfig(self.rect, fill="#d2d6d3")
            if self.clicked is not None:
                self.clicked()

        else:
            self.itemconfig(self.rect, fill=self.btnbackground)

def func():
    print("Button pressed")

root = tk.Tk()
btn = RoundedButton(text="This is a \n rounded button", radius=100, btnbackground="#0078ff", btnforeground="#ffffff", clicked=func)
btn.pack(expand=True, fill="both")
root.mainloop()

使用canvas.create_rectangle()canvas.create_text()方法创建按钮,并将它们都分配给相同的标签,如"button"。在使用canvas.tag_bind("tag", "<ButtonPress>")时,将使用该标签(您还可以简单地传递标记为"current",此时标记分配给tkinter选择的项目,在这种情况下,您可以删除按钮标记)。
请在画布元素上使用canvas.tag_bind而不是在画布上使用bind,这样鼠标按下事件仅在圆形按钮内部发生时更改按钮颜色,而不是在边缘发生时更改。
您可以扩展并改进此功能,以在单击按钮内部时生成自定义事件,添加配置方法以配置按钮文本和背景等。
输出: enter image description here

我该如何创建更小的按钮? - Rovindu Thamuditha
1
@RovinduThamuditha 这取决于您的几何管理器。如果您使用pack,则可能需要删除expand=True和fill,并在RoundedButton构造函数中指定高度和宽度。 - Art
这太棒了,非常感谢! 我有一个问题,就是按钮周围有一个白色边框,在它后面有其他颜色时很明显。我一直在尝试理解它来自哪个类。 你有任何想法如何修复它吗? - Cai Allin
@CaiAllin 我无法重现这个问题,我尝试了蓝色和绿色背景。请确保您在画布中设置了 bdborderwidth 参数为0。同时尝试将 relief 设置为 "flat" 或查看此链接:https://dev59.com/2W855IYBdhLWcg3wfUZM - Art
@Art 谢谢,我得到了一些帮助,最终解决了问题,边框宽度是个问题。再次感谢。 - Cai Allin

5
您没有向构造函数传递任何参数。

具体来说,在这一行:
app = CustomButton()

你需要传递在构造函数定义中定义的参数,即 parentwidthheightcolor

5

首先需要创建根窗口(或其他小部件),并将其与不同参数一起传递给您的CustomButton(请参见__init__方法的定义)。

尝试使用以下代码替换app = CustomButton()

app = tk.Tk()
button = CustomButton(app, 100, 25, 'red')
button.pack()
app.mainloop()

1
谢谢。这使它运行了,但按钮不是圆形的。 - Martinn Roelofse
3
不是这样的。然而,这正是你所“发现”的代码应该做的事情。它创建一个带有凸起纹理的矩形画布,并在其上绘制一个椭圆形。当你按下/释放按钮时,它会再次使凸起深陷/凸起。 - avysk

2

我曾经遇到了很多麻烦,找不到适合我的代码。我尝试过将图像应用于按钮,并尝试了上面的自定义按钮样式。

这是适合我的自定义按钮代码,我感谢 Github 上的这个问题。

以下是代码:

from tkinter import *
import tkinter as tk
import tkinter.font as font

class RoundedButton(tk.Canvas):
  def __init__(self, parent, border_radius, padding, color, text='', command=None):
    tk.Canvas.__init__(self, parent, borderwidth=0,
                       relief="raised", highlightthickness=0, bg=parent["bg"])
    self.command = command
    font_size = 10
    self.font = font.Font(size=font_size, family='Helvetica')
    self.id = None
    height = font_size + (1 * padding)
    width = self.font.measure(text)+(1*padding)

    width = width if width >= 80 else 80

    if border_radius > 0.5*width:
      print("Error: border_radius is greater than width.")
      return None

    if border_radius > 0.5*height:
      print("Error: border_radius is greater than height.")
      return None

    rad = 2*border_radius

    def shape():
      self.create_arc((0, rad, rad, 0),
                      start=90, extent=90, fill=color, outline=color)
      self.create_arc((width-rad, 0, width,
                        rad), start=0, extent=90, fill=color, outline=color)
      self.create_arc((width, height-rad, width-rad,
                        height), start=270, extent=90, fill=color, outline=color)
      self.create_arc((0, height-rad, rad, height), start=180, extent=90, fill=color, outline=color)
      return self.create_polygon((0, height-border_radius, 0, border_radius, border_radius, 0, width-border_radius, 0, width,
                           border_radius, width, height-border_radius, width-border_radius, height, border_radius, height),
                                 fill=color, outline=color)

    id = shape()
    (x0, y0, x1, y1) = self.bbox("all")
    width = (x1-x0)
    height = (y1-y0)
    self.configure(width=width, height=height)
    self.create_text(width/2, height/2,text=text, fill='black', font= self.font)
    self.bind("<ButtonPress-1>", self._on_press)
    self.bind("<ButtonRelease-1>", self._on_release)

  def _on_press(self, event):
      self.configure(relief="sunken")

  def _on_release(self, event):
      self.configure(relief="raised")
      if self.command is not None:
          self.command()

现在将这段代码保存到一个文件中,例如命名为custombutton.py。 接下来,在您当前的Python文件中导入此文件(如:from custombutton import RoundedButton),并像这样使用它:
RoundedButton(root, text="Some Text", border_radius=2, padding=4, command=some_function, color="#cda989")

你如何为一个圆角按钮添加边框?我改变了borderwidth但是它不再是圆形的了。 - Lakshan Costa

0

如果您使用像@Xantium的方法中所示的图像,您可以将按钮参数borderwidth设置为0

例如:

homebtn = tk.Button(root, image=img, borderwidth=0)

网页内容由stack overflow 提供, 点击上面的
可以查看英文原文,
原文链接