我知道这个问题早于iOS 9,但是为了未来的读者,现在你可以定义一个视图,并将
collisionBoundsType设置为
UIDynamicItemCollisionBoundsTypePath,并使用一个圆形的
collisionBoundingPath。因此,虽然你不能“创建一个真正的圆形
UIView”,但是你可以定义一个路径,该路径定义了在视图内呈现的形状以及动画器的碰撞边界,从而产生一个圆形视图的效果(尽管视图本身显然仍然是矩形的,因为所有视图都是矩形的):
@interface CircleView: UIView
@property (nonatomic) CGFloat lineWidth;
@property (nonatomic, strong) CAShapeLayer *shapeLayer;
@end
@implementation CircleView
- (instancetype)initWithCoder:(NSCoder *)aDecoder {
self = [super initWithCoder:aDecoder];
if (self) {
[self configure];
}
return self;
}
- (instancetype)initWithFrame:(CGRect)frame {
self = [super initWithFrame:frame];
if (self) {
[self configure];
}
return self;
}
- (instancetype)init {
return [self initWithFrame:CGRectZero];
}
- (void)configure {
self.translatesAutoresizingMaskIntoConstraints = false;
self.shapeLayer = [CAShapeLayer layer];
self.shapeLayer.strokeColor = [[UIColor blueColor] CGColor];
self.shapeLayer.fillColor = [[[UIColor blueColor] colorWithAlphaComponent:0.5] CGColor];
self.lineWidth = 3;
[self.layer addSublayer:self.shapeLayer];
}
- (void)layoutSubviews {
[super layoutSubviews];
CGPoint center = CGPointMake(self.bounds.origin.x + self.bounds.size.width / 2, self.bounds.origin.y + self.bounds.size.height / 2);
self.shapeLayer.path = [[self circularPathWithLineWidth:self.lineWidth center:center] CGPath];
}
- (UIDynamicItemCollisionBoundsType)collisionBoundsType {
return UIDynamicItemCollisionBoundsTypePath;
}
- (UIBezierPath *)collisionBoundingPath {
return [self circularPathWithLineWidth:0 center:CGPointZero];
}
- (UIBezierPath *)circularPathWithLineWidth:(CGFloat)lineWidth center:(CGPoint)center {
CGFloat radius = (MIN(self.bounds.size.width, self.bounds.size.height) - self.lineWidth) / 2;
return [UIBezierPath bezierPathWithArcCenter:center radius:radius startAngle:0 endAngle:M_PI * 2 clockwise:true];
}
@end
然后,当您进行碰撞时,它将尊重collisionBoundingPath的值:
self.animator = [[UIDynamicAnimator alloc] initWithReferenceView:self.view];
CircleView *circle1 = [[CircleView alloc] initWithFrame:CGRectMake(60, 100, 80, 80)];
[self.view addSubview:circle1];
CircleView *circle2 = [[CircleView alloc] initWithFrame:CGRectMake(250, 150, 120, 120)];
[self.view addSubview:circle2];
UICollisionBehavior *collision = [[UICollisionBehavior alloc] initWithItems:@[circle1, circle2]];
[self.animator addBehavior:collision];
UIDynamicItemBehavior *behavior = [[UIDynamicItemBehavior alloc] initWithItems:@[circle1, circle2]];
behavior.elasticity = 1;
[self.animator addBehavior:behavior];
UIPushBehavior *push = [[UIPushBehavior alloc] initWithItems:@[circle1] mode:UIPushBehaviorModeInstantaneous];
[push setAngle:0 magnitude:1];
[self.animator addBehavior:push];
这将产生:
顺便提一下,文档概述了路径的一些限制:
您创建的路径对象必须表示具有逆时针或顺时针绕组的凸多边形,并且路径不能与自身相交。路径的(0, 0)点必须位于相应动态项的中心点处。如果中心点与路径的原点不匹配,则碰撞行为可能无法按预期工作。
但是一个简单的圆形路径很容易满足这些标准。
或者,对于Swift用户:
class CircleView: UIView {
    var lineWidth: CGFloat = 3

    var shapeLayer: CAShapeLayer = {
        let _shapeLayer = CAShapeLayer()
        _shapeLayer.strokeColor = UIColor.blue.cgColor
        _shapeLayer.fillColor = UIColor.blue.withAlphaComponent(0.5).cgColor
        return _shapeLayer
    }()

    override func layoutSubviews() {
        super.layoutSubviews()

        layer.addSublayer(shapeLayer)
        shapeLayer.lineWidth = lineWidth
        let center = CGPoint(x: bounds.midX, y: bounds.midY)
        shapeLayer.path = circularPath(lineWidth: lineWidth, center: center).cgPath
    }

    private func circularPath(lineWidth: CGFloat = 0, center: CGPoint = .zero) -> UIBezierPath {
        let radius = (min(bounds.width, bounds.height) - lineWidth) / 2
        return UIBezierPath(arcCenter: center, radius: radius, startAngle: 0, endAngle: .pi * 2, clockwise: true)
    }

    override var collisionBoundsType: UIDynamicItemCollisionBoundsType { return .path }

    override var collisionBoundingPath: UIBezierPath { return circularPath() }
}

class ViewController: UIViewController {

    let animator = UIDynamicAnimator()

    override func viewDidAppear(_ animated: Bool) {
        super.viewDidAppear(animated)

        let circle1 = CircleView(frame: CGRect(x: 60, y: 100, width: 80, height: 80))
        view.addSubview(circle1)

        let circle2 = CircleView(frame: CGRect(x: 250, y: 150, width: 120, height: 120))
        view.addSubview(circle2)

        animator.addBehavior(UICollisionBehavior(items: [circle1, circle2]))

        let behavior = UIDynamicItemBehavior(items: [circle1, circle2])
        behavior.elasticity = 1
        animator.addBehavior(behavior)

        let push = UIPushBehavior(items: [circle1], mode: .instantaneous)
        push.setAngle(0, magnitude: 1)
        animator.addBehavior(push)
    }

}
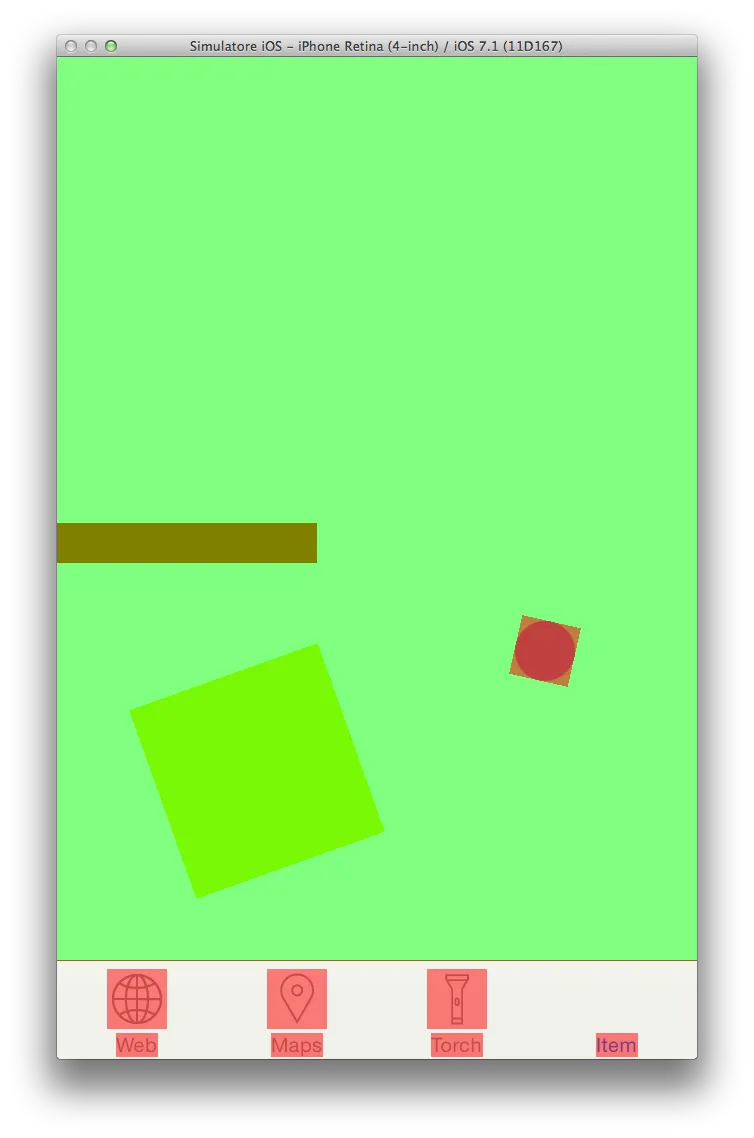 如您所见,此圆形明显是一个正方形。
UIDynamicItem属性collisionBoundsType和collisionBoundingPath现在是可能的。 - Rob