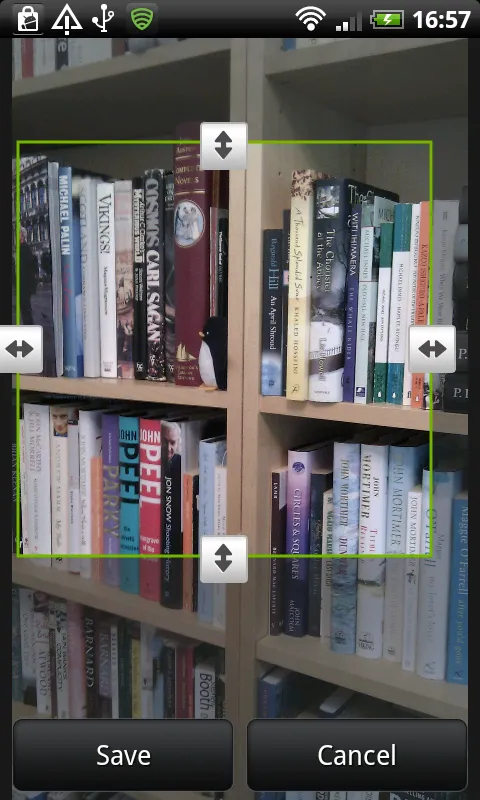
我最近为自己的项目完成了这个。请根据您的需求进行自定义。您还可以使用4个边缘和4个角来调整大小!虽然我的英语不好,但我尽力在代码中添加注释。请阅读它们,它们可能会有所帮助。
...
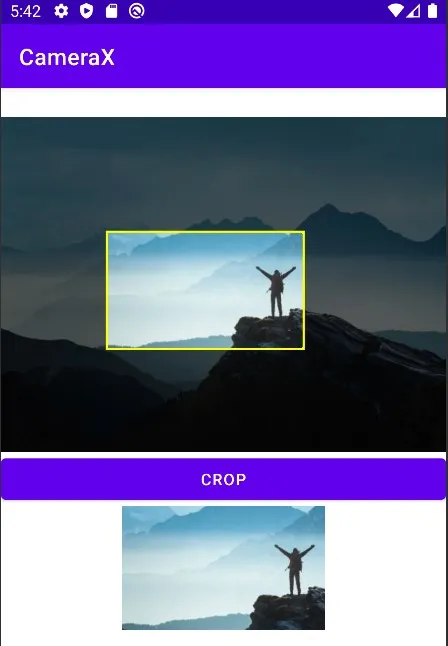
XML
     <your_package_name.CV4
            android:id="@+id/cv4"
            android:layout_width="match_parent"
            android:layout_height="wrap_content"
            />

        <Button
            android:id="@+id/cropBtn"
            android:layout_width="match_parent"
            android:layout_height="wrap_content"
            android:text="Crop"/>

        <ImageView
            android:id="@+id/croppedImage"
            android:layout_width="wrap_content"
            android:layout_height="wrap_content"/>
在活动或片段中编写代码
cropBtn.setOnClickListener {
            val x = cv4.test()
            croppedImage.setImageBitmap(x)
        }
自定义视图代码
package your.package.name
import android.annotation.SuppressLint
import android.content.Context
import android.graphics.*
import android.util.AttributeSet
import android.view.MotionEvent
import android.view.View
import com.voice.translator.app.speak.to.world.camerax.R
import kotlin.math.max
import kotlin.math.min
class CV4 @JvmOverloads constructor(
context: Context, attrs: AttributeSet? = null, defStyleAttr: Int = 0
) : View(context, attrs, defStyleAttr) {
override fun onMeasure(widthMeasureSpec: Int, heightMeasureSpec: Int) {
screenWidth = MeasureSpec.getSize(widthMeasureSpec)
imageWidth = screenWidth
imageHeight = ((screenWidth.toFloat() / src.width) * src.height).toInt()
setMeasuredDimension(screenWidth, imageHeight)
}
override fun onSizeChanged(w: Int, h: Int, oldw: Int, oldh: Int) {
super.onSizeChanged(w, h, oldw, oldh)
val desiredWidthInPx = imageWidth
val derivedHeightInPx = (desiredWidthInPx / aspectRatio).toInt()
output = Bitmap.createScaledBitmap(src, desiredWidthInPx, derivedHeightInPx, true)
rectF2 = RectF(0f, 0f, imageWidth.toFloat(), derivedHeightInPx.toFloat())
}
override fun onDraw(canvas: Canvas?) {
super.onDraw(canvas)
parent.requestDisallowInterceptTouchEvent(true)
canvas?.apply {
drawBitmap(output, 0f, 0f, null)
drawRect(rectF2, rectPaint2)
clipRect(rectF)
drawBitmap(output, 0f, 0f, null)
drawRoundRect(rectF, 10f, 10f, rectPaint)
}
}
@SuppressLint("ClickableViewAccessibility")
override fun onTouchEvent(event: MotionEvent?): Boolean {
if (event != null) {
motionX = event.x
motionY = event.y
when (event.action) {
MotionEvent.ACTION_MOVE -> moveMove()
MotionEvent.ACTION_DOWN -> moveDown()
MotionEvent.ACTION_UP -> moveUp()
}
}
return true
}
private fun moveMove() {
if (c5) {
if (pr < screenWidth && motionX > plx) {
pr = min(r + (motionX - plx), screenWidth.toFloat())
pl = min(l + (motionX - plx), screenWidth.toFloat() - (r - l))
}
if (pl > 0 && motionX < plx) {
pr = max(r - (plx - motionX), 0f + (r - l))
pl = max(l - (plx - motionX), 0f)
}
if (pb < imageHeight && motionY > pty) {
pb = min(b + (motionY - pty), imageHeight.toFloat())
pt = min(t + (motionY - pty), imageHeight.toFloat() - (b - t))
}
if (pt > 0 && motionY < pty) {
pb = max(b - (pty - motionY), 0f + (b - t))
pt = max(t - (pty - motionY), 0f)
}
rectF.set(pl + 5, pt + 5, pr - 5, pb - 5)
invalidate()
}
if (c6) {
if (motionX > 0 && motionX < (pr - 100)) pl = motionX
if (motionY > 0 && motionY < (pb - 100)) pt = motionY
}
if (c7) {
if (motionY > 0 && motionY < (pb - 100)) pt = motionY
if (motionX > (pl + 100) && motionX < screenWidth) pr = motionX
}
if (c8) {
if (motionX > (pl + 100) && motionX < screenWidth) pr = motionX
if (motionY > (pt + 100) && motionY < imageHeight) pb = motionY
}
if (c9) {
if (motionX > 0 && motionX < (pr - 100)) pl = motionX
if (motionY > (pt + 100) && motionY < imageHeight) pb = motionY
}
if (c1) if (motionX > 0 && motionX < (pr - 100)) pl = motionX
if (c2) if (motionY > 0 && motionY < (pb - 100)) pt = motionY
if (c3) if (motionX > (pl + 100) && motionX < screenWidth) pr = motionX
if (c4) if (motionY > (pt + 100) && motionY < imageHeight) pb = motionY
rectF.set(pl + 5, pt + 5, pr - 5, pb - 5)
invalidate()
}
private fun moveDown() {
if (motionX > (pl + rng) && motionX < (pr - rng) && motionY > (pt + rng) && motionY < (pb - rng)) {
c5 = true
l = pl
t = pt
r = pr
b = pb
if (motionY >= 0 && motionY <= imageHeight) pty = motionY
if (motionX >= 0 && motionX <= screenWidth) plx = motionX
invalidate()
return
}
if (motionX in pl - rng..pl + rng && motionY in pt - rng..pt + rng) {
c6 = true
invalidate()
return
}
if (motionY in pt - rng..pt + rng && motionX in pr - rng..pr + rng) {
c7 = true
invalidate()
return
}
if (motionX in pr - rng..pr + rng && motionY in pb - rng..pb + rng) {
c8 = true
invalidate()
return
}
if (motionY in pb - rng..pb + rng && motionX in pl - rng..pl + rng) {
c9 = true
invalidate()
return
}
if (motionX > (pl - rng) && motionX < (pl + rng) && motionY > pt && motionY < pb) {
c1 = true
invalidate()
return
}
if (motionY > (pt - rng) && motionY < (pt + rng) && motionX > pl && motionX < pr) {
c2 = true
invalidate()
return
}
if (motionX > (pr - rng) && motionX < (pr + rng) && motionY > pt && motionY < pb) {
c3 = true
invalidate()
return
}
if (motionY > (pb - rng) && motionY < (pb + rng) && motionX > pl && motionX < pr) {
c4 = true
invalidate()
return
}
invalidate()
}
private fun moveUp() {
c1 = false
c2 = false
c3 = false
c4 = false
c5 = false
c6 = false
c7 = false
c8 = false
c9 = false
invalidate()
}
private val src: Bitmap = BitmapFactory.decodeResource(resources, R.drawable.mountain)
private var screenWidth = 0
private var imageWidth = 0
private var imageHeight = 0
private val aspectRatio: Float = src.width / src.height.toFloat()
private lateinit var output: Bitmap
fun test(): Bitmap? {
val cropWidth: Float = (pr - pl)
val cropHeight: Float = (pb - pt)
invalidate()
return Bitmap.createBitmap(
output,
pl.toInt(),
pt.toInt(),
cropWidth.toInt(),
cropHeight.toInt()
)
}
private var motionX = 0f
private var motionY = 0f
private var rng = 40f
private var pl = 100f
private var plx = 100f
private var pt = 100f
private var pty = 100f
private var pr = 300f
private var pb = 400f
private var l = 0f
private var t = 0f
private var r = 0f
private var b = 0f
private var c1 = false
private var c2 = false
private var c3 = false
private var c4 = false
private var c5 = false
private var c6 = false
private var c7 = false
private var c8 = false
private var c9 = false
private var rectF = RectF(pl + 5, pt + 5, pr - 5, pb - 5)
private val rectPaint = Paint().apply {
style = Paint.Style.STROKE
strokeWidth = 10f
color = Color.YELLOW
}
private val foregroundArcColor =
context.resources?.getColor(R.color.custom3, null) ?: Color.GRAY
private var rectF2 = RectF(0f, 0f, screenWidth.toFloat(), imageHeight.toFloat())
private val rectPaint2 = Paint().apply {
style = Paint.Style.FILL
color = foregroundArcColor
}
}