我找不到任何有关在MAUI应用中实现本地化的指导方向。我已经阅读了一些关于本地化Xamarin应用的信息,但即使进行了广泛的网页搜索,我也无法将其翻译成MAUI相关内容。
是否有人可以指出我可能错过的参考资料?
是否有人可以指出我可能错过的参考资料?
如何在XAML中使用
[...] xmlns:res="clr-namespace:MauiApp1.Resources"

<Button Text="{x:Static res:AppRes.Title}" />
使用代码
//get lang as "en"
string lang = Thread.CurrentThread.CurrentCulture.TwoLetterISOLanguageName;

//toggle lang
if(lang == "ru")
{
    Thread.CurrentThread.CurrentCulture = new System.Globalization.CultureInfo("ru-RU");
    Thread.CurrentThread.CurrentUICulture = new System.Globalization.CultureInfo("ru-RU");
}
else
{
    Thread.CurrentThread.CurrentCulture = new System.Globalization.CultureInfo("en-US");
    Thread.CurrentThread.CurrentUICulture = new System.Globalization.CultureInfo("en-US");
}

//get translated title
//using MauiApp1.Resources;
string title = AppRes.Title
更新时只需重置应用程序
(App.Current as App).MainPage = new AppShell();
就是这样
更新1: 可以从任何地方重新开始
void Reset()
{
    (App.Current as App).MainPage.Dispatcher.Dispatch(() =>
    {
        // there some LoadLang method;
        (App.Current as App).MainPage = new AppShell();//REQUIRE RUN MAIN THREAD
    });


}
使用 Microsoft Extensions Localization 包
创建用于本地化扩展的类。 这里的 AppStrings 是您指定的 ResourceFileName
[ContentProperty(nameof(Key))]
public class LocalizeExtension : IMarkupExtension
{
    IStringLocalizer<AppStrings> _localizer;

    public string Key { get; set; } = string.Empty;

    public LocalizeExtension()
    {
        _localizer = ServiceHelper.GetService<IStringLocalizer<AppStrings>>();
    }

    public object ProvideValue(IServiceProvider serviceProvider)
    {
        string localizedText = _localizer[Key];
        return localizedText;
    }

    object IMarkupExtension.ProvideValue(IServiceProvider serviceProvider) => ProvideValue(serviceProvider);
}
<Button Text="{local:Localize Key}"/>
查看此示例应用程序以获取更多详细信息 LocalizationDemo
本答案与Valliappan的类似,但更为全面,您无需检查github repo即可连接剩余的点。此外,MAUI是一个高度发展的框架,因此希望这个答案在一段时间内仍然相关。
步骤1:向项目添加 Microsoft Extensions Localization Nuget 包。
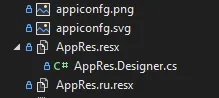
步骤2:将一个或多个资源文件(.resx)添加到您的项目中。可以任意命名这些文件,例如LocalizableStrings.fr-CA.resx。通常,这会添加到Resources/Strings文件夹中,但出于某些原因,我的Visual Studio Mac版会对此位置进行投诉。如果发生这种情况,请查找其他位置 - 这无关紧要。
步骤3:将密钥和翻译添加到您的.resx文件中。
步骤4:如果还没有,请添加Microsoft Extensions Dependency Injection nuget。
步骤5:(可选)创建依赖注入助手类以能够按需获取服务。或者,如果您已有检索可注入服务的方法,则可以重用该方法。
namespace yourproject
{
    public static class ServiceHelper
    {
        public static TService GetService<TService>() => Current.GetService<TService>();

        public static IServiceProvider Current =>
#if WINDOWS
            MauiWinUIApplication.Current.Services;
#elif ANDROID
            MauiApplication.Current.Services;
#elif IOS || MACCATALYST
            MauiUIApplicationDelegate.Current.Services;
#else
            null;
#endif
    }
}
第6步:创建一个MarkupExtension。详细信息可以在微软官网上找到;然而,这里是要点。
namespace yourproject.modules.localization //this namespace is important
{
    [ContentProperty(nameof(Key))]
    //give any name you want to this class; however,
    //you will use this name in XML like so: Text="{local:Localize hello_world}"
    public class LocalizeExtension: IMarkupExtension
    {
        //Generic LocalizableStrings name has to match your .resx filename
        private IStringLocalizer<LocalizableStrings> _localizer { get; }

        public string Key { get; set; } = string.Empty;

        public LocalizeExtension()
        {
            //you have to inject this like so because LocalizeExtension constructor
            //has to be parameterless in order to be used in XML
            _localizer = ServiceHelper.GetService<IStringLocalizer<AppStrings>>();
        }

        public object ProvideValue(IServiceProvider serviceProvider)
        {
            string localizedText = _localizer[Key];
            return localizedText;
        }

        object IMarkupExtension.ProvideValue(IServiceProvider serviceProvider) => ProvideValue(serviceProvider);
    }
}
public static class MauiProgram
{
    public static MauiApp CreateMauiApp()
    {
        var builder = MauiApp.CreateBuilder();
        builder
            .UseMauiApp<EclypseApp>()
            ...
            .RegisterServices(); //register injectable services here

        return builder.Build();
    }


    private static MauiAppBuilder RegisterServices(this MauiAppBuilder mauiAppBuilder)
    {
        //this service is needed to inject IStringLocalizer into LocalizeExtension
        mauiAppBuilder.Services.AddLocalization();

        //IStringLocalizer appears to be dependent on a logging service
        mauiAppBuilder.Services.AddLogging();

        ... //register other services here
    }
}
<?xml version="1.0" encoding="utf-8" ?>
<ContentPage xmlns="http://schemas.microsoft.com/dotnet/2021/maui"
             xmlns:x="http://schemas.microsoft.com/winfx/2009/xaml"
             x:Class="..."
             xmlns:local="clr-namespace:yourproject.modules.localization" //use the same namespace as in Step 5
             >
    <VerticalStackLayout>
        <Label
            Text="{local:Localize Key=a_key_in_your_resx_file}"
            VerticalOptions="Center"
            HorizontalOptions="Center" />
    </VerticalStackLayout>
</ContentPage>
加油!
这个方法如第一个答案所述是有效的,但是如果你在Mac上工作,你不能只创建一个资源文件,因为它会创建一个旧的Xamarin资源文件,你无法在Maui中使用。
按照顶部答案中的步骤,但将以下内容粘贴到您创建的资源文件(来自Mac),并覆盖所有内容:
<root>
  <xsd:schema id="root" xmlns="" xmlns:xsd="http://www.w3.org/2001/XMLSchema" xmlns:msdata="urn:schemas-microsoft-com:xml-msdata">
    <xsd:import namespace="http://www.w3.org/XML/1998/namespace" />
    <xsd:element name="root" msdata:IsDataSet="true">
      <xsd:complexType>
        <xsd:choice maxOccurs="unbounded">
          <xsd:element name="metadata">
            <xsd:complexType>
              <xsd:sequence>
                <xsd:element name="value" type="xsd:string" minOccurs="0" />
              </xsd:sequence>
              <xsd:attribute name="name" use="required" type="xsd:string" />
              <xsd:attribute name="type" type="xsd:string" />
              <xsd:attribute name="mimetype" type="xsd:string" />
              <xsd:attribute ref="xml:space" />
            </xsd:complexType>
          </xsd:element>
          <xsd:element name="assembly">
            <xsd:complexType>
              <xsd:attribute name="alias" type="xsd:string" />
              <xsd:attribute name="name" type="xsd:string" />
            </xsd:complexType>
          </xsd:element>
          <xsd:element name="data">
            <xsd:complexType>
              <xsd:sequence>
                <xsd:element name="value" type="xsd:string" minOccurs="0" msdata:Ordinal="1" />
                <xsd:element name="comment" type="xsd:string" minOccurs="0" msdata:Ordinal="2" />
              </xsd:sequence>
              <xsd:attribute name="name" type="xsd:string" use="required" msdata:Ordinal="1" />
              <xsd:attribute name="type" type="xsd:string" msdata:Ordinal="3" />
              <xsd:attribute name="mimetype" type="xsd:string" msdata:Ordinal="4" />
              <xsd:attribute ref="xml:space" />
            </xsd:complexType>
          </xsd:element>
          <xsd:element name="resheader">
            <xsd:complexType>
              <xsd:sequence>
                <xsd:element name="value" type="xsd:string" minOccurs="0" msdata:Ordinal="1" />
              </xsd:sequence>
              <xsd:attribute name="name" type="xsd:string" use="required" />
            </xsd:complexType>
          </xsd:element>
        </xsd:choice>
      </xsd:complexType>
    </xsd:element>
  </xsd:schema>
  <resheader name="resmimetype">
    <value>text/microsoft-resx</value>
  </resheader>
  <resheader name="version">
    <value>2.0</value>
  </resheader>
  <resheader name="reader">
    <value>System.Resources.ResXResourceReader, System.Windows.Forms, Version=4.0.0.0, Culture=neutral, PublicKeyToken=b77a5c561934e089</value>
  </resheader>
  <resheader name="writer">
    <value>System.Resources.ResXResourceWriter, System.Windows.Forms, Version=4.0.0.0, Culture=neutral, PublicKeyToken=b77a5c561934e089</value>
  </resheader>


  <data name="Login" xml:space="preserve">
    <value>Login</value>
  </data>


</root>
这个文件包含一个字符串(在底部)写着“login”。你只需要向这个文件添加数据,它就可以工作。
*.Designer.cs 文件的生成操作设置为 Compile。在Visual Studio for Mac 17.5.2版本中,默认情况下它似乎将生成操作设置为 BundleResource。 - Wolfgang Schreurs*.resx 文件的构建操作应该是 EmbeddedResource(在 Visual Studio for Mac 版本 17.5.2 中默认情况下似乎也是 BundleResource)。 - Wolfgang SchreursResources/Strings/AppStrings.resx
LBL_HELLO "Hello, World!"
LBL_WELCOME "Welcome to .NET Multi-platform App UI"
Resources/Strings/AppStrings.fr.resx
LBL_HELLO "Salut, le monde !"
LBL_WELCOME "Bienvenue dans .NET Multi-platform App UI"
Resources/Strings/AppStrings.de.resx
LBL_HELLO "Hallo, Programmierwelt!"
LBL_WELCOME "Willkommen bei .NET Multi-platform App UI"
xmlns:resx声明resx命名空间,然后使用{x:Static}引用资源。<ContentPage xmlns:resx="clr-namespace:maui_localize_resx.Resources.Strings">
<Label Text="{x:Static resx:AppStrings.LBL_HELLO}"/>
<Label Text="{x:Static resx:AppStrings.LBL_WELCOME}"/>
</ContentPage>
{x:Static}标记扩展,它将永远不会改变,并且不会对语言更改做出反应。这是不幸的,因为底层字符串资源实际上会根据本地化更改而更改其字符串值。在看到本地化更改之前,人们必须重新打开页面,甚至重新打开应用程序。public FlowDirection FlowDirection => CultureInfo.CurrentUICulture.TextInfo.IsRightToLeft ? FlowDirection.RightToLeft : FlowDirection.LeftToRight;
public string LBL_HELLO => Resources.Strings.AppStrings.LBL_HELLO;
public string LBL_WELCOME => Resources.Strings.AppStrings.LBL_WELCOME;
<ContentPage FlowDirection="{Binding FlowDirection}">
    <Label Text="{Binding LBL_HELLO}"/>
    <Label Text="{Binding LBL_WELCOME}"/>
</ContentPage>
CultureInfo.CurrentUICulture,然后发出适当的 OnPropertyChanged。CultureInfo newCulture = new CultureInfo("fr-FR");
CultureInfo.CurrentUICulture = newCulture;
CultureInfo.CurrentCulture = newCulture; // Optional
OnPropertyChanged(nameof(FlowDirection));
OnPropertyChanged(nameof(LBL_HELLO));
OnPropertyChanged(nameof(LBL_WELCOME));
OnPropertyChanged()信号。Microsoft.Extensions.Localization NuGet包,它提供了一个方便的IStringLocalizer来访问您的资源字符串。如果通过ViewModel公开它,您可以使用它来本地化任何字符串:public FlowDirection FlowDirection => CultureInfo.CurrentUICulture.TextInfo.IsRightToLeft ? FlowDirection.RightToLeft : FlowDirection.LeftToRight;
private IStringLocalizer _localizer = ServiceHelper.GetService<IStringLocalizer<AppStrings>>();
public IStringLocalizer Localizer => _localizer;
<ContentPage FlowDirection="{Binding FlowDirection}">
    <Label Text="{Binding Localizer[LBL_HELLO]}"/>
    <Label Text="{Binding Localizer[LBL_WELCOME]}"/>
</ContentPage>
CurrentUICulture,但现在我们只需要触发OnPropertyChanged(nameof(Localizer))信号:CultureInfo newCulture = new CultureInfo("fr-FR");
CultureInfo.CurrentUICulture = newCulture;
CultureInfo.CurrentCulture = newCulture; // Optional
OnPropertyChanged(nameof(FlowDirection));
OnPropertyChanged(nameof(Localizer));
LocalizationManager.Current的单例ViewModel中,您可以在您的代码中调用它,例如。public partial class LocalizationManager : ObservableObject
{
private static LocalizationManager _current;
public static LocalizationManager Current => _current ??= new LocalizationManager();
public FlowDirection FlowDirection => Culture.TextInfo.IsRightToLeft ? FlowDirection.RightToLeft : FlowDirection.LeftToRight;
private IStringLocalizer _localizer = ServiceHelper.GetService<IStringLocalizer<AppStrings>>();
public IStringLocalizer Localizer => _localizer;
public CultureInfo Culture
{
get => CultureInfo.CurrentUICulture;
set
{
if (value.Name == CultureInfo.CurrentUICulture.Name) return;
CultureInfo.CurrentCulture = CultureInfo.CurrentUICulture = value;
OnPropertyChanged(nameof(FlowDirection));
OnPropertyChanged(nameof(Localizer));
}
}
}
LocalizationManager.Current单例,并使用LocalizationManager.Current.Culture setter将资源字符串更改广播到所有页面:<ContentPage FlowDirection="{Binding FlowDirection,Source={x:Static local:LocalizationManager.Current}}">
<Label Text="{Binding Localizer[LBL_HELLO],Source={x:Static local:LocalizationManager.Current}}"/>
<Label Text="{Binding Localizer[LBL_WELCOME],Source={x:Static local:LocalizationManager.Current}}"/>
</ContentPage>
<ContentPage FlowDirection="{local:Localize FlowDirection}">
    <Label Text="{local:Localize LBL_HELLO}"/>
    <Label Text="{local:Localize LBL_WELCOME}"/>
</ContentPage>
Localize标记扩展基本上实现了对LocalizationManager.Current单例及其成员Localize[Path]的直接Binding。[ContentProperty(nameof(Path))]
public class LocalizeExtension : IMarkupExtension<BindingBase>
{
public string Path { get; set; } = ".";
public BindingMode Mode { get; set; } = BindingMode.OneWay;
public IValueConverter Converter { get; set; } = null;
public string ConverterParameter { get; set; } = null;
public string StringFormat { get; set; } = null;
public object ProvideValue(IServiceProvider serviceProvider)
=> (this as IMarkupExtension<BindingBase>).ProvideValue(serviceProvider);
BindingBase IMarkupExtension<BindingBase>.ProvideValue(IServiceProvider serviceProvider)
=> new Binding(
Path == "FlowDirection" ? Path : $"Localizer[{Path}]",
Mode, Converter, ConverterParameter, StringFormat, LocalizationManager.Current);
}
LocalizationManager.Current 实现的一个很酷的特性是将 Culture 实现为一个属性。这意味着我们可以在 XAML 中创建一个 TwoWay 绑定,并通过它来改变语言。例如,假设您的 ViewModel 中有以下内容:private List<CultureInfo> _languages = new List<CultureInfo>()
{
new CultureInfo("en-US"),
new CultureInfo("fr-FR"),
new CultureInfo("de-DE")
}
public List<CultureInfo> Languages => _languages;
flag_us.svg、flag_fr.svg 和 flag_de.svg 作为标志。可以使用 CollectionView 来组合 Languages 和 LocalizationManager.Current.Culture 来构建一个语言切换器。<CollectionView ItemsSource="{Binding Languages}"
SelectedItem="{local:Localize Culture,Mode=TwoWay}"
SelectionMode="Single">
<CollectionView.ItemTemplate>
<DataTemplate>
<Image Source="{Binding TwoLetterISOLanguageName,StringFormat='flag_{0}.png'}"
WidthRequest="32"
HeightRequest="32"/>
</DataTemplate>
</CollectionView.ItemTemplate>
</CollectionView>
resx文件完成的内容吗?Xamarin中的字符串和图像本地化。那么问题就变成了MAUI如何引用resx中根据语言/文化动态更改的资源。这些resx文件可能由.NET 6管理,如Localization in .NET(https://learn.microsoft.com/en-us/dotnet/core/extensions/localization)所述。但我不确定MAUI如何指向当前文件。 - ToolmakerSteve