使用XIB文件创建自定义viewForHeaderInSection的Swift方法?

51

我可以通过编程方式创建简单的自定义viewForHeaderInSection,就像下面这样。但是我希望能做更复杂的事情,比如与不同的类连接并访问它们的属性,就像tableView cell一样。简单地说,我想看看我所做的。

func tableView(tableView: UITableView, viewForHeaderInSection section: Int) -> UIView? {

    if(section == 0) {

        let view = UIView() // The width will be the same as the cell, and the height should be set in tableView:heightForRowAtIndexPath:
        let label = UILabel()
        let button   = UIButton(type: UIButtonType.System)

        label.text="My Details"
        button.setTitle("Test Title", forState: .Normal)
        // button.addTarget(self, action: Selector("visibleRow:"), forControlEvents:.TouchUpInside)

        view.addSubview(label)
        view.addSubview(button)

        label.translatesAutoresizingMaskIntoConstraints = false
        button.translatesAutoresizingMaskIntoConstraints = false

        let views = ["label": label, "button": button, "view": view]

        let horizontallayoutContraints = NSLayoutConstraint.constraintsWithVisualFormat("H:|-10-[label]-60-[button]-10-|", options: .AlignAllCenterY, metrics: nil, views: views)
        view.addConstraints(horizontallayoutContraints)

        let verticalLayoutContraint = NSLayoutConstraint(item: label, attribute: .CenterY, relatedBy: .Equal, toItem: view, attribute: .CenterY, multiplier: 1, constant: 0)
        view.addConstraint(verticalLayoutContraint)

        return view
    }

    return nil
}


func tableView(tableView: UITableView, heightForHeaderInSection section: Int) -> CGFloat {
    return 50
}

请问有人能够解释如何使用xib创建自定义的tableView头部视图吗?我在旧的Obj-C主题中遇到过,但我对Swift语言还很陌生。如果有人能够详细解释一下,那就太好了。

1.问题: Button @IBAction无法连接到我的ViewController。(已修复)

通过File's Owner、ViewController基类 (点击左侧大纲菜单)解决了问题。

2.问题: 头部高度问题(已修正)

viewForHeaderInSection:方法中添加headerView.clipsToBounds = true即可解决问题。

对于约束警告这个答案解决了我的问题

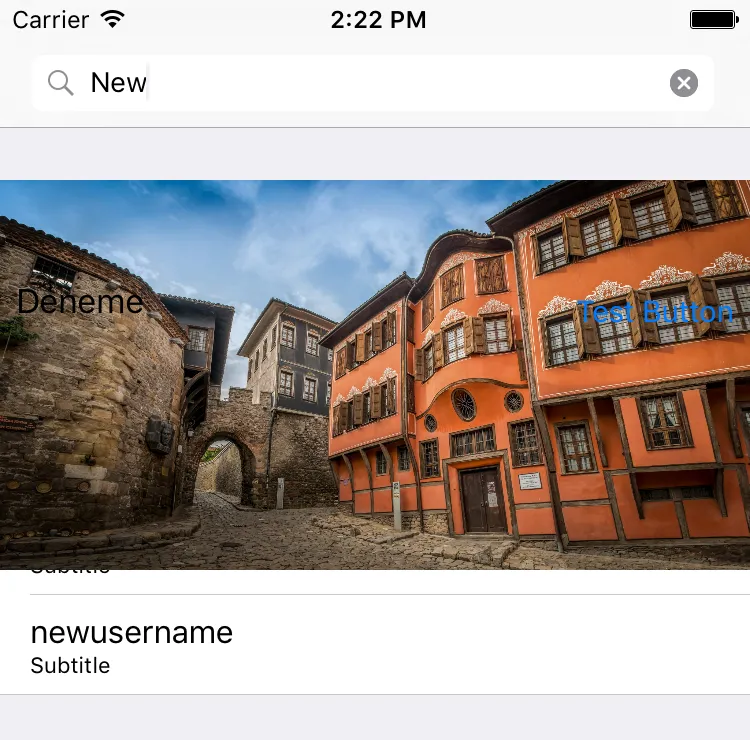
当我在viewController中使用这种方法添加ImageView时,即使与同样高的约束条件相同,它也会覆盖tableView行,看起来像图片

 func tableView(tableView: UITableView, heightForHeaderInSection section: Int) -> CGFloat {
    return 120
}

如果我在viewDidLoad中使用automaticallyAdjustsScrollViewInsets,在这种情况下,图片会流动到导航栏下面。-已修复-

self.automaticallyAdjustsScrollViewInsets = false

问题3: 如果按钮在“查看”下面(已修复)

@IBAction func didTapButton(sender: AnyObject) {
    print("tapped")

    if let upView = sender.superview {
        if let headerView = upView?.superview as? CustomHeader {
            print("in section \(headerView.sectionNumber)")
        }

    }
}

试着看这里:https://dev59.com/1mox5IYBdhLWcg3wbDok - Curmudgeonlybumbly
就此而言,那个问题的被接受答案是一个笨拙的解决方案,在iOS提供头部/尾部视图的出队能力之前使用过。 - Rob
4个回答

109
典型的 NIB 头文件处理过程如下:

  1. Create UITableViewHeaderFooterView subclass with, at the least, an outlet for your label. You might want to also give it some identifier by which you can reverse engineer to which section this header corresponds. Likewise, you may want to specify a protocol by which the header can inform the view controller of events (like the tapping of the button). Thus, in Swift 3 and later:

    // if you want your header to be able to inform view controller of key events, create protocol
    
    protocol CustomHeaderDelegate: class {
        func customHeader(_ customHeader: CustomHeader, didTapButtonInSection section: Int)
    }
    
    // define CustomHeader class with necessary `delegate`, `@IBOutlet` and `@IBAction`:
    
    class CustomHeader: UITableViewHeaderFooterView {
        static let reuseIdentifier = "CustomHeader"
    
        weak var delegate: CustomHeaderDelegate?
    
        @IBOutlet weak var customLabel: UILabel!
    
        var sectionNumber: Int!  // you don't have to do this, but it can be useful to have reference back to the section number so that when you tap on a button, you know which section you came from; obviously this is problematic if you insert/delete sections after the table is loaded; always reload in that case
    
        @IBAction func didTapButton(_ sender: AnyObject) {
            delegate?.customHeader(self, didTapButtonInSection: section)
        }
    
    }
    
  2. Create NIB. Personally, I give the NIB the same name as the base class to simplify management of my files in my project and avoid confusion. Anyway, the key steps include:

    • Create view NIB, or if you started with an empty NIB, add view to the NIB;

    • Set the base class of the view to be whatever your UITableViewHeaderFooterView subclass was (in my example, CustomHeader);

    • Add your controls and constraints in IB;

    • Hook up @IBOutlet references to outlets in your Swift code;

    • Hook up the button to the @IBAction; and

    • For the root view in the NIB, make sure to set the background color to "default" or else you'll get annoying warnings about changing background colors.

  3. In the viewDidLoad in the view controller, register the NIB. In Swift 3 and later:

    override func viewDidLoad() {
        super.viewDidLoad()
    
        tableView.register(UINib(nibName: "CustomHeader", bundle: nil), forHeaderFooterViewReuseIdentifier: CustomHeader.reuseIdentifier)
    }
    
  4. In viewForHeaderInSection, dequeue a reusable view using the same identifier you specified in the prior step. Having done that, you can now use your outlet, you don't have to do anything with programmatically created constraints, etc. The only think you need to do (for the protocol for the button to work) is to specify its delegate. For example, in Swift 3:

    override func tableView(_ tableView: UITableView, viewForHeaderInSection section: Int) -> UIView? {
        let headerView = tableView.dequeueReusableHeaderFooterView(withIdentifier: "CustomHeader") as! CustomHeader
    
        headerView.customLabel.text = content[section].name  // set this however is appropriate for your app's model
        headerView.sectionNumber = section
        headerView.delegate = self
    
        return headerView
    }
    
    override func tableView(_ tableView: UITableView, heightForHeaderInSection section: Int) -> CGFloat {
        return 44  // or whatever
    }
    
  5. Obviously, if you're going to specify the view controller as the delegate for the button in the header view, you have to conform to that protocol:

    extension ViewController: CustomHeaderDelegate {
        func customHeader(_ customHeader: CustomHeader, didTapButtonInSection section: Int) {
            print("did tap button", section)
        }
    }
    
这听起来有些混乱,但只要你做过一两次就会觉得非常简单。我认为它比以编程方式构建标题视图更简单。
matt's answer中,他抗议道:
问题很简单,你不能仅通过在“Identity inspector”中声明一个UITableViewHeaderFooterView来将nib中的UIView变成一个UITableViewHeaderFooterView
这是不正确的。如果您使用上述基于NIB的方法,则用于此标题视图的根视图实例化的类是UITableViewHeaderFooterView子类,而不是UIView。它实例化您为NIB的根视图指定的基类的任何类。
尽管如此,确切的是,这个类的一些属性(特别是contentView)在这种基于NIB的方法中并没有得到使用。它实际上应该是一个可选属性,就像textLabeldetailTextLabel一样(或者更好的是,在IB中为UITableViewHeaderFooterView添加适当的支持)。我同意这是苹果设计上的瑕疵,但对于表视图中的所有问题而言,它似乎只是一个松散、独特的细节,是一个次要问题。例如,令人惊讶的是,多年过去了,我们仍然无法在storyboard中完全使用原型头/尾视图,必须完全依赖这些NIB和类注册技术。

但是,错误的结论是不能使用register(_:forHeaderFooterViewReuseIdentifier:),这是一个自iOS 6以来一直在积极使用的API方法。让我们不要把孩子和洗澡水一起倒掉。


查看此答案的Swift 2版本,请参见以前的版本


2
你是否将NIB的文件所有者设置为你的视图控制器类?如果是这样,当你选择按钮时,在助理编辑器下“自动”设置中应该有两个可用的类之一是视图控制器。 - Rob
1
我建议您检查视图层次结构(例如使用视图调试器),只需查看按钮的superview是什么。例如,您是否将按钮放置在“CustomHeader”的容器视图中? - Rob
2
我认为值得一提的是:在“viewDidLoad”中添加“self.tableView.sectionHeaderHeight = UITableViewAutomaticDimension”和“self.tableView.estimatedSectionHeaderHeight = 70”。如果您的约束将每个子视图固定在所有边缘上,则可以获得自适应大小的标题。 - Torsten B
1
非常感谢您的详细回答!;) - Thomás Pereira
2
重新阐述@Rob在上面的评论中所说的,确保当您将IBOutlet钩子连接到xib时,选择自定义类的名称,而不是“文件所有者”。 - Jacob F. Davis C-CISO
显示剩余16条评论

40

虽然Rob的答案听起来很有说服力并且经受了时间的考验,但是它是错误的,并且一直都是错的。独自站在众多接受和点赞的“智慧”背景下显得孤立无援,但我将试着鼓起勇气说出真相。

问题很简单,你不能仅仅通过在Identity inspector中声明一个UIView来将其神奇地变成UITableViewHeaderFooterView。UITableViewHeaderFooterView具有关键的功能,对于其正确操作至关重要,而纯粹的UIView无论你如何进行“强制类型转换”,都缺少这些功能。

  • UITableViewHeaderFooterView具有contentView,所有自定义子视图必须添加到其中,而不是UITableViewHeaderFooterView中。

    但是在nib中神奇地强制类型转换为UITableViewHeaderFooterView的UIView缺乏这个contentView。因此,当Rob说“在IB中添加控件和约束”时,他让您将子视图直接添加到UITableViewHeaderFooterView中,而不是添加到其contentView中。因此,头部最终配置不正确。

  • 该问题的另一个迹象是您不能为UITableViewHeaderFooterView设置背景颜色。如果这样做,您将在控制台中得到以下消息:

    Setting the background color on UITableViewHeaderFooterView has been deprecated. Please set a custom UIView with your desired background color to the backgroundView property instead.

    但是,在nib中,您无法避免为UITableViewHeaderFooterView设置背景颜色,并且您确实会在控制台中获取该消息。

那么问题的正确答案是什么?根本就没有可能的答案。苹果公司犯了一个巨大的错误。他们提供了一种方法,允许您将一个nib注册为您的UITableViewHeaderFooterView的来源,但是对象库中没有UITableViewHeaderFooterView。因此,此方法是无用的。在nib中无法正确设计UITableViewHeaderFooterView。

Xcode中存在一个巨大的漏洞。我在2013年提交了关于此事的缺陷报告,它仍然未被解决,仍然处于开放状态。每年我都重新提交缺陷报告,苹果公司不断拖延回复,说“尚未确定如何或何时解决此问题”。因此,他们承认了这个漏洞,但他们什么也没有做。

不过,您可以在nib中设计一个普通的UIView,然后在代码中(在实现viewForHeaderInSection时)手动从nib中加载视图并将其插入到您的头部视图的contentView中。

例如,假设我们想在nib中设计标题,而我们在标题中有一个标签需要连接一个outlet lab。那么我们需要一个自定义的头部类和一个自定义的视图类:

class MyHeaderView : UITableViewHeaderFooterView {
    weak var content : MyHeaderViewContent!
}
class MyHeaderViewContent : UIView {
    @IBOutlet weak var lab : UILabel!
}

我们注册header view的,而不是nib:

self.tableView.register(MyHeaderView.self,
    forHeaderFooterViewReuseIdentifier: self.headerID)

在视图的xib文件中,我们声明我们的视图是一个MyHeaderViewContent,而不是MyHeaderView。

viewForHeaderInSection方法中,我们从nib中提取出视图,将其放入标题的contentView中,并配置对其的引用:

override func tableView(_ tableView: UITableView, 
    viewForHeaderInSection section: Int) -> UIView? {
    let h = tableView.dequeueReusableHeaderFooterView(
        withIdentifier: self.headerID) as! MyHeaderView
    if h.content == nil {
        let v = UINib(nibName: "MyHeaderView", bundle: nil).instantiate
            (withOwner: nil, options: nil)[0] as! MyHeaderViewContent
        h.contentView.addSubview(v)
        v.translatesAutoresizingMaskIntoConstraints = false
        v.topAnchor.constraint(equalTo: h.contentView.topAnchor).isActive = true
        v.bottomAnchor.constraint(equalTo: h.contentView.bottomAnchor).isActive = true
        v.leadingAnchor.constraint(equalTo: h.contentView.leadingAnchor).isActive = true
        v.trailingAnchor.constraint(equalTo: h.contentView.trailingAnchor).isActive = true
        h.content = v
        // other initializations for all headers go here
    }
    h.content.lab.text = // whatever
    // other initializations for this header go here
    return h
}

这很糟糕且令人烦恼,但这是你能做到的最好的。


1
@Piotr “然后如果你想要访问你的MyHeaderViewContent,你可以使用contentView as! MyHeaderViewContent。” 然后崩溃?为什么这样做会有好处? - matt
1
此外,“在大多数情况下,您可以直接使用此类而无需进行子类化。”并不意味着不建议进行子类化。我成功地进行了子类化。 - matt
1
不必使用UIView,您可以在表格中创建一个原型单元格,使用dequeueReusableCell获取UITableViewCell,并将该单元格的contentView复制到新的UITableViewHeaderFooterView的backgroundView中。如果您计划对视图进行更改,请注意可能实际重用该视图对象,但如果您的标题纯粹是可视化的,则此操作无需任何问题。别忘了实现heightForHeaderInSection。 - bitmusher
1
@AwaisFayyaz,你有一个新问题。你犯了一个错误。你得到了一个“不符合键值编码”的错误,而你并不理解它。我不会在这些评论中向你解释它。这与我的答案完全无关。 - matt
1
@matt,感谢您详细的解释。我有一个问题,为什么不直接将nib添加到UITableViewHeaderFooterView的contentView属性中?为什么我们需要添加另一个属性(弱变量content)?谢谢。 - OhadM
显示剩余6条评论

8
创建一个UITableViewHeaderFooterView和对应的xib文件。
class BeerListSectionHeader: UITableViewHeaderFooterView {
    @IBOutlet weak var sectionLabel: UILabel!
    @IBOutlet weak var abvLabel: UILabel!
}

类似于注册表视图单元格一样注册nib。nib名称和重用标识符应与文件名匹配。(xib没有重用标识符。)

func registerHeader {
    let nib = UINib(nibName: "BeerListSectionHeader", bundle: nil)
    tableView.register(nib, forHeaderFooterViewReuseIdentifier: "BeerListSectionHeader")
}

将其出队并与单元格类似使用。标识符是文件名。

override func tableView(_ tableView: UITableView, viewForHeaderInSection section: Int) -> UIView? {

    let header = tableView.dequeueReusableHeaderFooterView(withIdentifier: "BeerListSectionHeader") as! BeerListSectionHeader

    let sectionTitle = allStyles[section].name
    header.sectionLabel.text = sectionTitle
    header.dismissButton?.addTarget(self, action: #selector(dismissView), for: .touchUpInside)
    return header
}

不要忘记头部的高度。

 override func tableView(_ tableView: UITableView, heightForHeaderInSection section: Int) -> CGFloat {
     return BeerListSectionHeader.height
 }

3

我声望不够,无法为Matt的答案添加评论。

无论如何,在此遗漏的唯一事项是在添加新视图之前从UITableViewHeaderFooterView.contentView中删除所有子视图。这将重置重用的单元格到初始状态并避免内存泄漏。


网页内容由stack overflow 提供, 点击上面的
可以查看英文原文,
原文链接