我目前正在查看一个具有属性 addMessageLabel.layer.cornerRadius = 5.0f; 的UILabel。 在安装了iOS 7.0的设备上,它的角是圆形的。 在安装了iOS 7.1的设备上,它的角不是圆形的。
这只是iOS 7.1的一个错误吗?
我目前正在查看一个具有属性 addMessageLabel.layer.cornerRadius = 5.0f; 的UILabel。 在安装了iOS 7.0的设备上,它的角是圆形的。 在安装了iOS 7.1的设备上,它的角不是圆形的。
这只是iOS 7.1的一个错误吗?
将属性clipsToBounds设置为true
addMessageLabel.clipsToBounds = true
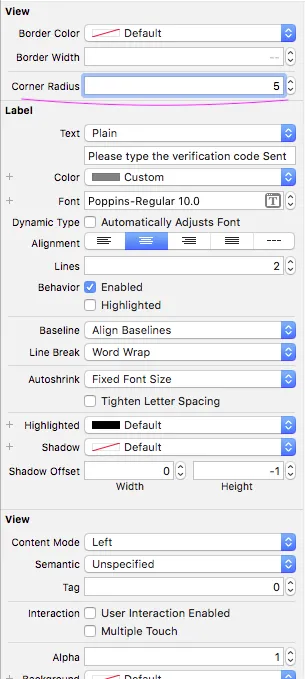
我认为设置圆角的最佳方式是:
并确保勾选“剪裁子视图”:
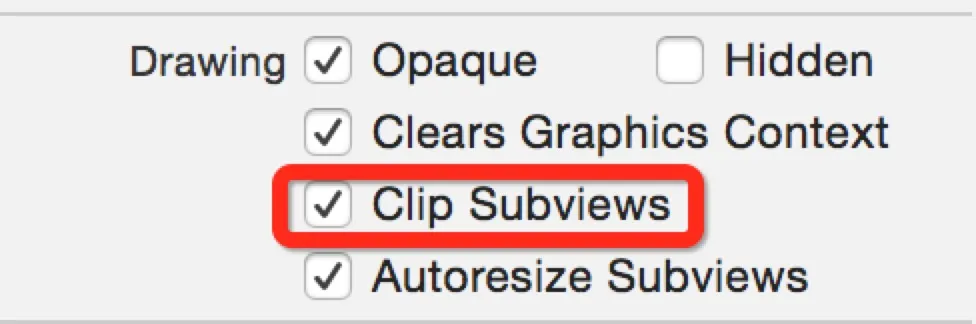
勾选“剪裁子视图”等同于代码addMessageLabel.clipsToBounds = YES;。
请尝试以下方法,
[[addMessageLabel layer] setCornerRadius:5.0f];
[[addMessageLabel layer] setMasksToBounds:YES];

//or
[addMessageLabel setClipsToBounds:YES];
Swift
addMessageLable.layer.cornerRadius = 5.0
addMessageLable.layer.masksToBounds = true

//or
addMessageLable.layer.clipsToBounds = true
我的问题有些不同。
虽然我确实使用了btn.clipsToBounds = true
但我没有设置:
btn.layer.cornerRadius = 20
因为我有不同的屏幕尺寸。所以我按照这个回答的方法进行了操作:
override func layoutSubviews() {
    seeMoreButton.layer.cornerRadius = seeMoreButton.bounds.size.height / 2
}
super.layoutSubviews(),所以它没有起作用。 正确的代码是:override func layoutSubviews() {
super.layoutSubviews()
seeMoreButton.layer.cornerRadius = seeMoreButton.bounds.size.height / 2
}
yourlabelname.layer.cornerRadius = 10.0f;
[yourlabelname setClipsToBounds:YES];
还有什么其他事情阻止了您吗?
clipsToBounds的默认值为YES,因此我的原始代码中没有这行代码[yourlabelname setClipsToBounds:YES];。 - mverderese //works perfect in Swift 2.0 for a circular or round image
@IBOutlet var theImage: UIImageView!
override func viewDidLoad() {
super.viewDidLoad()
//Make sure the width and height are same
self.theImage.layer.cornerRadius = self.theImage.frame.size.width / 2
self.theImage.layer.borderWidth = 2.0
self.theImage.layer.borderColor = UIColor.whiteColor().CGColor
self.theImage.clipsToBounds = true
}
yourlabelname.layer.cornerRadius = yourlabelname.frame.size.width/2;
[yourlabelname setClipsToBounds:YES];
请确保您正在与适当的部署目标进行检查。
//// Story board Extra Feature for create border radius, border width and border Color
extension UIView {
    /// corner radius
    @IBInspectable var borderColor: UIColor? {
        set {
            layer.borderColor = newValue!.cgColor
        }
        get {
            if let color = layer.borderColor {
                return UIColor(cgColor: color)
            } else {
                return nil
            }
        }
    }
    @IBInspectable var borderWidth: CGFloat {
        set {
            layer.borderWidth = newValue
        }
        get {
            return layer.borderWidth
        }
    }
    @IBInspectable var cornerRadius: CGFloat {
        set {
            layer.cornerRadius = newValue
            clipsToBounds = newValue > 0
        }
        get {
            return layer.cornerRadius
        }
    }
}
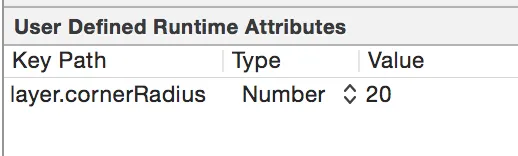
之后,您将在接口生成器中获得以下属性。