iOS 11中导航栏UIBarButtonItem的负间距

25
在 iOS 10 及以下版本中,有一种方法可以将负间隔符添加到导航栏中的按钮数组中,例如:
UIBarButtonItem *negativeSpacer = [[UIBarButtonItem alloc] initWithBarButtonSystemItem:UIBarButtonSystemItemFixedSpace target:nil action:nil];
negativeSpacer.width = -8;
self.navigationItem.leftBarButtonItems = @[negativeSpacer, [self backButtonItem]];

iOS 11上不再起作用(间隔器变为正数而不是负数)。我已经检查了栏按钮项的视图层次结构,它现在嵌入到_UIButtonBarStackView中。如何调整iOS 11上栏按钮的位置?
5个回答

12

编辑:

iOS 13可能无法再使用此方法,您可能会收到以下错误:

尝试更改私有视图的布局边距时出现客户端错误

旧答案:

我在苹果开发者论坛上找到了一个有点hacky的解决方案: https://forums.developer.apple.com/thread/80075

看起来问题出在iOS 11如何处理UIBarButtonItem .fixedSpace按钮以及iOS 11中UINavigationBar的布局。导航栏现在使用自动布局和布局边距来布置按钮。该帖子介绍的解决方案(在底部)是将所有布局边距设置为所需值。

class InsetButtonsNavigationBar: UINavigationBar {

    override func layoutSubviews() {
        super.layoutSubviews()

        for view in subviews {
            // Setting the layout margins to 0 lines the bar buttons items up at
            // the edges of the screen. You can set this to any number to change
            // the spacing.
            view.layoutMargins = .zero
        }
    }

}

要使用具有自定义按钮间距的新导航栏,您需要使用以下代码更新创建任何导航控制器的位置:

let navController = UINavigationController(navigationBarClass: InsetButtonsNavigationBar.self, 
                                                 toolbarClass: UIToolbar.self)
navController.viewControllers = [yourRootViewController]

不确定这是否与iPhone X横向的扩展空间兼容。 - GuillermoMP
我希望有另一种处理方式...我的应用程序中有太多的导航控制器,为每个设置自定义导航栏将会相当繁琐。如果没有其他选择,我将接受这个答案。 - pckill
2
感谢您的回答。目前看来,设计应该进行更改以适应iOS 11的新UI变化,没有必要进行黑客攻击并冒险影响预期功能或破坏UI。 - Umar Farooque
1
这是其他视图列表,它们的布局边距也会被不必要地更改。这可能会在以后的iOS更新或当前版本中产生不良影响。我不建议这样做。<_UIBarBackground: layoutMargins = {8, 8, 8, 8},<_UINavigationBarLargeTitleView: layoutMargins = {0, 16, 0, 16}, <_UINavigationBarContentView: layoutMargins = {0, 16, 0, 16}, <_UINavigationBarModernPromptView: layoutMargins = {8, 8, 8, 8} - Josh Bernfeld
2
在 Xcode 13 beta7,iOS 13 中会引发异常:尝试更改私有视图的布局边距的客户端错误 - king wang
显示剩余3条评论

3

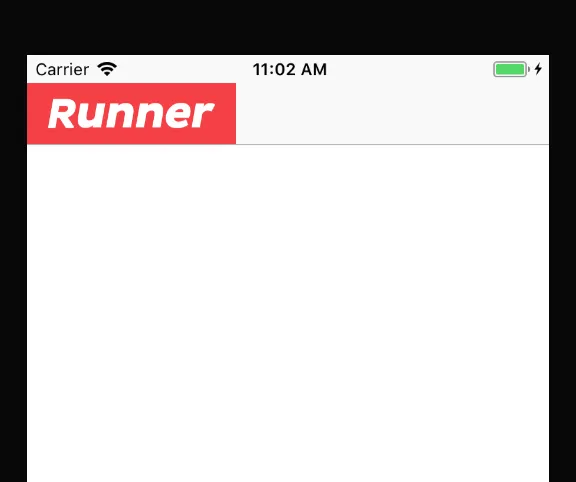
这只是我个人的一个解决方法,可能会对一些人有所帮助。我想要实现以下效果:

enter image description here 之前我也使用了negativeSpacer。现在我找到了这个解决方法:

        let logoImage = UIImage(named: "your_image")
        let logoImageView = UIImageView(image: logoImage)
        logoImageView.frame = CGRect(x: -16, y: 0, width: 150, height: 44)
        logoImageView.contentMode = .scaleAspectFit
        let logoView = UIView(frame: CGRect(x: 0, y: 0, width: 10, height: 44))
        **logoView.clipsToBounds = false**
        logoView.addSubview(logoImageView)
        let logoItem = UIBarButtonItem(customView: logoView)
        navigationItem.leftBarButtonItem = logoItem

1
这个解决方案的触摸区域是多少?如果你在视图的左侧全部轻点,它会注册一个触摸吗? - keithbhunter
很遗憾,触摸区域只是 logoView 而不是 logoImageView。 - Ke MA

1

基于keithbhunter的回答,我创建了一个自定义的UINavigationBar:

NavigationBarCustomMargins.h:

#import <UIKit/UIKit.h>

@interface NavigationBarCustomMargins : UINavigationBar

@property (nonatomic) IBInspectable CGFloat leftMargin;
@property (nonatomic) IBInspectable CGFloat rightMargin;

@end

NavigationBarCustomMargins.m:

#import "NavigationBarCustomMargins.h"

#define DefaultMargin 16
#define NegativeSpacerTag 87236223

@interface NavigationBarCustomMargins ()

@property (nonatomic) BOOL leftMarginIsSet;
@property (nonatomic) BOOL rightMarginIsSet;

@end

@implementation NavigationBarCustomMargins

@synthesize leftMargin = _leftMargin;
@synthesize rightMargin = _rightMargin;

- (void)layoutSubviews {
    [super layoutSubviews];

    if (([[[UIDevice currentDevice] systemVersion] compare:@"11.0" options:NSNumericSearch] != NSOrderedAscending)) {
        BOOL isRTL = [UIApplication sharedApplication].userInterfaceLayoutDirection == UIUserInterfaceLayoutDirectionRightToLeft;
        for (UIView *view in self.subviews) {
            view.layoutMargins = UIEdgeInsetsMake(0, isRTL ? self.rightMargin : self.leftMargin, 0, isRTL ? self.leftMargin : self.rightMargin);
        }
    } else {
        //left
        NSMutableArray *leftItems = [self.topItem.leftBarButtonItems mutableCopy];
        if (((UIBarButtonItem *)leftItems.firstObject).tag != NegativeSpacerTag) {

            UIBarButtonItem *negativeSpacer = [[UIBarButtonItem alloc] initWithBarButtonSystemItem:UIBarButtonSystemItemFixedSpace target:nil action:nil];
            negativeSpacer.tag = NegativeSpacerTag;
            negativeSpacer.width = self.leftMargin - DefaultMargin;
            [leftItems insertObject:negativeSpacer atIndex:0];

            [self.topItem setLeftBarButtonItems:[leftItems copy] animated:NO];
        }

        //right
        NSMutableArray *rightItems = [self.topItem.rightBarButtonItems mutableCopy];
        if (((UIBarButtonItem *)rightItems.firstObject).tag != NegativeSpacerTag) {

            UIBarButtonItem *negativeSpacer = [[UIBarButtonItem alloc] initWithBarButtonSystemItem:UIBarButtonSystemItemFixedSpace target:nil action:nil];
            negativeSpacer.tag = NegativeSpacerTag;
            negativeSpacer.width = self.rightMargin - DefaultMargin;
            [rightItems insertObject:negativeSpacer atIndex:0];
            [self.topItem setRightBarButtonItems:[rightItems copy] animated:NO];
        }
    }
}

- (CGFloat)leftMargin {
    if (_leftMarginIsSet) {
        return _leftMargin;
    }
    return DefaultMargin;
}

- (CGFloat)rightMargin {
    if (_rightMarginIsSet) {
        return _rightMargin;
    }
    return DefaultMargin;
}

- (void)setLeftMargin:(CGFloat)leftMargin {
    _leftMargin = leftMargin;
    _leftMarginIsSet = YES;
}

- (void)setRightMargin:(CGFloat)rightMargin {
    _rightMargin = rightMargin;
    _rightMarginIsSet = YES;
}

@end

在接口构建器中,我将自定义类设置为我的UINavigationController,并仅设置所需的边距:
截图1
运行良好。支持RTL和iOS 11之前的版本:
截图2

我认为你需要在setLeftMargin:和setRightMargin:的底部添加[self setNeedsLayout];。这样,layoutSubviews将在下一个可用的机会中使用更新后的边距参数被调用。 - Chilly

0

另一种方法是,您可以将内容包装到偏移视图中

class CustomBarItemView : UIView {
    
    var offsetContentView : UIView = UIView.init(frame: .zero)
    
    override init(frame: CGRect) {
        super.init(frame: frame)
        addSubview(offsetContentView)
        offsetContentView.snp.makeConstraints { make in
            make.edges.equalToSuperview().inset(UIEdgeInsets(top: 0, left: -8, bottom: 0, right: 0))
        }
        // implement add your content on offsetContentView
        // todo ...
    }
    
    required init?(coder: NSCoder) {
        fatalError("init(coder:) has not been implemented")
    }
}


因为CustomBarItemView图层没有使用maskToBounds = true,所以看起来还可以。
let naviItem = UIBarButtonItem.init(customView: CustomBarItemView())

-1

这有一个问题,即按钮的触摸区域在图像的右侧。 - Hogdotmac

网页内容由stack overflow 提供, 点击上面的
可以查看英文原文,
原文链接