在 Swift 4 中访问相机和照片库

5

我正在尝试使用以下代码在Swift4中访问相机和照片库

let imagePickerController = UIImagePickerController()
    imagePickerController.delegate = self
    let alert = UIAlertController(title: "", message: "", preferredStyle: .actionSheet)
    alert.addAction(UIAlertAction(title: "Camera", style: .default, handler: {(action: UIAlertAction) in
        imagePickerController.sourceType = .camera
        print(1)
    }))
    alert.addAction(UIAlertAction(title: "Photo Album", style: .default, handler: {(action: UIAlertAction) in
        imagePickerController.sourceType = .photoLibrary
    }))
    alert.addAction(UIAlertAction(title: "Cancel", style: .default, handler: nil))
    self.present(alert, animated: true, completion: nil)

但它不起作用。尽管我确保plist具有相机和照片库授权,但我没有获得访问授权请求。我对代码进行了一些修改,如下所示。
AVCaptureDevice.requestAccess(for: AVMediaType.video) { response in
    }
    let photos = PHPhotoLibrary.authorizationStatus()
    if photos == .notDetermined {
        PHPhotoLibrary.requestAuthorization({status in
        })
    }

    let imagePickerController = UIImagePickerController()
    imagePickerController.delegate = self
    let alert = UIAlertController(title: "", message: "", preferredStyle: .actionSheet)
    alert.addAction(UIAlertAction(title: "Camera", style: .default, handler: {(action: UIAlertAction) in
        imagePickerController.sourceType = .camera
        print(1)
    }))
    alert.addAction(UIAlertAction(title: "Photo Album", style: .default, handler: {(action: UIAlertAction) in
        imagePickerController.sourceType = .photoLibrary
    }))
    alert.addAction(UIAlertAction(title: "Cancel", style: .default, handler: nil))
    self.present(alert, animated: true, completion: nil)

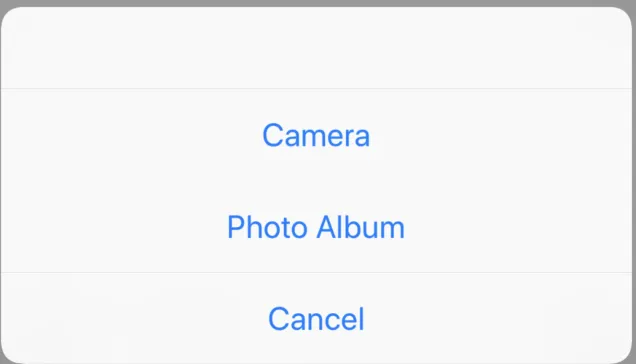
现在我正在获取相机和照片库的授权请求,我可以看到AlertView,但是当我按照图片所示按下相机或照片库时,什么也没有发生。

enter image description here

我在设备和模拟器上尝试了相机。


您可以在警告操作中使用特定的源类型相机和照片库来呈现uiImagepickercontroller,或者在此警告操作中获取权限代码。 - Virani Vivek
你能详细说明一下吗? - Ahmed
你添加了 UINavigationControllerDelegate 吗? - Yash Bhikadiya
我添加了UINavigationControllerDelegate和UIImagePickerControllerDelegate。 - Ahmed
我已经检查了代码的最后一行。 - Ahmed
显示剩余7条评论
2个回答

25

这是在iOS中从照片和相机加载图像的代码。

⁃ 您需要创建您UIImageView的一个插座

⁃ 然后将轻拍手势添加到图像视图上

⁃ 然后连接轻拍手势到didTapOnImageView函数

⁃ 然后将以下扩展添加到您的视图控制器中。

//MARK:- Image Picker
extension YourViewController: UIImagePickerControllerDelegate, UINavigationControllerDelegate {

    //This is the tap gesture added on my UIImageView.
    @IBAction func didTapOnImageView(sender: UITapGestureRecognizer) {
        //call Alert function
        self.showAlert()
    }

    //Show alert to selected the media source type.
    private func showAlert() {

        let alert = UIAlertController(title: "Image Selection", message: "From where you want to pick this image?", preferredStyle: .actionSheet)
        alert.addAction(UIAlertAction(title: "Camera", style: .default, handler: {(action: UIAlertAction) in
            self.getImage(fromSourceType: .camera)
        }))
        alert.addAction(UIAlertAction(title: "Photo Album", style: .default, handler: {(action: UIAlertAction) in
            self.getImage(fromSourceType: .photoLibrary)
        }))
        alert.addAction(UIAlertAction(title: "Cancel", style: .destructive, handler: nil))
        self.present(alert, animated: true, completion: nil)
    }

    //get image from source type
    private func getImage(fromSourceType sourceType: UIImagePickerController.SourceType) {

        //Check is source type available
        if UIImagePickerController.isSourceTypeAvailable(sourceType) {

            let imagePickerController = UIImagePickerController()
            imagePickerController.delegate = self
            imagePickerController.sourceType = sourceType
            self.present(imagePickerController, animated: true, completion: nil)
        }
    }

    //MARK:- UIImagePickerViewDelegate.
    func imagePickerController(_ picker: UIImagePickerController, didFinishPickingMediaWithInfo info: [UIImagePickerController.InfoKey : Any]) {

        self.dismiss(animated: true) { [weak self] in

            guard let image = info[UIImagePickerController.InfoKey.originalImage] as? UIImage else { return }
            //Setting image to your image view
            self?.profileImgView.image = image
        }
    }

    func imagePickerControllerDidCancel(_ picker: UIImagePickerController) {
        picker.dismiss(animated: true, completion: nil)
    }

}

注意:不要忘记在info.plist中添加隐私设置

隐私 - 相机使用说明

隐私 - 照片库使用说明


非常有用对我。谢谢! - Lahiru Pinto

10

首先,您需要导入这些库:

import Photos
import UIKit

 @IBOutlet weak var loadPhoto: UIButton!

你需要设置代理:

class YourClass: UIViewController, UIImagePickerControllerDelegate, UINavigationControllerDelegate, UNUserNotificationCenterDelegate 

func displayUploadImageDialog(btnSelected: UIButton) {
    let picker = UIImagePickerController()
    picker.delegate = self
    picker.allowsEditing = true
    let alertController = UIAlertController(title: "", message: "Upload profile photo?".localized(), preferredStyle: .actionSheet)
    let cancelAction = UIAlertAction(title: NSLocalizedString("Cancel", comment: "Cancel action"), style: .cancel, handler: {(_ action: UIAlertAction) -> Void in
        alertController.dismiss(animated: true) {() -> Void in }
    })
    alertController.addAction(cancelAction)
    let cameraRollAction = UIAlertAction(title: NSLocalizedString("Open library".localized(), comment: "Open library action"), style: .default, handler: {(_ action: UIAlertAction) -> Void in
        if UI_USER_INTERFACE_IDIOM() == .pad {
            OperationQueue.main.addOperation({() -> Void in
                picker.sourceType = .photoLibrary
                self.present(picker, animated: true) {() -> Void in }
            })
        }
        else {
            picker.sourceType = .photoLibrary
            self.present(picker, animated: true) {() -> Void in }
        }
    })
    alertController.addAction(cameraRollAction)
    alertController.view.tintColor = .black
    present(alertController, animated: true) {() -> Void in }
}

func imagePickerController(_ picker: UIImagePickerController, didFinishPickingMediaWithInfo info: [String : Any]) {
    let image = info[UIImagePickerControllerOriginalImage] as! UIImage
    profileImage.image = image
    let imageData = UIImageJPEGRepresentation(image, 0.05)
    self.dismiss(animated: true, completion: nil)
}

func checkPermission() {
    let authStatus = AVCaptureDevice.authorizationStatus(for: AVMediaType.video)
    switch authStatus {
    case .authorized:
        self.displayUploadImageDialog(btnSelected: self.loadPhoto)
    case .denied:
        print("Error")
    default:
        break
    }
}

func imagePickerControllerDidCancel(picker: UIImagePickerController) {
    self.dismiss(animated: true, completion: nil)
}

func checkLibrary() {
    let photos = PHPhotoLibrary.authorizationStatus()
    if photos == .authorized {
        switch photos {
        case .authorized:
            self.displayUploadImageDialog(btnSelected: self.loadPhoto)
        case .denied:
            print("Error")
        default:
            break
        }
    }
}

按钮的设置操作:

@IBAction func loadPhotoTapped(_ sender: UIButton) {
    let photos = PHPhotoLibrary.authorizationStatus()
    if photos == .notDetermined {
        PHPhotoLibrary.requestAuthorization({status in
            if status == .authorized{
                print("OKAY")
            } else {
                print("NOTOKAY")
            }
        })
    }
    checkLibrary()
    checkPermission()
}

在Info.plist中设置权限:

隐私 - 媒体库使用说明

隐私 - 照片库使用说明

隐私 - 相机使用说明

这应该有效。


1
你的UserNotifications导入有什么意义?我有什么遗漏吗? - emmics

网页内容由stack overflow 提供, 点击上面的
可以查看英文原文,
原文链接