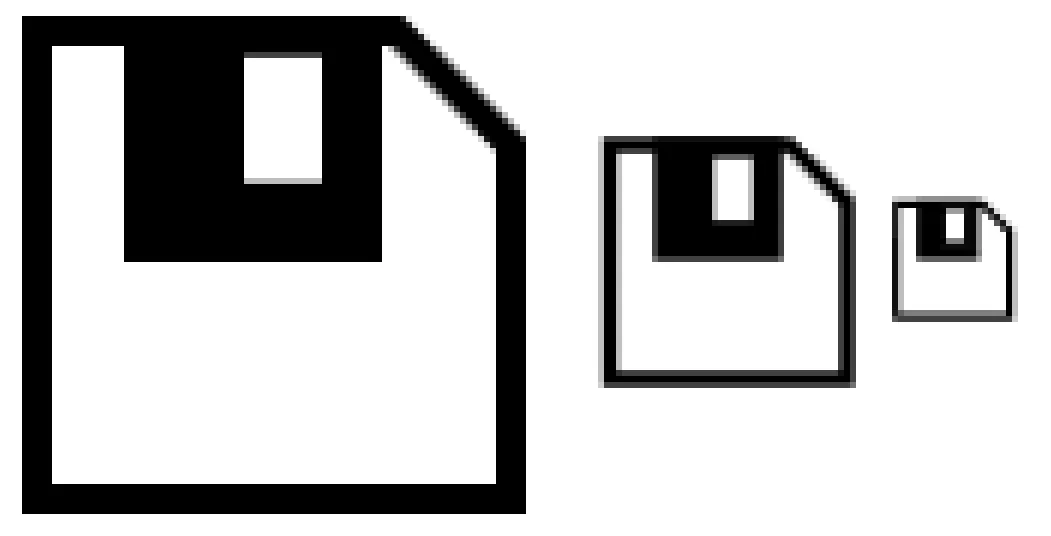
为了使我的WPF应用程序支持高DPI,我选择使用嵌入式XAML矢量图形创建所有内部图形和图标。然而,我不明白为什么我的XAML矢量图形在渲染时会变得模糊。以下是一个示例:我使用XAML路径和矩形元素绘制了一个简单的软盘图标。下面的图像是在我的显示器的本机分辨率2048x1152下以不同大小和不同的“SnapsToDevicePixels”和“UseLayoutRounding”值呈现的相同图标。
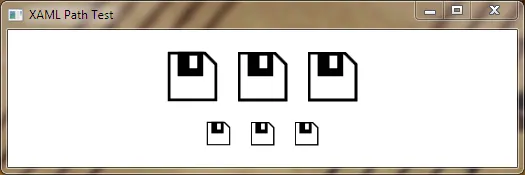
还有小图标:
两种尺寸下边缘都不够清晰。使用不同的SnapsToDevicePixels值,有些边缘是清晰的,但其他边缘仍然不够清晰。
如何正确绘制这样的图标,使其不会模糊呢?
以下是此窗口的XAML,包括路径数据:
<Window x:Class="WpfApplication1.MainWindow"
        xmlns="http://schemas.microsoft.com/winfx/2006/xaml/presentation"
        xmlns:x="http://schemas.microsoft.com/winfx/2006/xaml"
        Title="XAML Path Test" Height="175" Width="525">
    <Window.Resources>
        <ResourceDictionary>
            <Canvas x:Key="icon">
                <Path Width="84" Height="83" Canvas.Left="6.5" Canvas.Top="9.5" Stretch="Fill" StrokeThickness="5" StrokeMiterLimit="2.75" Stroke="#FF000000" Fill="#FFFFFFFF" Data="F1 M 9,12L 68.9914,12L 88,31.0086L 88,90L 9,90L 9,12 Z "/>
                <Rectangle Width="43" Height="41" Canvas.Left="23.5" Canvas.Top="9.5" Stretch="Fill" StrokeThickness="5" StrokeMiterLimit="2.75" Stroke="#FF000000" Fill="#FF000000"/>
                <Rectangle Width="23" Height="31" Canvas.Left="38.5" Canvas.Top="11.25" Stretch="Fill" StrokeThickness="5" StrokeMiterLimit="2.75" Stroke="#FF000000" Fill="#FFFFFFFF"/>
            </Canvas>
        </ResourceDictionary>
    </Window.Resources>
    <StackPanel HorizontalAlignment="Center" VerticalAlignment="Center">
        <StackPanel Orientation="Horizontal" HorizontalAlignment="Center" VerticalAlignment="Center">
            <Rectangle Width="50" Height="50" Margin="10">
                <Rectangle.Fill>
                    <VisualBrush Visual="{StaticResource icon}"/>
                </Rectangle.Fill>
            </Rectangle>

            <Rectangle Width="50" Height="50" Margin="10" SnapsToDevicePixels="True">
                <Rectangle.Fill>
                    <VisualBrush Visual="{StaticResource icon}"/>
                </Rectangle.Fill>
            </Rectangle>

            <Rectangle Width="50" Height="50" Margin="10" UseLayoutRounding="True" SnapsToDevicePixels="True">
                <Rectangle.Fill>
                    <VisualBrush Visual="{StaticResource icon}"/>
                </Rectangle.Fill>
            </Rectangle>
        </StackPanel>

        <StackPanel Orientation="Horizontal" HorizontalAlignment="Center" VerticalAlignment="Center">
            <Rectangle Width="24" Height="24" Margin="10">
                <Rectangle.Fill>
                    <VisualBrush Visual="{StaticResource icon}"/>
                </Rectangle.Fill>
            </Rectangle>

            <Rectangle Width="24" Height="24" Margin="10" SnapsToDevicePixels="True">
                <Rectangle.Fill>
                    <VisualBrush Visual="{StaticResource icon}"/>
                </Rectangle.Fill>
            </Rectangle>

            <Rectangle Width="24" Height="24" Margin="10" UseLayoutRounding="True" SnapsToDevicePixels="True">
                <Rectangle.Fill>
                    <VisualBrush Visual="{StaticResource icon}"/>
                </Rectangle.Fill>
            </Rectangle>
        </StackPanel>
    </StackPanel>
</Window>
编辑:
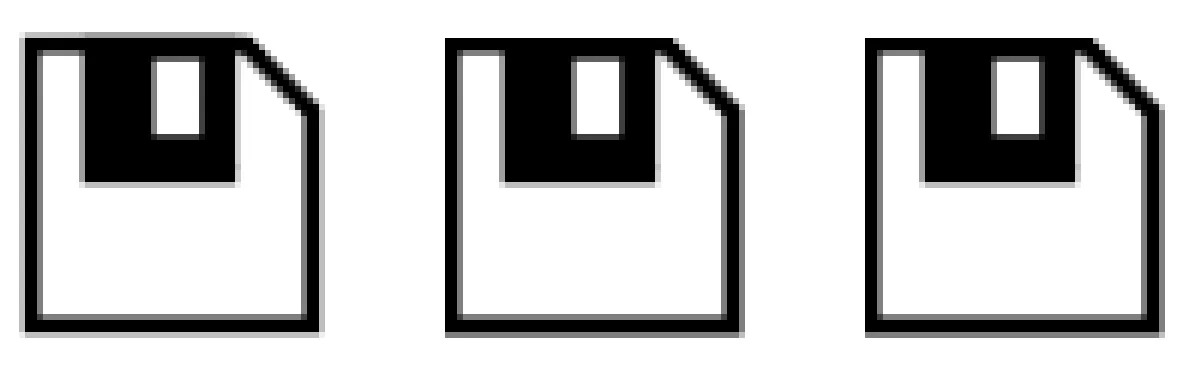
按照Chris W.建议,将路径+矩形包装在ControlTemplate中,并使用Viewbox进行调整大小,但图片仍然模糊。从左到右,这是未调整大小的(画布尺寸为100x100),调整大小为50和调整大小为24:
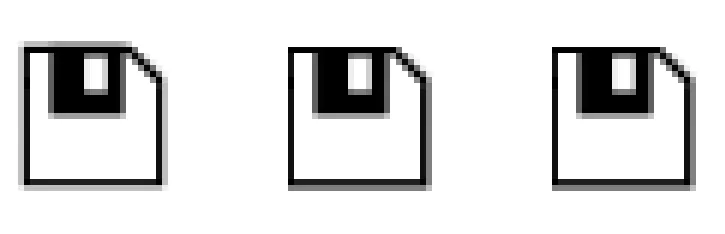
还有600%的缩放视图:
这里是ControlTemplate:
<ControlTemplate x:Key="icon">
    <Canvas Width="100" Height="100">
        <Path Width="84" Height="83" Canvas.Left="6.5" Canvas.Top="9.5" Stretch="Fill" StrokeThickness="5" StrokeMiterLimit="2.75" Stroke="#FF000000" Fill="#FFFFFFFF" Data="F1 M 9,12L 68.9914,12L 88,31.0086L 88,90L 9,90L 9,12 Z "/>
        <Rectangle Width="43" Height="41" Canvas.Left="23.5" Canvas.Top="9.5" Stretch="Fill" StrokeThickness="5" StrokeMiterLimit="2.75" Stroke="#FF000000" Fill="#FF000000"/>
        <Rectangle Width="23" Height="31" Canvas.Left="38.5" Canvas.Top="11.25" Stretch="Fill" StrokeThickness="5" StrokeMiterLimit="2.75" Stroke="#FF000000" Fill="#FFFFFFFF"/>
    </Canvas>
</ControlTemplate>
而且用法:
<Control Template="{StaticResource icon}"/>
<Viewbox Height="50">
    <Control Template="{StaticResource icon}"/>
</Viewbox>
<Viewbox Height="24">
    <Control Template="{StaticResource icon}"/>
</Viewbox>