
我已经使用以下方法通过asp .net将GCM消息推送到Google服务器:
现在我计划升级到FCM方法,有没有人知道如何在asp .net中开发或实现此操作,请告知。
我已经使用以下方法通过asp .net将GCM消息推送到Google服务器:
现在我计划升级到FCM方法,有没有人知道如何在asp .net中开发或实现此操作,请告知。
2019年更新
现在有一个新的.NET管理SDK,允许您从服务器发送通知。使用Nuget进行安装
Install-Package FirebaseAdmin
你需要按照这里的说明下载服务账号密钥,并在你的项目中引用它。我可以通过像这样初始化客户端来发送消息。
using FirebaseAdmin;
using FirebaseAdmin.Messaging;
using Google.Apis.Auth.OAuth2;
...

public class MobileMessagingClient : IMobileMessagingClient
{
    private readonly FirebaseMessaging messaging;

    public MobileMessagingClient()
    {
        var app = FirebaseApp.Create(new AppOptions() { Credential = GoogleCredential.FromFile("serviceAccountKey.json").CreateScoped("https://www.googleapis.com/auth/firebase.messaging")});
        messaging = FirebaseMessaging.GetMessaging(app);
    }
    //...
}
初始化应用程序后,您现在可以创建通知和数据消息并将它们发送到您想要的设备。
private Message CreateNotification(string title, string notificationBody, string token)
{
    return new Message()
    {
        Token = token,
        Notification = new Notification()
        {
            Body = notificationBody,
            Title = title
        }
    };
}

public async Task SendNotification(string token, string title, string body)
{
    var result = await messaging.SendAsync(CreateNotification(title, body, token));
    //do something with result
}
在您的服务集合中,然后您可以将其添加...
services.AddSingleton<IMobileMessagingClient, MobileMessagingClient >();
FirebaseApp.Create(new AppOptions() { Credential = GoogleCredential.FromFile("serviceAccountKey.json").CreateScoped("https://www.googleapis.com/auth/firebase.messaging")});我认为这是由于CreatedScope链接出现404错误导致的。我使用了文档中提供的IHostingEnvironment和GoogleCredentials来创建消息变量:var credential = GoogleCredential.FromFile(jsonPath);
var app = FirebaseApp.Create(new AppOptions() { Credential = credential });
var messaging = FirebaseMessaging.GetMessaging(app); - armourshieldservices.AddSingleton而不是AddScoped或AddTransient? - Grigory ZhadkoC# 服务器端代码 用于 Firebase 云消息传递
using System;
using System.Collections.Generic;
using System.IO;
using System.Linq;
using System.Net;
using System.Text;
using System.Web;
using System.Web.Script.Serialization;

namespace Sch_WCFApplication
{
    public class PushNotification
    {
        public PushNotification(Plobj obj)
        {
            try
            {
                var applicationID = "AIza---------4GcVJj4dI";

                var senderId = "57-------55";

                string deviceId = "euxqdp------ioIdL87abVL";

                WebRequest tRequest = WebRequest.Create("https://fcm.googleapis.com/fcm/send");

                tRequest.Method = "post";

                tRequest.ContentType = "application/json";

                var data = new

                {

                    to = deviceId,

                    notification = new

                    {

                        body = obj.Message,

                        title = obj.TagMsg,

                        icon = "myicon"

                    }
                };

                var serializer = new JavaScriptSerializer();

                var json = serializer.Serialize(data);

                Byte[] byteArray = Encoding.UTF8.GetBytes(json);

                tRequest.Headers.Add(string.Format("Authorization: key={0}", applicationID));

                tRequest.Headers.Add(string.Format("Sender: id={0}", senderId));

                tRequest.ContentLength = byteArray.Length;


                using (Stream dataStream = tRequest.GetRequestStream())
                {

                    dataStream.Write(byteArray, 0, byteArray.Length);


                    using (WebResponse tResponse = tRequest.GetResponse())
                    {

                        using (Stream dataStreamResponse = tResponse.GetResponseStream())
                        {

                            using (StreamReader tReader = new StreamReader(dataStreamResponse))
                            {

                                String sResponseFromServer = tReader.ReadToEnd();

                                string str = sResponseFromServer;

                            }
                        }
                    }
                }
            }

            catch (Exception ex)
            {

                string str = ex.Message;

            }

        }

    }
}
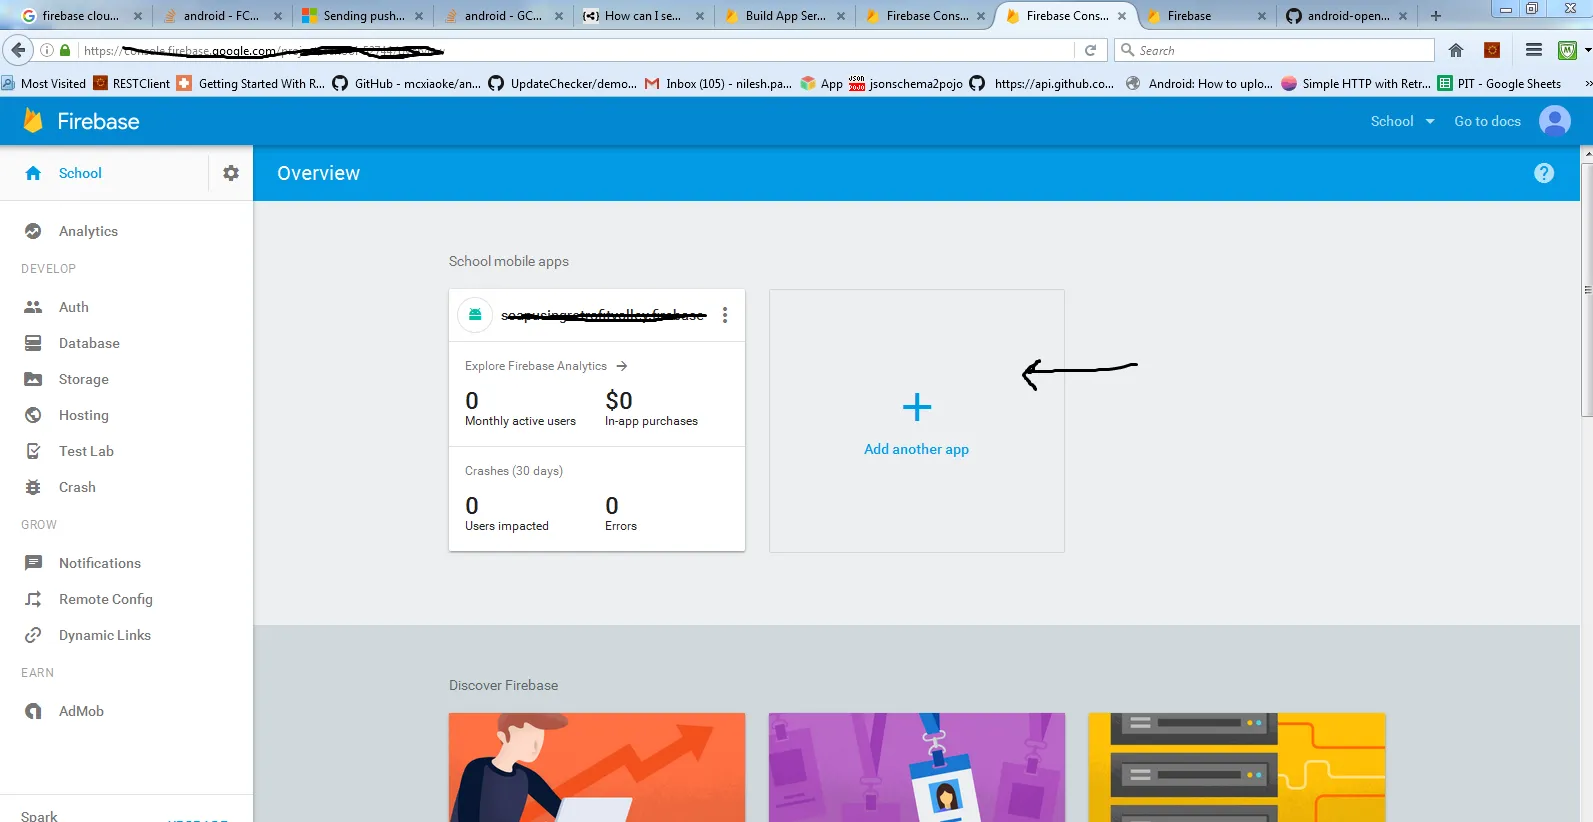
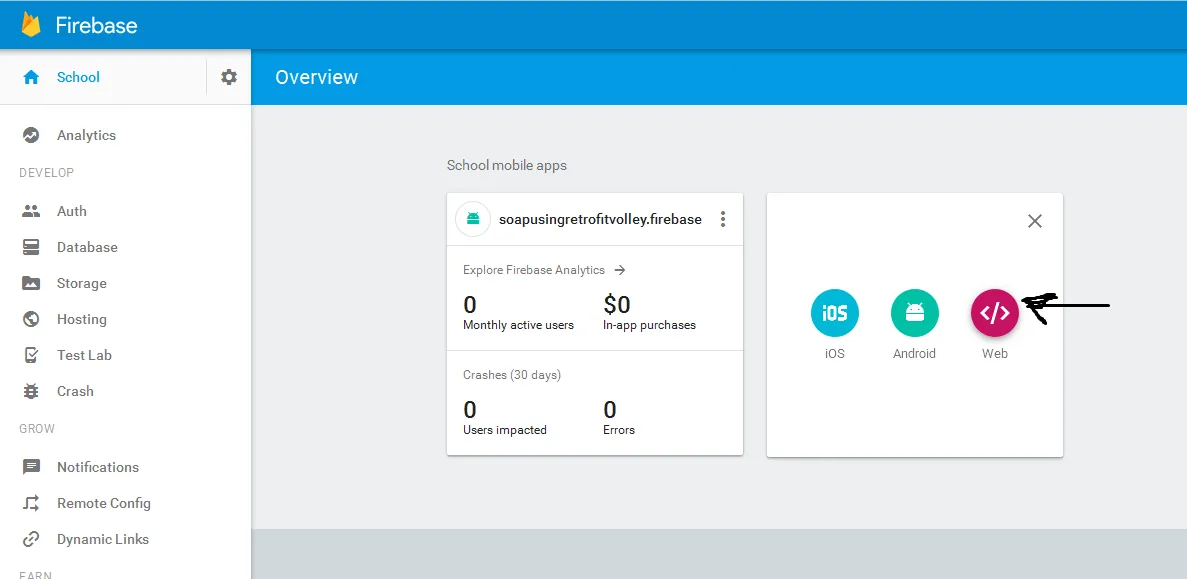
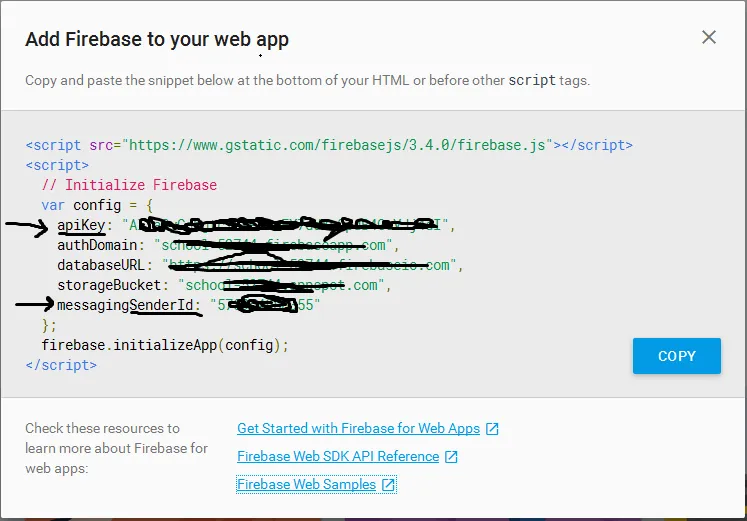
这里提供APIKey和senderId的获取方式,具体步骤如下(参见下图):
 public class Notification
{
    private string serverKey = "kkkkk";
    private string senderId = "iiddddd";
    private string webAddr = "https://fcm.googleapis.com/fcm/send";

    public string SendNotification(string DeviceToken, string title ,string msg )
    {
        var result = "-1";
        var httpWebRequest = (HttpWebRequest)WebRequest.Create(webAddr);
        httpWebRequest.ContentType = "application/json";
        httpWebRequest.Headers.Add(string.Format("Authorization: key={0}", serverKey));
        httpWebRequest.Headers.Add(string.Format("Sender: id={0}", senderId));
        httpWebRequest.Method = "POST";

        var payload = new
        {
            to = DeviceToken,
            priority = "high",
            content_available = true,
            notification = new
            {
                body = msg,
                title = title
            },
        };
        var serializer = new JavaScriptSerializer();
        using (var streamWriter = new StreamWriter(httpWebRequest.GetRequestStream()))
        {
            string json = serializer.Serialize(payload);
            streamWriter.Write(json);
            streamWriter.Flush();
        }

        var httpResponse = (HttpWebResponse)httpWebRequest.GetResponse();
        using (var streamReader = new StreamReader(httpResponse.GetResponseStream()))
        {
            result = streamReader.ReadToEnd();
        }
        return result;
    }
}
        public async Task<bool> SendNotificationAsync(string token, string title, string body)
    {
        using (var client = new HttpClient())
        {
            var firebaseOptionsServerId = _firebaseOptions.ServerApiKey;
            var firebaseOptionsSenderId = _firebaseOptions.SenderId;

            client.BaseAddress = new Uri("https://fcm.googleapis.com");
            client.DefaultRequestHeaders.Accept.Add(new MediaTypeWithQualityHeaderValue("application/json"));
            client.DefaultRequestHeaders.TryAddWithoutValidation("Authorization",
                $"key={firebaseOptionsServerId}");
            client.DefaultRequestHeaders.TryAddWithoutValidation("Sender", $"id={firebaseOptionsSenderId}");


            var data = new
            {
                to = token,
                notification = new
                {
                    body = body,
                    title = title,
                },
                priority = "high"
            };

            var json = JsonConvert.SerializeObject(data);
            var httpContent = new StringContent(json, Encoding.UTF8, "application/json");

            var result = await _client.PostAsync("/fcm/send", httpContent);
            return result.StatusCode.Equals(HttpStatusCode.OK);
        }
    }
以下是这些参数:
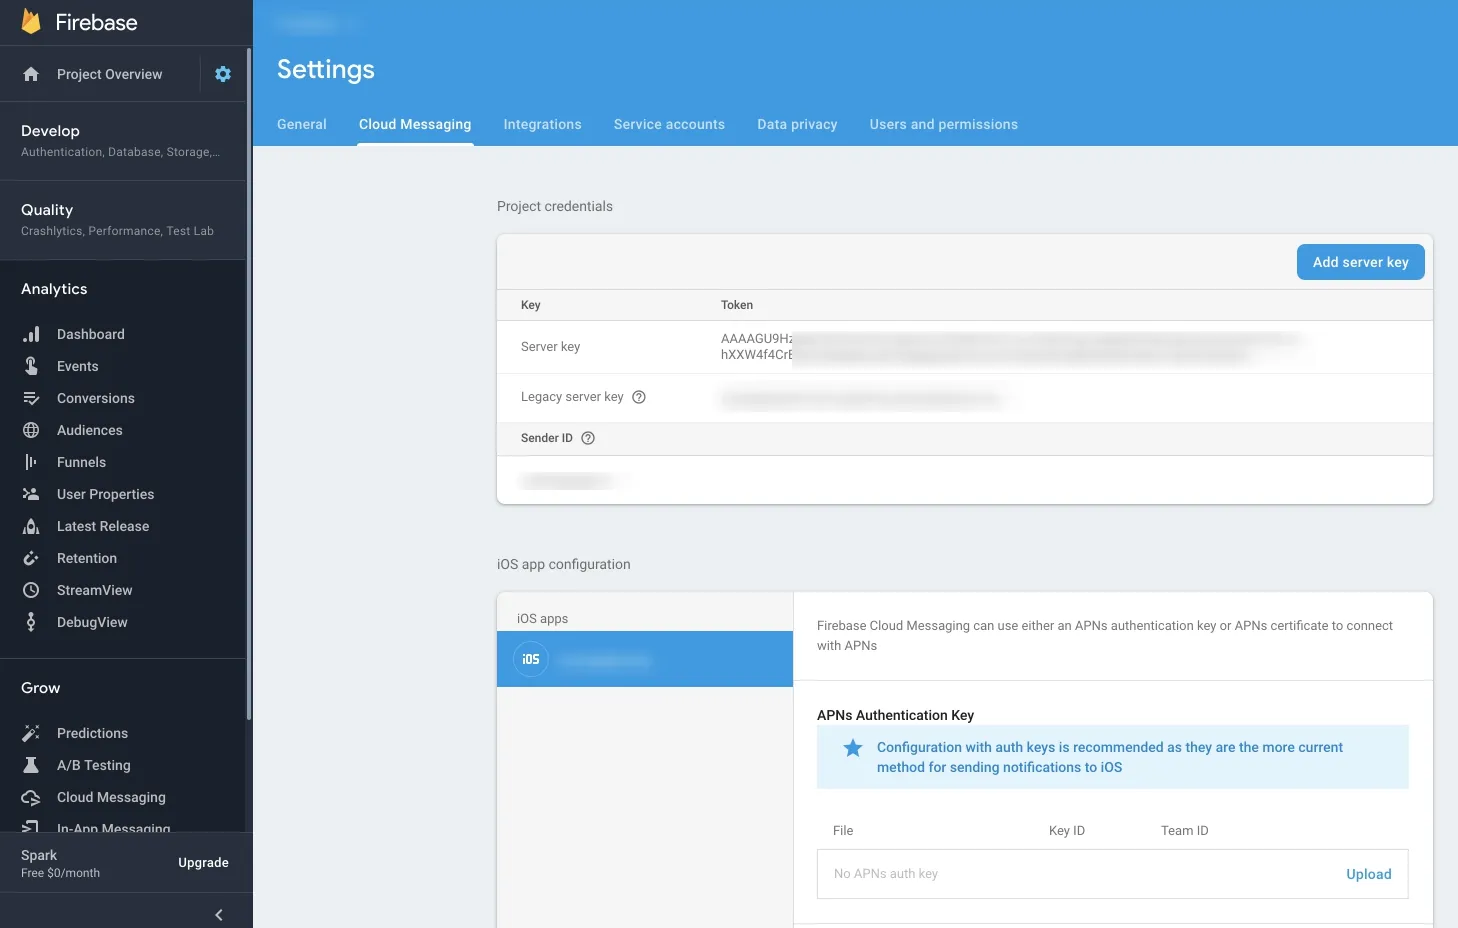
要查找您的Sender ID和API密钥,您需要执行以下操作:
以下是我的VBScript示例,适用于偏爱VB的人:
//Create Json body
posturl="https://fcm.googleapis.com/fcm/send"
body=body & "{ ""notification"": {"
body=body & """title"": ""Your Title"","
body=body & """text"": ""Your Text"","
body=body & "},"
body=body & """to"" : ""target Token""}"

//Set Headers :Content Type and server key
set xmlhttp = server.Createobject("MSXML2.ServerXMLHTTP")
xmlhttp.Open "POST",posturl,false
xmlhttp.setRequestHeader "Content-Type", "application/json"
xmlhttp.setRequestHeader "Authorization", "Your Server key"

xmlhttp.send body
result= xmlhttp.responseText
//response.write result to check Firebase response
Set xmlhttp = nothing
这个库非常轻量级。我在所有项目中都使用它来发送Firebase的Android、WebPush和苹果iOS推送通知。有用的链接:
接口非常简单和极简:
发送APN消息:
var apn = new ApnSender(settings, httpClient);
await apn.SendAsync(notification, deviceToken);
发送 FCM 消息:
var fcm = new FcmSender(settings, httpClient);
await fcm.SendAsync(deviceToken, notification);
2020/11/28
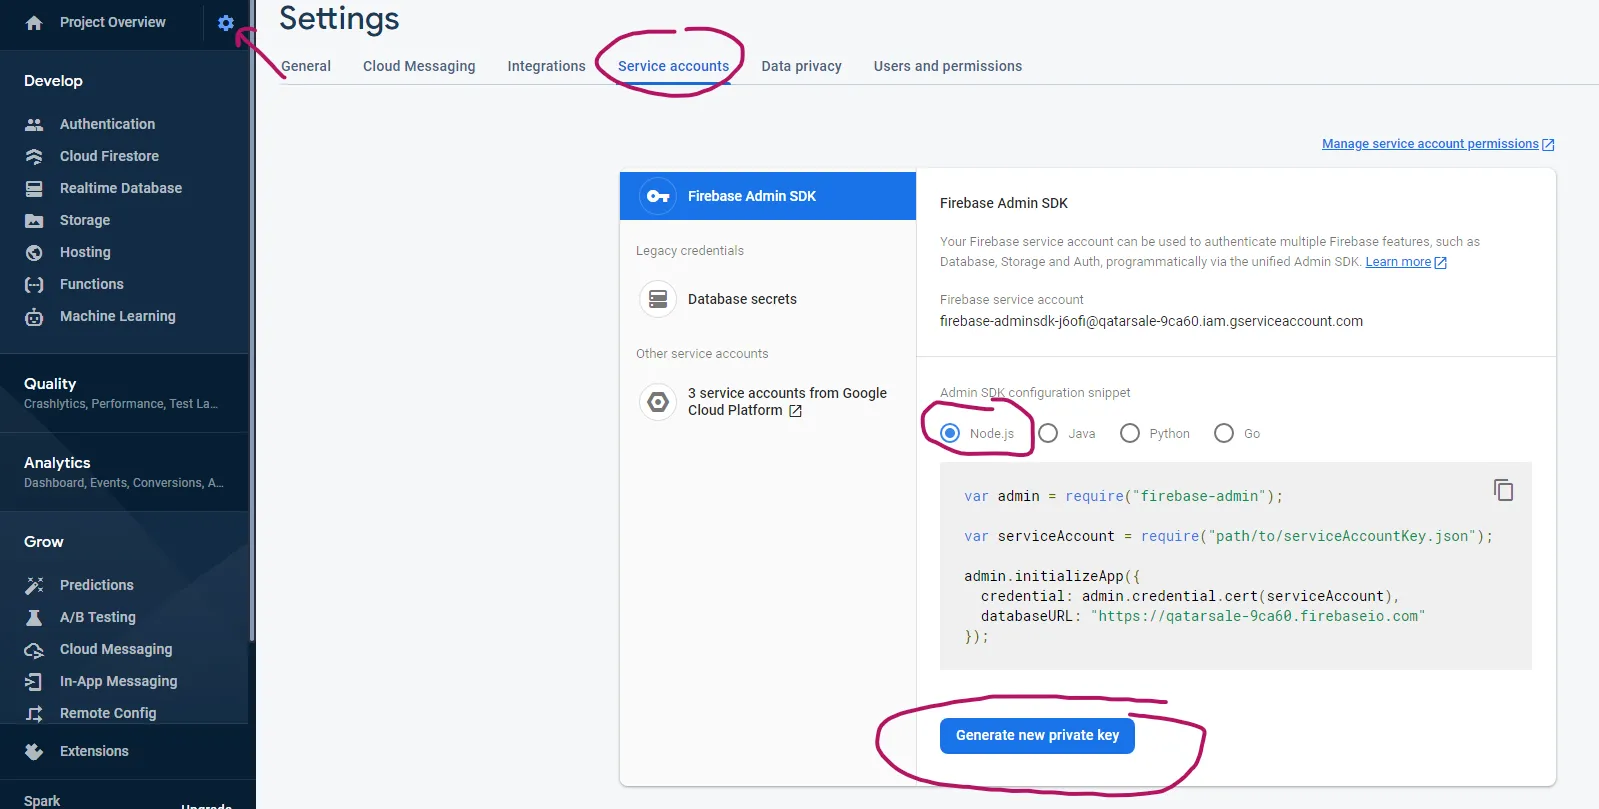
从 Firebase -> 设置 -> 服务帐户 -> Firebase Admin SDK 下载此文件。
将下载的文件移动到您的 dotnet Core 根目录,然后将其名称更改为 key.json。
然后在您的项目根目录中的YourProjectName.csproj文件中添加以下代码:
  <ItemGroup>
    <None Update="key.json">
      <CopyToOutputDirectory>PreserveNewest</CopyToOutputDirectory>
    </None>
  </ItemGroup>
然后将以下代码添加到您的 Program.cs 文件中的 Main 函数:
var defaultApp = FirebaseApp.Create(new AppOptions()
{
  Credential =
  GoogleCredential.FromFile(Path.Combine(AppDomain.CurrentDomain.BaseDirectory,
  "key.json")),
});
public async Task SendNotificationAsync(string DeviceToken, string title ,string body){
 var message = new Message()
 {
  Notification = new FirebaseAdmin.Messaging.Notification
  {
     Title = title,
     Body = body
  },
  Token = DeviceToken,
 };
 var messaging = FirebaseMessaging.DefaultInstance;
 var result = await messaging.SendAsync(message);
}
我不相信你发送推送通知的方式有任何变化。在 FCM 中,你将以与 GCM 相同的方式进行 HTTP POST 请求:
https://fcm.googleapis.com/fcm/send
Content-Type:application/json
Authorization:key=AIzaSyZ-1u...0GBYzPu7Udno5aA

{ "data": {
    "score": "5x1",
    "time": "15:10"
  },
  "to" : "bk3RNwTe3H0:CI2k_HHwgIpoDKCIZvvDMExUdFQ3P1..."
}
阅读有关FCM服务器的更多信息。
现在我能看到的唯一变化是目标URL。句号。