我有一个如下所示的流式布局:
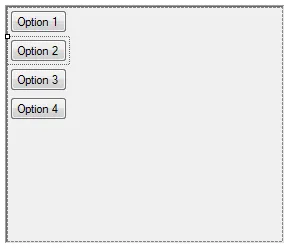
我需要将表单上所有控件居中(换句话说,假设表单的宽度为 200,则 btnOpt1 到 btnOpt4 的 Left 应该从按钮宽度的一半开始的 100,而不是 0。)
有两种方法可以实现,但每种方法都有其限制。
AnchorDocking和Anchor属性的布局控件来实现。方法1: 锚定属性
控件默认情况下始终锚定在表单的左上角,这意味着当表单大小改变时,它们与表单左上角的距离将保持不变。如果将控件锚定到底部左侧,则在调整表单大小时,控件将保持与表单底部和左侧相同的距离。
关闭某个方向上的锚定将使控件在该方向上保持居中位置。
示例:
public TestForm12()
{
   InitializeComponent();

   Button btn = new Button();
   btn.Width = this.Width - 10;
   btn.Height = 20;
   btn.Left = (this.ClientSize.Width - btn.Width) / 2;
   btn.Top = (this.ClientSize.Height - btn.Height) / 2;
   btn.Text = "click me";
   this.Controls.Add(btn);
   btn.Anchor = AnchorStyles.None;

}
2. 使用布局控件
示例-窗体的Designer.cs代码片段。
private void InitializeComponent()
 {
     this.tableLayoutPanel1 = new System.Windows.Forms.TableLayoutPanel();
     this.panel1 = new System.Windows.Forms.Panel();
     this.button1 = new System.Windows.Forms.Button();
     this.button2 = new System.Windows.Forms.Button();
     this.tableLayoutPanel1.SuspendLayout();
     this.panel1.SuspendLayout();
     this.SuspendLayout();
     //
     // tableLayoutPanel1
     //
     this.tableLayoutPanel1.ColumnCount = 3;
     this.tableLayoutPanel1.ColumnStyles.Add(new System.Windows.Forms.ColumnStyle(System.Windows.Forms.SizeType.Percent, 50F));
     this.tableLayoutPanel1.ColumnStyles.Add(new System.Windows.Forms.ColumnStyle(System.Windows.Forms.SizeType.Absolute, 200F));
     this.tableLayoutPanel1.ColumnStyles.Add(new System.Windows.Forms.ColumnStyle(System.Windows.Forms.SizeType.Percent, 50F));
      this.tableLayoutPanel1.Controls.Add(this.panel1, 1, 0);
      this.tableLayoutPanel1.Dock = System.Windows.Forms.DockStyle.Fill;
      this.tableLayoutPanel1.Location = new System.Drawing.Point(0, 0);
      this.tableLayoutPanel1.Name = "tableLayoutPanel1";
      this.tableLayoutPanel1.RowCount = 1;
      this.tableLayoutPanel1.RowStyles.Add(new System.Windows.Forms.RowStyle(System.Windows.Forms.SizeType.Percent, 100F));
      this.tableLayoutPanel1.Size = new System.Drawing.Size(284, 262);
      this.tableLayoutPanel1.TabIndex = 0;
      //
      // panel1
      //
      this.panel1.Controls.Add(this.button2);
      this.panel1.Controls.Add(this.button1);
      this.panel1.Dock = System.Windows.Forms.DockStyle.Fill;
      this.panel1.Location = new System.Drawing.Point(45, 3);
      this.panel1.Name = "panel1";
      this.panel1.Size = new System.Drawing.Size(194, 256);
      this.panel1.TabIndex = 0;
      //
      // button1
      //
      this.button1.Anchor = ((System.Windows.Forms.AnchorStyles)(((System.Windows.Forms.AnchorStyles.Top | System.Windows.Forms.AnchorStyles.Left)
    | System.Windows.Forms.AnchorStyles.Right)));
    this.button1.Location = new System.Drawing.Point(3, 9);
    this.button1.Name = "button1";
    this.button1.Size = new System.Drawing.Size(188, 23);
    this.button1.TabIndex = 0;
    this.button1.Text = "button1";
    this.button1.UseVisualStyleBackColor = true;
    //
    // button2
    //
    this.button2.Anchor = ((System.Windows.Forms.AnchorStyles)(((System.Windows.Forms.AnchorStyles.Top | System.Windows.Forms.AnchorStyles.Left)
    | System.Windows.Forms.AnchorStyles.Right)));
    this.button2.Location = new System.Drawing.Point(3, 38);
    this.button2.Name = "button2";
    this.button2.Size = new System.Drawing.Size(188, 23);
    this.button2.TabIndex = 0;
    this.button2.Text = "button1";
    this.button2.UseVisualStyleBackColor = true;
    //
    // TestForm11
    //
    this.AutoScaleDimensions = new System.Drawing.SizeF(6F, 13F);
    this.AutoScaleMode = System.Windows.Forms.AutoScaleMode.Font;
    this.ClientSize = new System.Drawing.Size(284, 262);
    this.Controls.Add(this.tableLayoutPanel1);
    this.Name = "TestForm11";
    this.Text = "TestForm11";
    this.tableLayoutPanel1.ResumeLayout(false);
    this.panel1.ResumeLayout(false);
    this.ResumeLayout(false);

}

 #endregion

private System.Windows.Forms.TableLayoutPanel tableLayoutPanel1;
private System.Windows.Forms.Panel panel1;
private System.Windows.Forms.Button button2;
private System.Windows.Forms.Button button1;
希望这可以帮到你。
我会选择使用TableLayoutPanel:
FillAutosizeFillTop顺便提一句,在你的解决方案中,你应该迭代flowLayoutPanel控件而不是窗体控件。还要考虑从宽度中减去水平间距和填充。
foreach (Control control in flowLayoutPanel.Controls)
{
    control.Size = new Size(flowLayoutPanel.Width - control.Margin.Horizontal,
                            control.Height);
}
但我建议您使用TableLayoutPanel。
int horizontalMargin = (int)(0.5 * (this.containingPanelOrForm.Width - this.button.Width));
this.btnOptX.Margin = new Padding(horizontalMargin, 0, horizontalMargin, 0);
Dim MarginLabelEmpty As Integer = ((FlowLayoutPanel1.Width - (LabelExisting1.Width + LabelExisting2.Width)) / 2)
        lblEmpty.Width = MarginLabelEmpty
我通过编写以下代码解决了我的问题。
对于您的按钮控件,创建4个新标签,并将每个标签放置在每个按钮的开头,标签名称如下:lblEmpty1、lblEmpty2、lblEmpty3、lblEmpty4,其中.Text=""(空)。
然后添加以下代码:
Dim MarginLeftbtnOptAll As Integer = ((FlowLayoutPanel1.Width - btnOpt1.Width) / 2)
        lblEmpty1.AutoSize = False
        lblEmpty1.Width = MarginLeftbtnOptAll
        lblEmpty2.AutoSize = False
        lblEmpty2.Width = MarginLeftbtnOptAll
        lblEmpty3.AutoSize = False
        lblEmpty3.Width = MarginLeftbtnOptAll
        lblEmpty4.AutoSize = False
        lblEmpty4.Width = MarginLeftbtnOptAll
这个中心按钮会根据FlowLayoutPanel1的宽度增加空标签的宽度。
Anchor = Top(仅限顶部),这样它们就不会居中,但在调整大小时始终会相对于表单(或容器)的边缘移动。我不擅长C#,但您也可以在flowlayoutpanel中添加一个与flowlayoutpanel相同宽度的面板。然后,您可以在运行时创建的面板中添加所需的按钮,并将其停靠在左侧或右侧。随您喜欢。让我用VB.net和C#(使用在线转换)举个例子。
VB.net
     Dim btn As New Button
            btn.Text = "Example"
            btn.Name = "Button"
            btn.Size = New Size(60,10)
            Dim panel As New Panel
            panel.Size = New Size(FlowLayoutPanel1.Width, 10) 'size of the flowlayoutpanel + height of button
            btn.Dock = DockStyle.Right
            FlowLayoutPanel1.Controls.Add(panel)
panel.controls.add(btn)
C#
Button btn = new Button();
btn.Text = "Example";
btn.Name = "Button";
btn.Size = new Size(60, 10);
Panel panel = new Panel();
panel.Size = new Size(FlowLayoutPanel1.Width, 10);
//size of the flowlayoutpanel + height of button
btn.Dock = DockStyle.Right;
FlowLayoutPanel1.Controls.Add(panel);
panel.controls.@add(btn);
Private Sub FlowLayoutPanel1_SizeChanged(sender As Object, e As EventArgs)` Handles FlowLayoutPanel1.SizeChanged

        Dim TotalWidth As Integer = FlowLayoutPanel1.Controls.Count * button.Width
        Dim LeftPadding As Integer = (FlowLayoutPanel1.Width - TotalWidth) / 2
        Dim GapPadding As Integer = FlowLayoutPanel1.Controls.Count * 5

        If TotalWidth <= FlowLayoutPanel1.Width Then
            FlowLayoutPanel1.Padding = New Padding(LeftPadding - GapPadding, 0, 0, 0)
        End If

End Sub
或者您可以使用网格布局。
FLowLayout不是为此设计的。 - SLaks