如何在Node服务器上使用HTTPS部署Sveltekit应用程序?

4

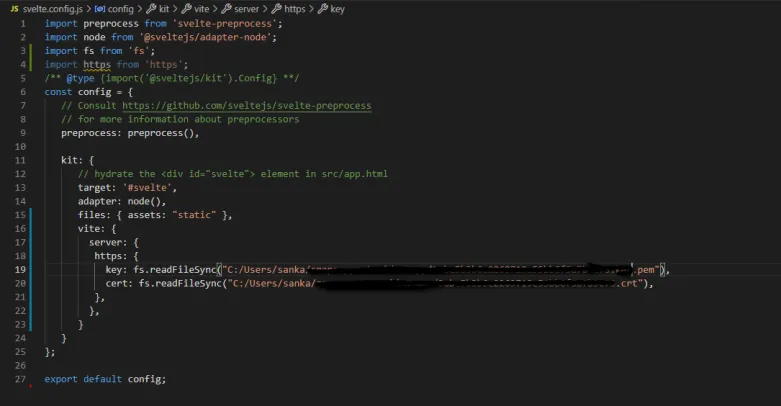
我想在HTTPS服务器上部署我的Sveltekit应用程序。 我也有密钥文件。 这是我的svelte.config.js文件

import preprocess from 'svelte-preprocess';
import node from '@sveltejs/adapter-node';
import fs from 'fs';
import https from 'https';
/** @type {import('@sveltejs/kit').Config} **/
const config = {
    // Consult https://github.com/sveltejs/svelte-preprocess
    // for more information about preprocessors
    preprocess: preprocess(),

    kit: {
        // hydrate the <div id="svelte"> element in src/app.html
        target: '#svelte',
        adapter: node(),
        files: { assets: "static" },
        vite: {
          server: {
            https: {
              key: fs.readFileSync("path\\privkey.pem"),
              cert: fs.readFileSync("path\\cert.pem"),
            },
          },
        }
    }
};

export default config;

我应该把我的关键文件放在哪里,以便从配置文件中读取?我尝试了几个位置,但出现了一些错误。附有屏幕截图。
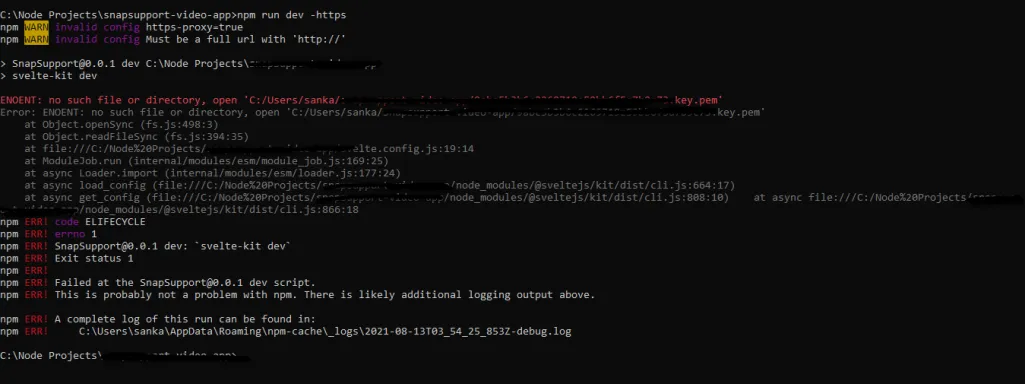
 enter image description here

enter image description here

有人请指导我。谢谢提前。


npm run build -https node .build/index.js still app loading from http am I doing anything wrong?npm运行构建-https node .build/index.js 仍然从http加载应用程序 我做错了什么吗? - Sankar
3个回答

6

我通过使用自定义服务器解决了这个问题

适配器会在您的构建目录中创建两个文件 — index.js 和 handler.js。运行 index.js — 例如,如果您使用默认的构建目录,则运行 node build,将在配置的端口上启动服务器。

或者,您可以导入 handler.js 文件,该文件导出一个适用于 Express、Connect 或 Polka(甚至只是内置的 http.createServer)的处理程序,并设置自己的服务器。

svelte.config.js 可以保持不变。 运行 npm run build 以生成构建文件夹,在项目根目录中创建server.js,像下面的示例一样,然后运行 node server.js

import {handler} from './build/handler.js';
import express from 'express';
import fs from 'fs';
import http from 'http';
import https from 'https';

const privateKey = fs.readFileSync('./config/ssl/xx.site.key', 'utf8');
const certificate = fs.readFileSync('./config/ssl/xx.site.crt', 'utf8');
const credentials = {key: privateKey, cert: certificate};

const app = express();

const httpServer = http.createServer(app);
const httpsServer = https.createServer(credentials, app);

const PORT = 80;
const SSLPORT = 443;

httpServer.listen(PORT, function () {
    console.log('HTTP Server is running on: http://localhost:%s', PORT);
});

httpsServer.listen(SSLPORT, function () {
    console.log('HTTPS Server is running on: https://localhost:%s', SSLPORT);
});

// add a route that lives separately from the SvelteKit app
app.get('/healthcheck', (req, res) => {
    res.end('ok');
});

// let SvelteKit handle everything else, including serving prerendered pages and static assets
app.use(handler);


2
我将在这里解释一下我的问题的解决方案,都是根据我有限的最佳理解来进行的。
我设置一个受信任的Sveltekit开发服务器(在没有DNS的私有子网中运行)的解决方案是配置一个Nginx反向代理,它充当Vite服务器(以纯HTTP模式运行的Sveltekit捆绑包中)和客户端(如我的Android手机)之间可信的HTTPS中间人。
我从以下资源中找到了最有用的指导:

解决方案的主要步骤包括:

将以下配置翻译成中文:
  • 成为本地证书授权机构,并在客户端注册该授权机构(例如在桌面版Chrome浏览器或Android手机的凭据存储中)。
  • 作为证书授权机构,为本地网络中dev服务器的IP地址(subjectAltName)签署x509证书。
  • 设置Nginx HTTPS反向代理(proxy_pass等),将流量转发到Vite服务器(通常在3000端口运行)。分配创建的证书和其使用的密钥。还要像上面的设置指南中所述添加Websocket支持。
  • 在svelte.config.js中声明kit.vite.server.hmr.port = <Nginx代理的端口>。这很重要,以便Sveltekit中间件(?)不会尝试绕过代理。

我配置文件中相关的片段:

openssl genrsa -out myCA.key 2048
openssl req -x509 -new -nodes -key myCA.key -sha256 -days 10000 -out myCA.pem
openssl genrsa -out 192.168.22.88.key 2048
openssl req -new -key 192.168.22.88.key -out 192.168.22.88.csr

>192.168.22.88.ext cat <<-EOF
authorityKeyIdentifier=keyid,issuer
basicConstraints=CA:FALSE
keyUsage = digitalSignature, nonRepudiation, keyEncipherment, dataEncipherment
subjectAltName = @alt_names
[alt_names]
IP.1 = 192.168.22.88
IP.2 = 127.0.0.1
DNS.1 = localhost
DNS.2 = localhost.local
EOF

openssl x509 -req -in 192.168.22.88.csr -CA myCA.pem -CAkey myCA.key -CAcreateserial -out 192.168.22.88.crt -days 10000 -sha256 -extfile 192.168.22.88.ext
openssl dhparam -out dhparam.pem 2048

server {
        listen 2200 http2 ssl default_server;
        listen [::]:2200 http2 ssl default_server;
        ssl_certificate     /etc/nginx/ssl/192.168.22.88.crt;
        ssl_certificate_key /etc/nginx/ssl/192.168.22.88.key;
        ssl_dhparam /etc/nginx/ssl/dhparam.pem;
        index index.html;
        server_name 192.168.22.88;

        ssl on;
        ssl_session_cache  builtin:1000  shared:SSL:10m;
        ssl_protocols  TLSv1 TLSv1.1 TLSv1.2;
        ssl_ciphers HIGH:!aNULL:!eNULL:!EXPORT:!CAMELLIA:!DES:!MD5:!PSK:!RC4;
        ssl_prefer_server_ciphers on;

        location / {

            proxy_set_header        Host $host;
            proxy_set_header        X-Real-IP $remote_addr;
            proxy_set_header        X-Forwarded-For $proxy_add_x_forwarded_for;
            proxy_set_header        X-Forwarded-Proto $scheme;

            proxy_pass          http://127.0.0.1:3000;
            proxy_read_timeout  90;

            proxy_redirect      http://127.0.0.1:3000 https://192.168.22.88:2200;

            # WebSocket support
            proxy_http_version 1.1;
            proxy_set_header Upgrade $http_upgrade;
            proxy_set_header Connection "upgrade";
 
       }

}

kit: {
    // hydrate the <div id="svelte"> element in src/app.html
    target: '#svelte',
    adapter: adapter(),
    vite: {
        server: {
            hmr: {
                port: 2200,
            }
        }
    }
}

pnpm run dev

-1

构建产品,然后使用nginx或lighttpd进行服务。不要使用hmr,因为该模块会不断检查文件更改,从而严重降低Web性能。然后将https应用于lighttpd或您的nginx。

如果太麻烦了,可以使用npm run preview。


网页内容由stack overflow 提供, 点击上面的
可以查看英文原文,
原文链接