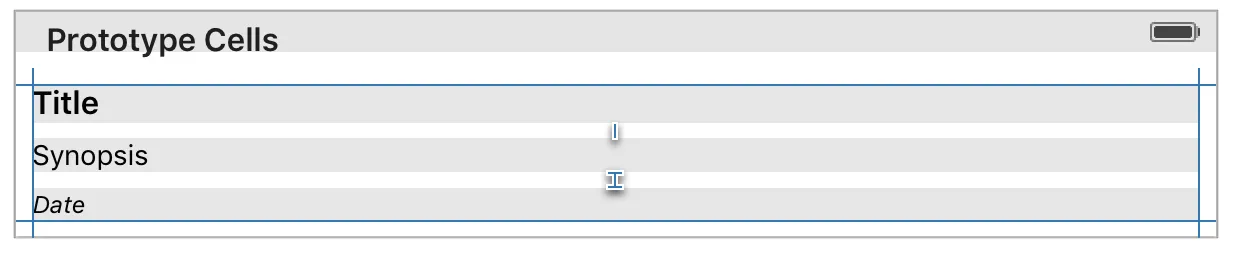
我正在尝试使我的表格视图可以在单击单元格时自动调整大小以适应单元格内的内容。(不同数量的文本将自动调整大小。)
未单击单元格的状态 (第一状态和大小,单击后应返回到44.0)
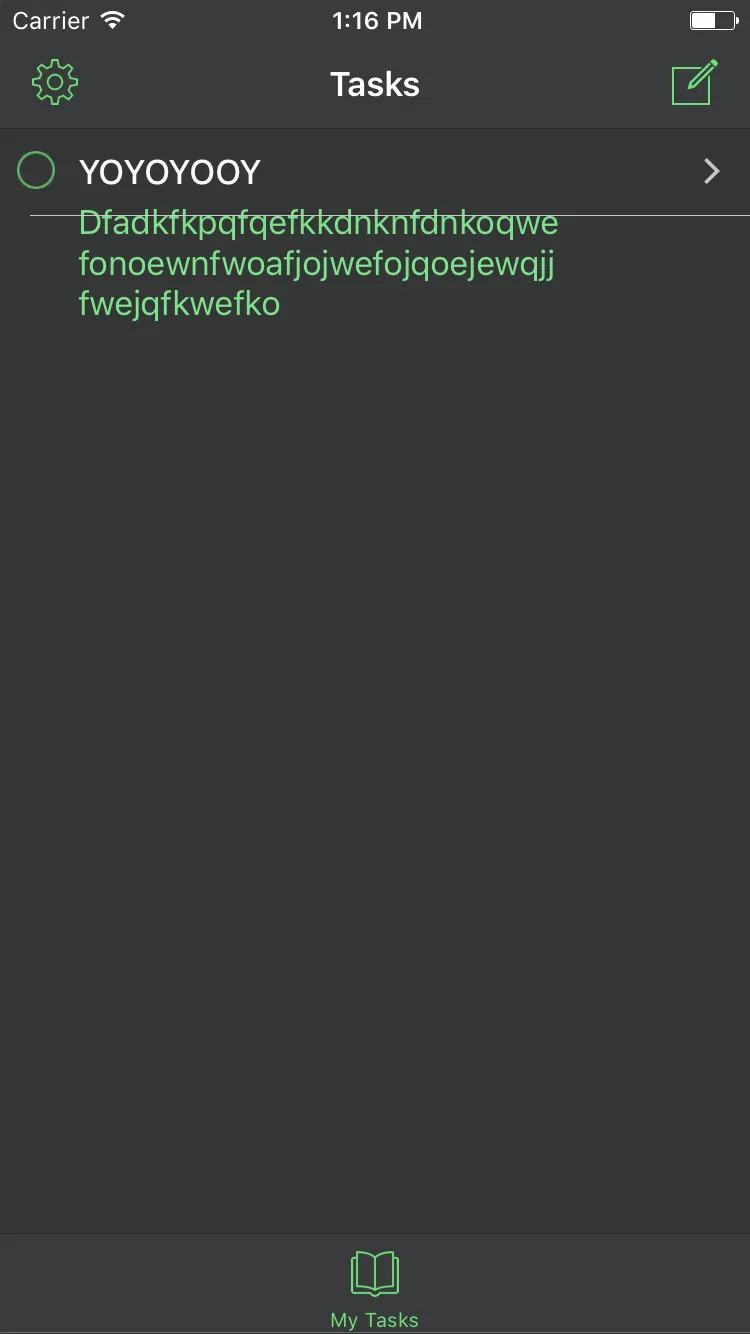
因此,对于这个图像,每个单元格只会处于默认和未选择状态。只有白色文本可见。
单元格单击状态。调整大小以适应我的“let selectedCellHeight: CGFloat = 88.0”常量。不管其中有多少绿色文本,都需要自动调整大小。
这是我的表格视图和视图控制器的完整代码。
import UIKit

class TasksViewController: UIViewController, UITableViewDelegate, UITableViewDataSource {

@IBOutlet weak var tblTasks: UITableView!

//For persisting data
let defaults = UserDefaults.standard


override func viewDidLoad() {
    super.viewDidLoad()


    self.tblTasks.backgroundColor = UIColor(red: 64/255.0, green: 67/255.0, blue: 68/255.0, alpha: 0)


    self.tblTasks.reloadData()
    self.tblTasks.register(UINib(nibName: "WhiteTaskTableViewCell", bundle: nil), forCellReuseIdentifier: "nameCell")
    tblTasks.tableFooterView = UIView()

    let darkModeColor = UIColor(red: 52/255.0, green: 55/255.0, blue: 55/255.0, alpha: 1.0)
    view.backgroundColor = darkModeColor


    tblTasks.dataSource = self;

    // Do any additional setup after loading the view.
}


override func viewWillAppear(_ animated: Bool) {
    self.tblTasks.reloadData()
}


override func didReceiveMemoryWarning() {
    super.didReceiveMemoryWarning()
    // Dispose of any resources that can be recreated.
}


func tableView(_ tableView: UITableView, numberOfRowsInSection section: Int) -> Int{
    return taskMgr.tasks.count

}


//Define how our cells look - 2 lines a heading and a subtitle
func tableView(_ tableView: UITableView, cellForRowAt indexPath: IndexPath) -> UITableViewCell{


    let identifier = "nameCell"
    var cell: WhiteTaskTableViewCell! = tableView.dequeueReusableCell(withIdentifier: identifier) as? WhiteTaskTableViewCell

    if cell == nil {
        tableView.register(UINib(nibName: "WhiteTaskTableViewCell", bundle: nil), forCellReuseIdentifier: identifier)
        cell = tableView.dequeueReusableCell(withIdentifier: identifier) as? WhiteTaskTableViewCell
    }


    //        Assign the contents of our var "items" to the textLabel of each cell
    //        cell.textLabel!.text = taskMgr.tasks[indexPath.row].name
    //        cell.detailTextLabel!.text = taskMgr.tasks[indexPath.row].desc

    cell.TaskNameLabel.text = taskMgr.tasks[indexPath.row].name
    cell.NotesLabel.text = taskMgr.tasks[indexPath.row].note

    cell.selectionStyle = .none


    return cell

}


func numberOfSections(in tableView: UITableView) -> Int {
        // #warning Incomplete implementation, return the number of sections
        return 1
}


   func tableView(_ willDisplayforRowAttableView: UITableView, willDisplay cell: UITableViewCell, forRowAt indexPath: IndexPath) {
    cell.backgroundColor = UIColor(red: 64/255.0, green: 67/255.0, blue: 68/255.0, alpha: 0)
}


func tableView(_ tableView: UITableView, commit editingStyle: UITableViewCellEditingStyle, forRowAt indexPath: IndexPath) {
    if (editingStyle == UITableViewCellEditingStyle.delete) {
        // handle delete (by removing the data from your array and updating the tableview)

        taskMgr.removeTask(indexPath.row)
        tblTasks.reloadData()
    }
}


   // EXPAND CELL ON CLICK


// Global Variables/Constants

var selectedCellIndexPath: NSIndexPath?

let selectedCellHeight: CGFloat = 88.0
let unselectedCellHeight: CGFloat = 44.0

 func tableView(_ tableView: UITableView, heightForRowAt indexPath: IndexPath) -> CGFloat {

    self.tblTasks.rowHeight = UITableViewAutomaticDimension

    if selectedCellIndexPath == indexPath as NSIndexPath?  {
        return selectedCellHeight
    }
    return unselectedCellHeight
}


 func tableView(_ tableView: UITableView, didSelectRowAt indexPath: IndexPath) {
    if selectedCellIndexPath != nil && selectedCellIndexPath == indexPath as NSIndexPath? {
        selectedCellIndexPath = nil
    } else {
        selectedCellIndexPath = indexPath as NSIndexPath?
    }

    tableView.beginUpdates()
    tableView.endUpdates()

    if selectedCellIndexPath != nil {
        // This ensures, that the cell is fully visible once expanded
        tableView.scrollToRow(at: indexPath as IndexPath, at: .none, animated: true)
    }
}

/*
// MARK: - Navigation

// In a storyboard-based application, you will often want to do a little preparation before navigation
override func prepare(for segue: UIStoryboardSegue, sender: Any?) {
    // Get the new view controller using segue.destinationViewController.
    // Pass the selected object to the new view controller.
}
*/


}
我乐意接受任何帮助和见解。非常感谢。