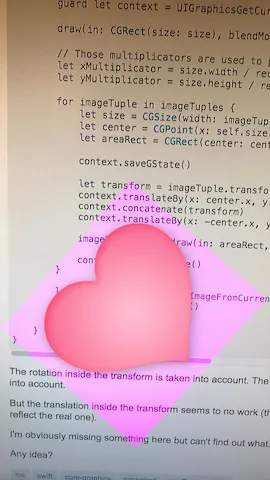
我正在尝试复制Instagram的一个功能,即在您的照片上添加贴纸(其他图片),然后保存。
因此,在包含我的照片的UIImageView上,我将贴纸(另一个UIImageView)作为子视图添加到其中,并将其定位在父UIImageView的中心位置。
要移动贴纸,我使用CGAffineTransform(不是移动UIImageView的中心)。我还应用了旋转和缩放的CGAffineTransform来旋转和缩放贴纸。
要保存带有贴纸的图片,我使用以下CGContext:
    extension UIImage {
        func merge2(in rect: CGRect, with imageTuples: [(image: UIImage, viewSize: CGSize, transform: CGAffineTransform)]) -> UIImage? {
            UIGraphicsBeginImageContextWithOptions(size, false, UIScreen.main.scale)

            guard let context = UIGraphicsGetCurrentContext() else { return nil }

            draw(in: CGRect(size: size), blendMode: .normal, alpha: 1)

            // Those multiplicators are used to properly scale the transform of each sub image as the parent image (self) might be bigger than its view bounds, same goes for the subviews
            let xMultiplicator = size.width / rect.width
            let yMultiplicator = size.height / rect.height

            for imageTuple in imageTuples {
                let size = CGSize(width: imageTuple.viewSize.width * xMultiplicator, height: imageTuple.viewSize.height * yMultiplicator)
                let center = CGPoint(x: self.size.width / 2, y: self.size.height / 2)
                let areaRect = CGRect(center: center, size: size)

                context.saveGState()

                let transform = imageTuple.transform
                context.translateBy(x: center.x, y: center.y)
                context.concatenate(transform)
                context.translateBy(x: -center.x, y: -center.y)

// EDITED CODE
                context.setBlendMode(.color)
                UIColor.subPink.setFill()
                context.fill(areaRect)
// EDITED CODE
                imageTuple.image.draw(in: areaRect, blendMode: .normal, alpha: 1)

                context.restoreGState()
            }

            let image = UIGraphicsGetImageFromCurrentImageContext()
            UIGraphicsEndImageContext()

            return image
        }
    }
在变换中考虑旋转。
在变换中考虑缩放。
但是,变换中的平移似乎不起作用(存在微小的平移,但它并不能反映真实的平移)。
很明显我漏掉了什么,但找不到是什么。
有什么想法吗?
编辑:
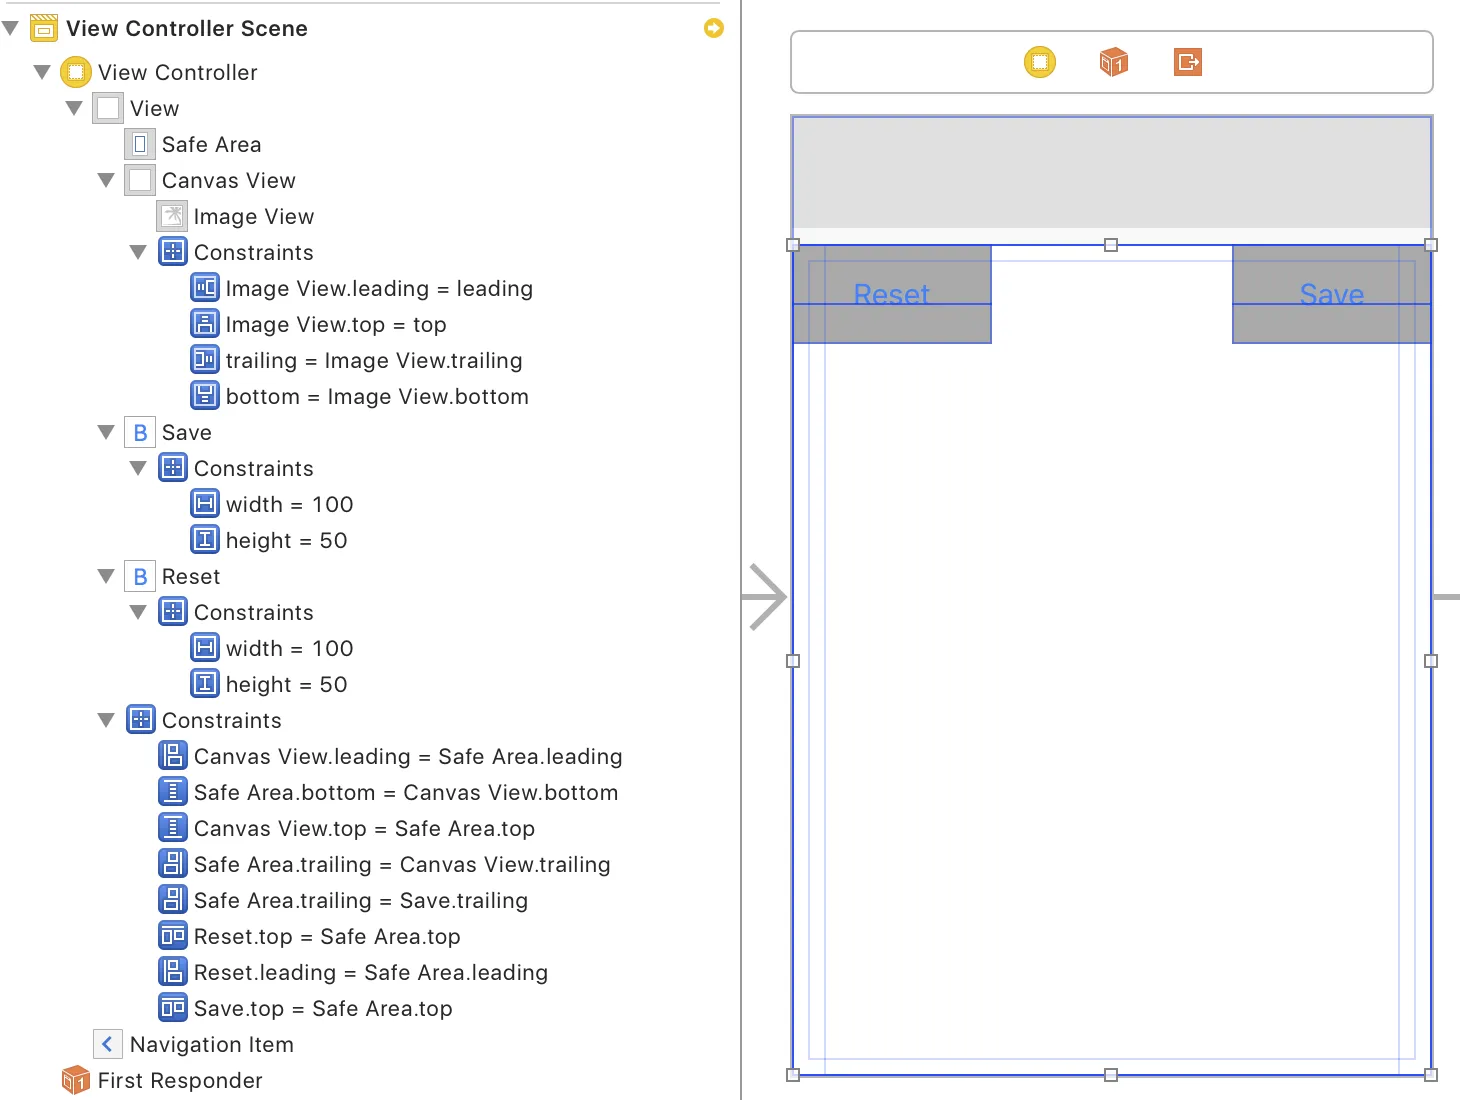
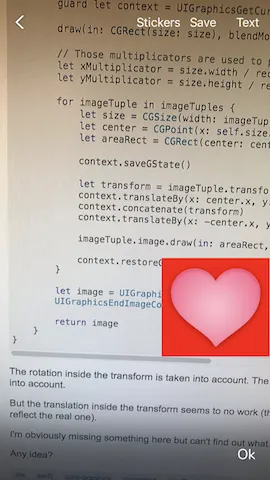
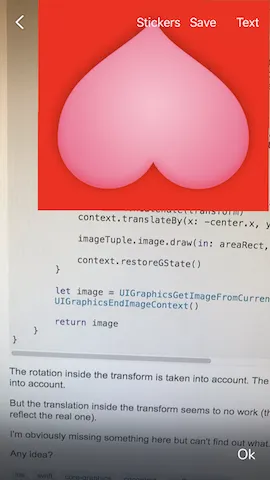
这里有一些应用程序中贴纸的截图以及库中保存的最终图像。
如您所见,最终图像的旋转和比例(宽度/高度比)与应用程序中的图像相同。
包含UIImage的UIImageView具有与其图像相同的比例。
在绘制贴纸时,我还添加了一个背景,以清楚地看到实际图像的边界。
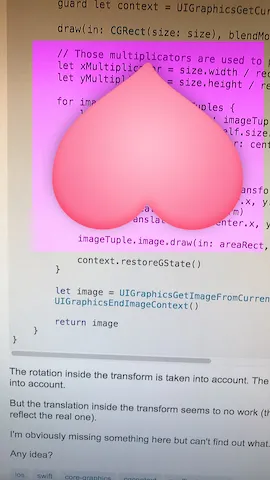
没有旋转或缩放:
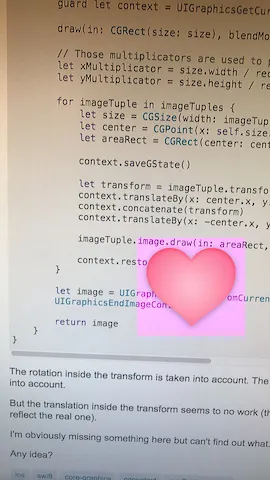
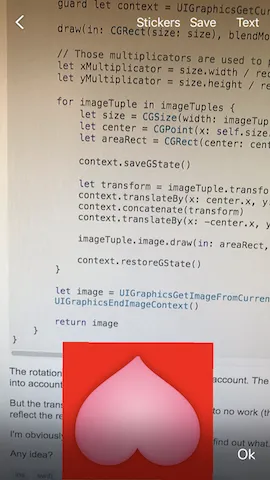
旋转和缩放:
编辑2:
这里是一个测试项目,重现了上述描述的行为。