我想要移除标准 Android 4.0+ 操作栏左侧图标周围的填充。我正在使用以下方法设置图标:
getActionBar().setIcon(getResources().getDrawable(R.drawable.ic_action_myapp));
我希望图标垂直填充空间,同时触及顶部和底部,类似于SoundCloud应用程序的效果:

我想要移除标准 Android 4.0+ 操作栏左侧图标周围的填充。我正在使用以下方法设置图标:
getActionBar().setIcon(getResources().getDrawable(R.drawable.ic_action_myapp));
我希望图标垂直填充空间,同时触及顶部和底部,类似于SoundCloud应用程序的效果:
com.android.internal.widget.ActionBarView.java中。特别是内部类ActionBarView$HomeView的onLayout()方法,部分报告如下(1433-1478行): @Override
protected void onLayout(boolean changed, int l, int t, int r, int b) {
...
final LayoutParams iconLp = (LayoutParams) mIconView.getLayoutParams();
final int iconHeight = mIconView.getMeasuredHeight();
final int iconWidth = mIconView.getMeasuredWidth();
final int hCenter = (r - l) / 2;
final int iconTop = Math.max(iconLp.topMargin, vCenter - iconHeight / 2);
final int iconBottom = iconTop + iconHeight;
final int iconLeft;
final int iconRight;
int marginStart = iconLp.getMarginStart();
final int delta = Math.max(marginStart, hCenter - iconWidth / 2);
if (isLayoutRtl) {
iconRight = width - upOffset - delta;
iconLeft = iconRight - iconWidth;
} else {
iconLeft = upOffset + delta;
iconRight = iconLeft + iconWidth;
}
mIconView.layout(iconLeft, iconTop, iconRight, iconBottom);
}
res/layout/action_bar_home.xml中:<view xmlns:android="http://schemas.android.com/apk/res/android"
class="com.android.internal.widget.ActionBarView$HomeView"
android:layout_width="wrap_content"
android:layout_height="match_parent">
<ImageView android:id="@android:id/up"
android:src="?android:attr/homeAsUpIndicator"
android:layout_gravity="center_vertical|start"
android:visibility="gone"
android:layout_width="wrap_content"
android:layout_height="wrap_content"
android:layout_marginEnd="-8dip" />
<ImageView android:id="@android:id/home"
android:layout_width="wrap_content"
android:layout_height="wrap_content"
android:layout_marginEnd="8dip"
android:layout_marginTop="@android:dimen/action_bar_icon_vertical_padding"
android:layout_marginBottom="@android:dimen/action_bar_icon_vertical_padding"
android:layout_gravity="center"
android:adjustViewBounds="true"
android:scaleType="fitCenter" />
</view>
android.R.id.home的Imageview中。上述提到的onLayout()方法考虑了在布局中定义的ImageView边距,这些边距不能通过主题/样式覆盖设置,因为它们使用值@android:dimen/action_bar_icon_vertical_padding。ImageView并将其顶部和底部边距设置为0。就像这样:ImageView icon = (ImageView) findViewById(android.R.id.home);
FrameLayout.LayoutParams iconLp = (FrameLayout.LayoutParams) icon.getLayoutParams();
iconLp.topMargin = iconLp.bottomMargin = 0;
icon.setLayoutParams( iconLp );
编辑:我刚意识到我没有讲述如何去除左边填充。下面是解决方案。
操作栏的左填充受到操作栏图标的Navigating Up行为的影响。当禁用它(通过ActionBar.setDisplayHomeAsUpEnabled(false))时,左/上指示器消失了,但也使用了左填充。一个简单的解决方法:
ActionBar.setDisplayHomeAsUpEnabled(true)启用操作栏向上导航以考虑指示器视图在布局过程中res/values-v14/styles.xml中强制使用作为向上指示器的可绘制对象为null例如:
<style name="AppBaseTheme" parent="android:Theme.Holo.Light.DarkActionBar">
    <!-- API 14 theme customizations can go here. -->
    <item name="android:homeAsUpIndicator">@null</item>
</style>
我发现另一个解决方案(参考 appcompat-v7 库)可以改变 toolbarStyle,代码如下:
<item name="toolbarStyle">@style/Widget.Toolbar</item>


<style name="Widget.Toolbar" parent="@style/Widget.AppCompat.Toolbar">
    <item name="contentInsetStart">0dp</item>
</style>
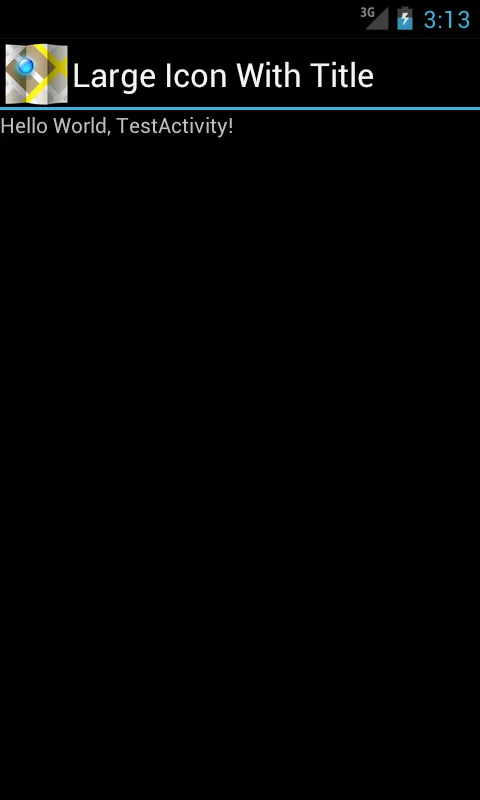
使用自定义布局来定制 ActionBar
public class TestActivity extends Activity {

    /** Called when the activity is first created. */
    @Override
    public void onCreate(Bundle savedInstanceState) {
        super.onCreate(savedInstanceState);

        final ActionBar actionBar = getActionBar();
        actionBar.setCustomView(R.layout.actionbar_custom_view_home);
        actionBar.setDisplayShowTitleEnabled(false);
        actionBar.setDisplayShowCustomEnabled(true);
        actionBar.setDisplayUseLogoEnabled(false);
        actionBar.setDisplayShowHomeEnabled(false);

        setContentView(R.layout.main);

    }

    public void Click(View v) {
        if (v.getId() == R.id.imageIcon) {
            Log.e("click on-->  ", "Action icon");
        }
    }
}
actionbar_custom_view_home.xml
<LinearLayout xmlns:android="http://schemas.android.com/apk/res/android"
    android:id="@+id/linearLayout1"
    android:layout_width="fill_parent"
    android:layout_height="fill_parent"
    android:gravity="center" >

    <ImageView
        android:id="@+id/imageIcon"
        android:onClick="Click"
        android:layout_width="wrap_content"
        android:layout_height="match_parent"
        android:src="@drawable/ic_launcher" />

    <TextView
        android:id="@+id/textView1"
        android:layout_width="match_parent"
        android:layout_height="wrap_content"
        android:text="Large Icon With Title"
        android:textAppearance="?android:attr/textAppearanceLarge" />

</LinearLayout>
在Android 4.0及以上版本中去除操作栏左侧图标周围的填充中,增强了parrzhang的回答。
 private void adjustHomeButtonLayout(){
        ImageView view = (ImageView)findViewById(android.R.id.home);
        if(view.getParent() instanceof ViewGroup){
            ViewGroup viewGroup = (ViewGroup)view.getParent();
            View upView = viewGroup.getChildAt(0);
            if(upView != null && upView.getLayoutParams() instanceof FrameLayout.LayoutParams){
                FrameLayout.LayoutParams layoutParams = (FrameLayout.LayoutParams) upView.getLayoutParams();
                layoutParams.width = 20;// **can give your own width**
                upView.setLayoutParams(layoutParams);
            }
        }
    }
要设置ActionBar的高度,您可以创建一个新的主题,如下所示:
<?xml version="1.0" encoding="utf-8"?>
<resources>
    <style name="Theme.BarSize" parent="Theme.Sherlock.Light.DarkActionBar">
        <item name="actionBarSize">48dip</item>
        <item name="android:actionBarSize">48dip</item>
    </style>
 </resources>
并将此主题设置为您的活动:
android:theme="@style/Theme.BarSize"
现在,将图标的高度设置为"match_parent"。
这将删除顶部和底部填充。
现在,左侧的箭头是内置到框架中的,因此您有两个解决方法:
使用ActionBarSherlock。它使用自己的drwables和资源,因此您可以将箭头图标修改为一个空的png,这样您的向上图标就会移动到极左边。
向上/返回图标来自于:
public boolean onOptionsItemSelected(MenuItem item)
               {
          switch (item.getItemId())
                {
                case android.R.id.home:
                            NavUtils.navigateUpFromSameTask(this);
              return true;
                }
               }
因此,您可以创建另一个操作栏选项,它具有用于返回上一个活动的意图,然后将该图标放置在操作栏中,而不是使用此选项作为向上按钮。
虽然这样做需要更多的工作,但这可以解决问题。
希望能对您有所帮助.. :)
你可以在actionbarview中定义homeview,像这样:
<view xmlns:android="http://schemas.android.com/apk/res/android"
  class="com.android.internal.widget.ActionBarView$HomeView"
  android:layout_width="wrap_content"
  android:layout_height="match_parent">
<ImageView android:id="@android:id/up"
           android:src="?android:attr/homeAsUpIndicator"
           android:layout_gravity="center_vertical|start"
           android:visibility="gone"
           android:layout_width="wrap_content"
           android:layout_height="wrap_content"
           android:layout_marginEnd="-8dip" />
<ImageView android:id="@android:id/home"
           android:layout_width="wrap_content"
           android:layout_height="wrap_content"
           android:layout_marginEnd="8dip"
           android:layout_marginTop="@android:dimen/action_bar_icon_vertical_padding"
           android:layout_marginBottom="@android:dimen/action_bar_icon_vertical_padding"
           android:layout_gravity="center"
           android:adjustViewBounds="true"
           android:scaleType="fitCenter" />
但是你不能通过findViewById(android.R.id.up)获取upView。
所以你可以获取homeView并获取其父视图,将upView的宽度设置为0。
    ImageView view = (ImageView)findViewById(android.R.id.home);
    if(view.getParent() instanceof ViewGroup){
        ViewGroup viewGroup = (ViewGroup)view.getParent();
        View upView = viewGroup.getChildAt(0);
        FrameLayout.LayoutParams layoutParams = (FrameLayout.LayoutParams) upView.getLayoutParams();
        layoutParams.width = 0;
        upView.setLayoutParams(layoutParams);
    }