我使用SPM成功导入了自定义字体,参考了这个Stack Overflow的答案:https://dev59.com/amcs5IYBdhLWcg3wXSuU#36871032
以下是我的操作步骤。首先创建你的包并添加字体文件。这是我的Package.swift文件:
import PackageDescription
let package = Package(
name: "MyFonts",
products: [
.library(
name: "MyFonts",
targets: ["MyFonts"]),
],
dependencies: [
],
targets: [
.target(
name: "MyFonts",
dependencies: [],
resources: [.process("Fonts")]),
.testTarget(
name: "MyFontsTests",
dependencies: ["MyFonts"]),
]
)
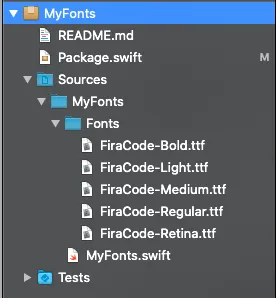
这是我的文件夹结构。我把所有字体都放在一个名为 Fonts 的文件夹中。
在 MyFonts.swift 中,我执行以下操作:
import Foundation // This is important remember to import Foundation

public let fontBundle = Bundle.module
这使我可以在包外访问Bundle。
接下来,我将该包添加到我的项目中。这是一个带有AppDelegate的SwiftUI项目。
- 导入MyFonts
- 在
didFinishLaunchingWithOptions中检查字体文件是否可用(可选)
- 使用扩展将字体添加到UIFont中。
- 打印字体以检查它们是否已安装(可选)
因此,这是我的AppDelegate:
import UIKit
import MyFonts
@UIApplicationMain
class AppDelegate: UIResponder, UIApplicationDelegate {
func application(_ application: UIApplication, didFinishLaunchingWithOptions launchOptions: [UIApplication.LaunchOptionsKey: Any]?) -> Bool {
if let files = try? FileManager.default.contentsOfDirectory(atPath: fontBundle.bundlePath ){
for file in files {
print(file)
}
}
_ = UIFont.registerFont(bundle: fontBundle, fontName: "FiraCode-Medium", fontExtension: "ttf")
_ = UIFont.registerFont(bundle: fontBundle, fontName: "FiraCode-Bold", fontExtension: "ttf")
_ = UIFont.registerFont(bundle: fontBundle, fontName: "FiraCode-Light", fontExtension: "ttf")
_ = UIFont.registerFont(bundle: fontBundle, fontName: "FiraCode-Regular", fontExtension: "ttf")
_ = UIFont.registerFont(bundle: fontBundle, fontName: "FiraCode-Retina", fontExtension: "ttf")
for family in UIFont.familyNames.sorted() {
let names = UIFont.fontNames(forFamilyName: family)
print("Family: \(family) Font names: \(names)")
}
return true
}
func application(_ application: UIApplication, configurationForConnecting connectingSceneSession: UISceneSession, options: UIScene.ConnectionOptions) -> UISceneConfiguration {
return UISceneConfiguration(name: "Default Configuration", sessionRole: connectingSceneSession.role)
}
func application(_ application: UIApplication, didDiscardSceneSessions sceneSessions: Set<UISceneSession>) {}
}
extension UIFont {
static func registerFont(bundle: Bundle, fontName: String, fontExtension: String) -> Bool {
guard let fontURL = bundle.url(forResource: fontName, withExtension: fontExtension) else {
fatalError("Couldn't find font \(fontName)")
}
guard let fontDataProvider = CGDataProvider(url: fontURL as CFURL) else {
fatalError("Couldn't load data from the font \(fontName)")
}
guard let font = CGFont(fontDataProvider) else {
fatalError("Couldn't create font from data")
}
var error: Unmanaged<CFError>?
let success = CTFontManagerRegisterGraphicsFont(font, &error)
guard success else {
print("Error registering font: maybe it was already registered.")
return false
}
return true
}
}
然后在你的ContentView中,你可以像这样做:
import SwiftUI

struct ContentView: View {
    var body: some View {
        VStack(spacing: 20) {
            Text("Hello San Francisco")
            Text("Hello FiraCode Medium").font(Font.custom("FiraCode-Medium", size: 16))
            Text("Hello FiraCode Bold").font(Font.custom("FiraCode-Bold", size: 16))
            Text("Hello FiraCode Light").font(Font.custom("FiraCode-Light", size: 16))
            Text("Hello FiraCode Regular").font(Font.custom("FiraCode-Regular", size: 16))
            Text("Hello FiraCode Retina").font(Font.custom("FiraCode-Retina", size: 16))
        }
    }
}
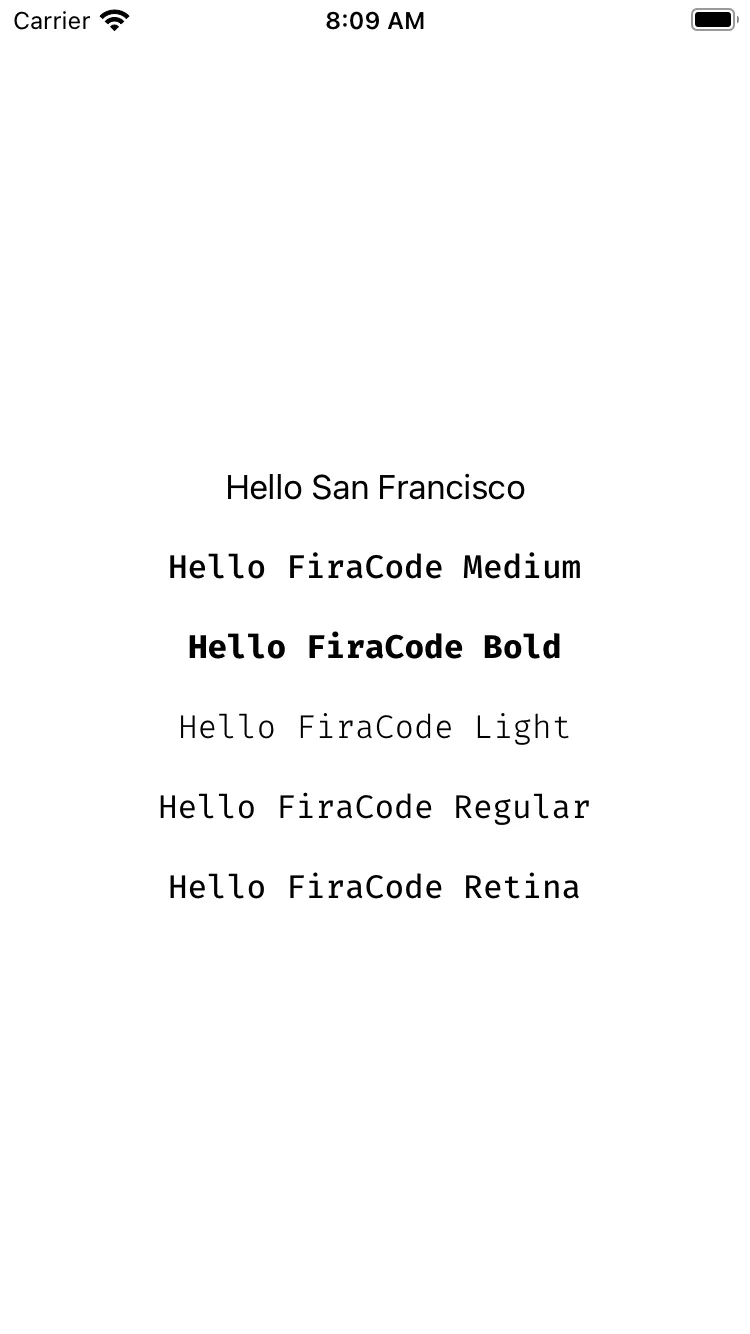
这将产生以下结果:
注意事项
我没有在完全使用SwiftUI的应用程序中尝试过这个方法,但是如果您没有一个AppDelegate,您可以按照此处所示的教程添加一个。
显然,在fontBundle中打印文件和已安装的字体是可选的。它们只是用于调试和确保您拥有正确的字体名称,文件名可能与您用于显示字体的字体名称相差很大。请参阅我的SO帖子关于添加自定义字体:
更新
我想知道是否可能创建一个包含在包中的函数,并调用该函数来加载字体。显然是可以的。
我将MyFonts.swift更新为以下内容:
import Foundation
import UIKit

public func registerFonts() {
    _ = UIFont.registerFont(bundle: .module, fontName: "FiraCode-Medium", fontExtension: "ttf")
    _ = UIFont.registerFont(bundle: .module, fontName: "FiraCode-Bold", fontExtension: "ttf")
    _ = UIFont.registerFont(bundle: .module, fontName: "FiraCode-Light", fontExtension: "ttf")
    _ = UIFont.registerFont(bundle: .module, fontName: "FiraCode-Regular", fontExtension: "ttf")
    _ = UIFont.registerFont(bundle: .module, fontName: "FiraCode-Retina", fontExtension: "ttf")
}

extension UIFont {
    static func registerFont(bundle: Bundle, fontName: String, fontExtension: String) -> Bool {

        guard let fontURL = bundle.url(forResource: fontName, withExtension: fontExtension) else {
            fatalError("Couldn't find font \(fontName)")
        }

        guard let fontDataProvider = CGDataProvider(url: fontURL as CFURL) else {
            fatalError("Couldn't load data from the font \(fontName)")
        }

        guard let font = CGFont(fontDataProvider) else {
            fatalError("Couldn't create font from data")
        }

        var error: Unmanaged<CFError>?
        let success = CTFontManagerRegisterGraphicsFont(font, &error)
        guard success else {
            print("Error registering font: maybe it was already registered.")
            return false
        }

        return true
    }
}
这意味着我可以从AppDelegate中移除扩展名,并且不必像之前那样在AppDelegate中注册每个字体,只需调用
registerFonts()即可。因此,我的
didFinishLaunchingWithOptions现在看起来像这样:
func application(_ application: UIApplication, didFinishLaunchingWithOptions launchOptions: [UIApplication.LaunchOptionsKey: Any]?) -> Bool {
registerFonts()
return true
}
请记住,您仍然需要导入您的包。