Python 3:我试图通过遍历np.array中的所有像素来查找图像中所有绿色像素,但无法解决索引错误。

4

目前我的代码加载图像成功,我认为这与问题无关。

接下来,我将会把彩色图像转换成一个名为rgb的np.array数组。

    # convert image into array
    rgb = np.array(img)
    red = rgb[:,:,0]
    green = rgb[:,:,1]
    blue = rgb[:,:,2]

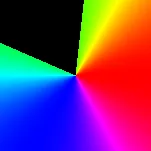
为了确保我对这个数组的理解没有问题,以防这可能是问题的根源,该数组是这样的:rgb[x坐标,y坐标,颜色通道],它保存了红、绿或蓝色的0-255之间的值。
然后,我的想法是编写一个嵌套的for循环来遍历我的图像中的所有像素(620px,400px),并根据绿色与蓝色和红色的比率对它们进行排序,以便单独识别出更绿的像素,并将所有其他像素设置为黑色或0。
for i in range(xsize):
for j in range(ysize):
    color = rgb[i,j]  <-- Index error occurs here
    if(color[0] > 128):
        if(color[1] < 128):
            if(color[2] > 128):
                rgb[i,j] = [0,0,0]

当我尝试运行时,出现了以下错误:

IndexError: index 400 超出了大小为 400 的轴 0 的范围

我原以为可能是我给 i 和 j 的限制有关,因此我尝试仅对图像的小部分进行排序,但仍然收到相同的错误。此时,我甚至不知道错误的根源,更不用说解决方法了。


numpy 中,行坐标 y 先出现。请交换您的索引。 - Mark Setchell
@MarkSetchell 非常感谢!这解决了我的问题。 - WhiteTomatoes
很酷 - 不客气。祝你的项目好运!顺便说一下,如果你想找到绿色像素,最好将图像转换为HSV颜色空间https://en.wikipedia.org/wiki/HSL_and_HSV,并查找色调为110-130度的位置。 - Mark Setchell
如果您正在使用 PIL / Pillow,那么我的建议是 im = Image.open("image.png").convert("HSL") - Mark Setchell
1个回答

11

直接回答您的问题,numpy 数组中首先给出 y 轴,其次是 x 轴,因此请交换索引。


间接地说,您会发现在 Python 中使用 for 循环非常慢,通常最好使用 numpy 向量化操作。另外,在HSV 颜色空间中更容易找到绿色的不同阴影。

让我们从 HSL 颜色轮开始:

enter image description here

假设您想将所有绿色变为黑色。因此,在维基百科页面上,与绿色对应的 Hue 值为 120 度,这意味着您可以这样做:

#!/usr/local/bin/python3
import numpy as np
from PIL import Image

# Open image and make RGB and HSV versions
RGBim = Image.open("image.png").convert('RGB')
HSVim = RGBim.convert('HSV')

# Make numpy versions
RGBna = np.array(RGBim)
HSVna = np.array(HSVim)

# Extract Hue
H = HSVna[:,:,0]

# Find all green pixels, i.e. where 100 < Hue < 140
lo,hi = 100,140
# Rescale to 0-255, rather than 0-360 because we are using uint8
lo = int((lo * 255) / 360)
hi = int((hi * 255) / 360)
green = np.where((H>lo) & (H<hi))

# Make all green pixels black in original image
RGBna[green] = [0,0,0]

count = green[0].size
print("Pixels matched: {}".format(count))
Image.fromarray(RGBna).save('result.png')

这就是结果:

输入图像描述


这是稍微改进过的版本,保留了alpha/透明度,并匹配了红色像素,更有趣:

#!/usr/local/bin/python3
import numpy as np
from PIL import Image

# Open image and make RGB and HSV versions
im = Image.open("image.png")

# Save Alpha if present, then remove
if 'A' in im.getbands():
    savedAlpha = im.getchannel('A')
    im = im.convert('RGB')

# Make HSV version
HSVim = im.convert('HSV')

# Make numpy versions
RGBna = np.array(im)
HSVna = np.array(HSVim)

# Extract Hue
H = HSVna[:,:,0]

# Find all red pixels, i.e. where 340 < Hue < 20
lo,hi =  340,20
# Rescale to 0-255, rather than 0-360 because we are using uint8
lo = int((lo * 255) / 360)
hi = int((hi * 255) / 360)
red = np.where((H>lo) | (H<hi))

# Make all red pixels black in original image
RGBna[red] = [0,0,0]

count = red[0].size
print("Pixels matched: {}".format(count))

result=Image.fromarray(RGBna)

# Replace Alpha if originally present
if savedAlpha is not None:
    result.putalpha(savedAlpha)

result.save('result.png')

关键词: 图像处理, PIL, Pillow, 色相饱和度, HSV, HSL, 颜色范围, range, prime.

输入图像描述


网页内容由stack overflow 提供, 点击上面的
可以查看英文原文,
原文链接