我正在开发一款 Android 应用程序,使用前置摄像头为用户模拟镜子。我需要应用程序每隔 5 秒自动且无需用户交互地拍摄一张位图图片,之后再与另一个位图图片合并。
对我来说比较困难的部分是:如何拍照并将其作为位图获取?
我尝试了几种解决方案,但还没有成功。
这个问题被标记为重复,但是该问题是手动执行而不是自动执行。
package com.mreprogramming.test;

import java.io.ByteArrayInputStream;
import java.io.ByteArrayOutputStream;
import java.io.File;
import java.io.FileInputStream;
import java.io.FileNotFoundException;
import java.io.FileOutputStream;
import java.io.IOException;
import android.view.SurfaceHolder;
import android.view.SurfaceView;
import android.view.View;
import android.view.View.OnClickListener;
import android.widget.Button;
import android.widget.ImageView;
import android.widget.RelativeLayout;
import android.widget.Toast;
import android.app.Activity;
import android.content.Context;
import android.content.SharedPreferences;
import android.graphics.Bitmap;
import android.graphics.BitmapFactory;
import android.graphics.Bitmap.CompressFormat;
import android.hardware.Camera;
import android.hardware.Camera.PictureCallback;
import android.os.Bundle;
import android.os.Environment;
import android.preference.PreferenceManager;


public class CameraActivity extends Activity implements SurfaceHolder.Callback{

    protected static final int CAPTURE_IMAGE_ACTIVITY_REQUEST_CODE = 0;
    private SurfaceView SurView;
    private SurfaceHolder camHolder;
    private boolean previewRunning;
    private Button button1;
    final Context context = this;
    public static Camera camera = null;
    private ImageView camera_image;
    private Bitmap bmp,bmp1;
    private ByteArrayOutputStream bos;
    private BitmapFactory.Options options,o,o2;
    private FileInputStream fis;
    ByteArrayInputStream fis2;
    private FileOutputStream fos;
    private File dir_image2,dir_image;
    private RelativeLayout CamView;

    @SuppressWarnings("deprecation")
    @Override
    protected void onCreate(Bundle savedInstanceState) {
    super.onCreate(savedInstanceState);
    setContentView(R.layout.camera);


    CamView = (RelativeLayout) findViewById(R.id.camview);

    SurView = (SurfaceView)findViewById(R.id.sview);
    camHolder = SurView.getHolder();
    camHolder.addCallback(this);
    camHolder.setType(SurfaceHolder.SURFACE_TYPE_PUSH_BUFFERS);
    button1 = (Button)findViewById(R.id.button_1);


    camera_image = (ImageView) findViewById(R.id.camera_image);


    button1.setOnClickListener(new OnClickListener()
    {

    public void onClick(View v)
    {

        button1.setClickable(false);
        button1.setVisibility(View.INVISIBLE);  //<-----HIDE HERE
        camera.takePicture(null, null, mPicture);

    }

    });


    }


    @Override
    public void surfaceChanged(SurfaceHolder holder, int format, int width,
        int height) {
    if(previewRunning){
        camera.stopPreview();
    }
    Camera.Parameters camParams = camera.getParameters();
    Camera.Size size = camParams.getSupportedPreviewSizes().get(0);
    camParams.setPreviewSize(size.width, size.height);
    camera.setParameters(camParams);
    try{
        camera.setPreviewDisplay(holder);
        camera.startPreview();
        previewRunning=true;
    }catch(IOException e){
        e.printStackTrace();
    }
    }

    public void surfaceCreated(SurfaceHolder holder) {
    try{
        camera=Camera.open();
    }catch(Exception e){
        e.printStackTrace();
        Toast.makeText(getApplicationContext(),"Error",Toast.LENGTH_LONG).show();
        finish();
    }
    }

    @Override
    public void surfaceDestroyed(SurfaceHolder holder) {
    camera.stopPreview();
    camera.release();
    camera=null;
    }


    public void TakeScreenshot(){

        SharedPreferences preferences = PreferenceManager.getDefaultSharedPreferences(context);
        int nu = preferences.getInt("image_num",0);
        nu++;
        SharedPreferences.Editor editor = preferences.edit();
        editor.putInt("image_num",nu);
        editor.commit();
        CamView.setDrawingCacheEnabled(true);
        CamView.buildDrawingCache(true);
        bmp = Bitmap.createBitmap(CamView.getDrawingCache());
        CamView.setDrawingCacheEnabled(false);
                        bos = new ByteArrayOutputStream();
                        bmp.compress(CompressFormat.JPEG, 100, bos);
                        byte[] bitmapdata = bos.toByteArray();
                        fis2 = new ByteArrayInputStream(bitmapdata);

                        String picId=String.valueOf(nu);
                        String myfile="MyImage"+picId+".jpeg";

                        dir_image = new  File(Environment.getExternalStorageDirectory()+
                                File.separator+"My Custom Folder");
                        dir_image.mkdirs();

                        try {
                            File tmpFile = new File(dir_image,myfile);
                            fos = new FileOutputStream(tmpFile);

                             byte[] buf = new byte[1024];
                                int len;
                                while ((len = fis2.read(buf)) > 0) {
                                    fos.write(buf, 0, len);
                                }
                                    fis2.close();
                                    fos.close();

                                    Toast.makeText(getApplicationContext(),
                                            "The file is saved at :/My Custom Folder/"+"MyImage"+picId+".jpeg",Toast.LENGTH_LONG).show();

                                    bmp1 = null;
                                    camera_image.setImageBitmap(bmp1);
                                    camera.startPreview();
                                    button1.setClickable(true);
                                          button1.setVisibility(View.VISIBLE);//<----UNHIDE HER
                        } catch (FileNotFoundException e) {
                            e.printStackTrace();
                        } catch (IOException e) {
                            e.printStackTrace();
                        }


    }

    private PictureCallback mPicture = new PictureCallback() {

        @Override
        public void onPictureTaken(byte[] data, Camera camera) {
            dir_image2 = new  File(Environment.getExternalStorageDirectory()+
                    File.separator+"My Custom Folder");
            dir_image2.mkdirs();


            File tmpFile = new File(dir_image2,"TempImage.jpg");
            try {
                fos = new FileOutputStream(tmpFile);
                fos.write(data);
                fos.close();
            } catch (FileNotFoundException e) {
                Toast.makeText(getApplicationContext(),"Error",Toast.LENGTH_LONG).show();
            } catch (IOException e) {
                Toast.makeText(getApplicationContext(),"Error",Toast.LENGTH_LONG).show();
            }
            options = new BitmapFactory.Options();
            options.inPreferredConfig = Bitmap.Config.ARGB_8888;

                bmp1 = decodeFile(tmpFile);
                bmp=Bitmap.createScaledBitmap(bmp1,CamView.getWidth(), CamView.getHeight(),true);
                camera_image.setImageBitmap(bmp);
                tmpFile.delete();
                TakeScreenshot();

        }
    };


    public Bitmap decodeFile(File f) {
        Bitmap b = null;
        try {
            // Decode image size
            o = new BitmapFactory.Options();
            o.inJustDecodeBounds = true;

            fis = new FileInputStream(f);
            BitmapFactory.decodeStream(fis, null, o);
            fis.close();
            int IMAGE_MAX_SIZE = 1000;
            int scale = 1;
            if (o.outHeight > IMAGE_MAX_SIZE || o.outWidth > IMAGE_MAX_SIZE) {
                scale = (int) Math.pow(
                        2,
                        (int) Math.round(Math.log(IMAGE_MAX_SIZE
                                / (double) Math.max(o.outHeight, o.outWidth))
                                / Math.log(0.5)));
            }

            // Decode with inSampleSize
            o2 = new BitmapFactory.Options();
            o2.inSampleSize = scale;
            fis = new FileInputStream(f);
            b = BitmapFactory.decodeStream(fis, null, o2);
            fis.close();

        } catch (IOException e) {
            e.printStackTrace();
        }

        return b;
    }


}
 <RelativeLayout xmlns:android="http://schemas.android.com/apk/res/android"
xmlns:tools="http://schemas.android.com/tools"
android:layout_width="match_parent"
android:layout_height="match_parent"
android:id="@+id/camview">

<SurfaceView
android:id="@+id/sview"
android:layout_width="match_parent"
android:layout_height="match_parent"
android:layout_alignParentLeft="true"
android:layout_alignParentTop="true" />

<ImageView
    android:id="@+id/camera_image"
    android:layout_width="match_parent"
    android:layout_height="match_parent"
    android:contentDescription="@string/app_name" />

<Button
    android:id="@+id/button_1"
    android:layout_width="20dp"
    android:layout_height="20dp"
    android:layout_alignParentLeft="true"
    android:layout_alignParentTop="true" />
<uses-permission android:name="android.permission.CAMERA" />
<uses-permission android:name="android.permission.WRITE_EXTERNAL_STORAGE"/>
在清单文件中的“CameraActivity”活动标签下添加以下内容,以确保您的活动始终处于横向方向,否则,除非更改代码,否则将会反转图像的长宽比并严重扭曲。
<activity
        android:name="com.mreprogramming.test.CameraActivity"
        android:label="@string/app_name"
        android:screenOrientation="landscape" >   <-------ADD THIS ---!!!!!
        <intent-filter>
            <action android:name="android.intent.action.MAIN" />

            <category android:name="android.intent.category.LAUNCHER" />
        </intent-filter>
    </activity>
<resources>

<!--
    Base application theme, dependent on API level. This theme is replaced
    by AppBaseTheme from res/values-vXX/styles.xml on newer devices.
-->
<style name="AppBaseTheme" parent="android:Theme.NoTitleBar.Fullscreen">
    <!--
        Theme customizations available in newer API levels can go in
        res/values-vXX/styles.xml, while customizations related to
        backward-compatibility can go here.
    -->
</style>

<!-- Application theme. -->
<style name="AppTheme" parent="android:Theme.NoTitleBar.Fullscreen">
    <item name="android:windowFullscreen">true</item>
    <item name="android:windowNoTitle">true</item>
</style>
在我的应用程序中,我希望图像捕获每个布局的视图,而不仅仅是相机拍摄的内容,类似于这样: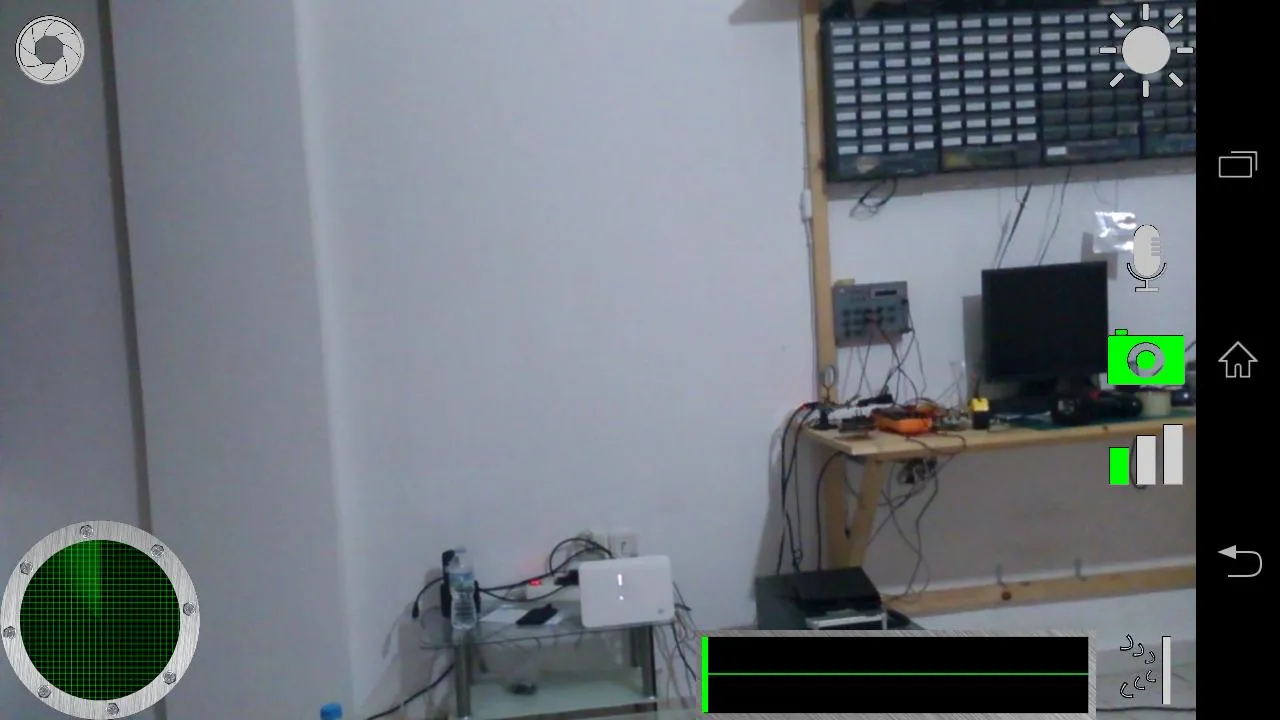
我发布的测试代码隐藏了捕获按钮,以便它不会出现在您的照片中。如果您的应用程序中有更多视图,并且不希望它们显示在照片中,请在捕获时隐藏它们(请参阅代码以了解如何隐藏),或编辑代码。
------>总之,这段代码可以进行基本的捕获和保存jpeg,但如果您想要专业图片,您需要稍微修改一下。祝你好运 :)<------
camera.takePicture(null, null, mPicture);移动到哪里,以便它在无限循环中被调用。此外,您的下载链接似乎已损坏。 - mcExchange我不确定这个解决方案是否符合您的需求。然而,将图片作为位图进行拍摄的基本步骤应该如下:
 private static final int CAMERA_REQUEST = 1888; // field

 private void takePicture(){ //you can call this every 5 seconds using a timer or whenever you want
  Intent cameraIntent = new  Intent(android.provider.MediaStore.ACTION_IMAGE_CAPTURE);
  startActivityForResult(cameraIntent, CAMERA_REQUEST);
}

@Override
protected void onActivityResult(int requestCode, int resultCode, Intent data) {
    super.onActivityResult(requestCode, resultCode, data);
    if (requestCode == CAMERA_REQUEST && resultCode == Activity.RESULT_OK) {
        Bitmap picture = (Bitmap) data.getExtras().get("data");//this is your bitmap image and now you can do whatever you want with this
        imageView.setImageBitmap(picture); //for example I put bmp in an ImageView
    }
}
不要忘记在你的清单文件中设置相机权限:
```<uses-feature android:name="android.hardware.camera" />
camera.takePicture返回JPEG更容易。但它确实教会了我如何使用BitmapFactory.decodeByteArray。 - Ciro Santilli OurBigBook.com你应该首先使用 IMAGE_CAPTURE Intent 拍下照片。
然后,你需要创建一个临时文件来存储照片,以防手机内存不足。
之后,使用 android.provider.MediaStore.Images.Media.getBitmap() 获取 Bitmap,并选择临时文件。
以下是关于如何完成此操作的完整代码示例:
BitmapFactory.decodeByteArray对从camera.takePicture获取的JPEG字节数组进行解码。可能是一种愚蠢的方法,因为它进行了两次编码/解码 :-) - Ciro Santilli OurBigBook.comcamera.takePicture可能没有其他格式可用:https://dev59.com/BmYq5IYBdhLWcg3wwDNA,因此也许`BitmapFactory.decodeByteArray`是正确的方法? - Ciro Santilli OurBigBook.com