这是一项挑战,但我认为我有一个有趣的方法:模式匹配
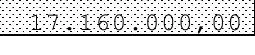
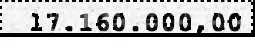
如果你放大看,你会发现背景中的图案只有4个可能的点,一个完整的像素,一个双倍的完整像素和一个带有中等左侧或右侧的双倍像素。所以我从这张价值17.160.000,00的图片中抓取了这4种图案并开始工作。为了方便加载,我直接在使用时获取它们。
img = cv2.imread('C:/Users/***/17.jpg', cv2.IMREAD_GRAYSCALE)
pattern_1 = img[2:5,1:5]
pattern_2 = img[6:9,5:9]
pattern_3 = img[6:9,11:15]
pattern_4 = img[9:12,22:26]
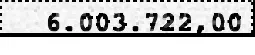
img = cv2.imread('C:/Users/****/6.jpg', cv2.IMREAD_GRAYSCALE)
实际模式匹配
接下来,我们匹配所有的模式和阈值,以找到所有的出现次数。我使用了0.7的阈值,但你可以尝试一些不同的值。这些模式会在两边取走一些像素,并且只匹配左侧的一个像素,因此我们需要填充两次(其中一次需要额外填充),以满足前三个模式。最后一个模式只有一个像素,所以不需要填充。
res_1 = cv2.matchTemplate(img,pattern_1,cv2.TM_CCOEFF_NORMED )
thresh_1 = cv2.threshold(res_1,0.7,1,cv2.THRESH_BINARY)[1].astype(np.uint8)
pat_thresh_1 = np.pad(thresh_1,((1,1),(1,2)),'constant')
pat_thresh_15 = np.pad(thresh_1,((1,1),(2,1)), 'constant')
res_2 = cv2.matchTemplate(img,pattern_2,cv2.TM_CCOEFF_NORMED )
thresh_2 = cv2.threshold(res_2,0.7,1,cv2.THRESH_BINARY)[1].astype(np.uint8)
pat_thresh_2 = np.pad(thresh_2,((1,1),(1,2)),'constant')
pat_thresh_25 = np.pad(thresh_2,((1,1),(2,1)), 'constant')
res_3 = cv2.matchTemplate(img,pattern_3,cv2.TM_CCOEFF_NORMED )
thresh_3 = cv2.threshold(res_3,0.7,1,cv2.THRESH_BINARY)[1].astype(np.uint8)
pat_thresh_3 = np.pad(thresh_3,((1,1),(1,2)),'constant')
pat_thresh_35 = np.pad(thresh_3,((1,1),(2,1)), 'constant')
res_4 = cv2.matchTemplate(img,pattern_4,cv2.TM_CCOEFF_NORMED )
thresh_4 = cv2.threshold(res_4,0.7,1,cv2.THRESH_BINARY)[1].astype(np.uint8)
pat_thresh_4 = np.pad(thresh_4,((1,1),(1,2)),'constant')
编辑图片
现在唯一剩下的事情就是从图像中删除所有匹配项。由于我们有一个主要是白色背景,因此我们将它们设置为255以融入其中。
img[pat_thresh_1==1] = 255
img[pat_thresh_15==1] = 255
img[pat_thresh_2==1] = 255
img[pat_thresh_25==1] = 255
img[pat_thresh_3==1] = 255
img[pat_thresh_35==1] = 255
img[pat_thresh_4==1] = 255
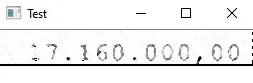
输出
编辑:
请查看Abstracts的答案以改进这个输出和进行Tesseract微调。