我是 Android 的新手。
我想知道是否可以将按钮或其他组件放在 ImageView 上面。我已经尝试将图像设置为 LinearLayout 的背景图像,但当我在横屏和竖屏模式之间切换时,图像的比例会发生改变。
非常感谢。
我是 Android 的新手。
我想知道是否可以将按钮或其他组件放在 ImageView 上面。我已经尝试将图像设置为 LinearLayout 的背景图像,但当我在横屏和竖屏模式之间切换时,图像的比例会发生改变。
非常感谢。
不要将图片设置为背景,因为你无法控制图片的缩放方式。相反,创建一个RelativeLayout,并将ImageView作为其中一个子项,你可以将其他内容(如按钮等)作为RelativeLayout的其他子项放置。
<RelativeLayout ...>
    <ImageView (your image) ...>
    <Button (the button you want) ... />
</RelativeLayout>
<?xml version="1.0" encoding="utf-8"?>
 <RelativeLayout xmlns:android="http://schemas.android.com/apk/res/android"
   android:orientation="vertical"
   android:layout_width="fill_parent"
   android:layout_height="fill_parent">

 <ImageView xmlns:android="http://schemas.android.com/apk/res/android"
    android:id="@+id/imageviewMain"
    android:layout_width="wrap_content"
    android:layout_height="wrap_content"
    android:src="Path "
/>
<Button android:id="@+id/but2"
     android:layout_width="wrap_content"
         android:layout_height="wrap_content" />
</RelativeLayout>
尝试这段代码...
在按钮中给定参数以设置您的按钮位置...
android:layout_margin or android:layout_alignParent
同时提供图片路径...
FrameLayout。使用ConstraintLayout很容易实现。
Button的约束设置为ImageView。Button拖动到ImageView上的任何位置进行定位。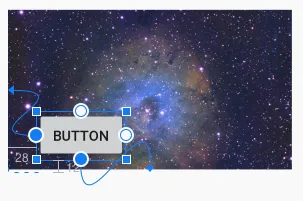
对于使用约束布局的用户:只需使用ImageView并将其约束从四个方向添加到父级,然后再添加其他视图即可。
<?xml version="1.0" encoding="utf-8"?>
<androidx.cardview.widget.CardView
    xmlns:android="http://schemas.android.com/apk/res/android"
    android:layout_width="match_parent"
    android:layout_height="wrap_content"
    android:layout_margin="10dp"
    app:cardCornerRadius="10dp"
    app:cardElevation="10dp"
    app:cardPreventCornerOverlap="true"
    app:contentPadding="5dp"
    xmlns:app="http://schemas.android.com/apk/res-auto">

        <androidx.constraintlayout.widget.ConstraintLayout
            android:layout_width="match_parent"
            android:layout_height="match_parent"
            android:padding="5dp">

            <ImageView
                android:layout_width="match_parent"
                android:layout_height="match_parent"
                android:src="@drawable/food"
                app:layout_constraintBottom_toBottomOf="parent"
                app:layout_constraintEnd_toEndOf="parent"
                app:layout_constraintStart_toStartOf="parent"
                app:layout_constraintTop_toTopOf="parent" />

            <ImageButton
                android:id="@+id/imagebtn_share"
                android:layout_width="wrap_content"
                android:layout_height="wrap_content"
                android:src="@drawable/ic_share_24"
                app:layout_constraintTop_toTopOf="parent"
                android:padding="15dp"
                app:layout_constraintStart_toStartOf="parent" />

            <ImageButton
                android:id="@+id/imagebtn_call"
                android:layout_width="wrap_content"
                android:layout_height="wrap_content"
                android:src="@drawable/ic_call_24"
                android:padding="15dp"
                app:layout_constraintTop_toTopOf="parent"
                app:layout_constraintEnd_toEndOf="parent" />

            <TextView
                android:id="@+id/expdate_textview"
                android:layout_width="wrap_content"
                android:layout_height="wrap_content"
                android:text="@string/test_date"
                android:background="#E2E3E4"
                android:layout_marginBottom="10dp"
                app:layout_constraintEnd_toEndOf="parent"
                app:layout_constraintBottom_toTopOf="@+id/imagebtn_address"
                android:layout_marginEnd="30dp"
                android:padding="5dp"/>

            <TextView
                android:id="@+id/title_textview"
                android:layout_width="wrap_content"
                android:layout_height="wrap_content"
                android:layout_marginStart="5dp"
                android:layout_marginBottom="5dp"
                android:background="#E2E3E4"
                android:padding="5dp"
                android:textSize="18sp"
                android:text="@string/test_foodname"
                app:layout_constraintBottom_toBottomOf="parent"
                app:layout_constraintEnd_toStartOf="@+id/imagebtn_address"
                app:layout_constraintHorizontal_bias="0.0"
                app:layout_constraintStart_toStartOf="parent" />

            <ImageButton
                android:id="@+id/imagebtn_address"
                android:layout_width="wrap_content"
                android:layout_height="wrap_content"
                android:src="@drawable/ic_location_on_24"
                android:padding="15dp"
                app:layout_constraintBottom_toBottomOf="parent"
                app:layout_constraintEnd_toEndOf="parent" />

        </androidx.constraintlayout.widget.ConstraintLayout>
</androidx.cardview.widget.CardView>