Android:如何将父布局底部对齐 + 底部边距

73

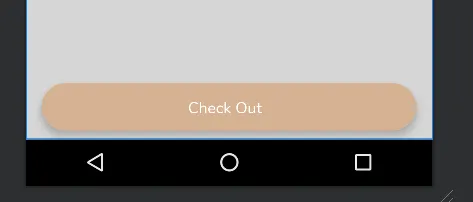
我使用了相对布局,想将按钮设置在屏幕底部。但是这会把它放到底部,我希望在屏幕/视图的末尾和按钮之间留出一些空间。但无论我怎么做,按钮的外边距在2.1+上似乎都没有用。由于相对布局包含背景,所以我不能在其上设置外边距。

有人知道解决方法吗?

<?xml version="1.0" encoding="utf-8"?>
<RelativeLayout xmlns:android="http://schemas.android.com/apk/res/android"
android:layout_width="match_parent"
android:layout_height="match_parent"
android:layout_marginBottom="0dp"
android:background="@drawable/background" >

    <Button
        android:id="@+id/confirm_mobile_button_next"
        android:layout_width="fill_parent"
        android:layout_height="40dip"
        android:layout_alignParentBottom="true"
        android:layout_alignParentLeft="false"
        android:layout_centerHorizontal="false"
        android:layout_centerInParent="false"
        android:layout_margin="15dp"
        android:background="@drawable/button_shape_selector"
        android:paddingLeft="10dip"
        android:paddingRight="10dip"
        android:text="@string/confirm_mobile_no_continue"
        android:textColor="@color/white"
        android:textStyle="bold" />

</RelativeLayout>
11个回答

76
你可以简单地向RelativeLayout添加padding而不是向Button添加margin,例如android:paddingBottom="15dp"
一般来说,我总是使用API Level 8设置在Exclipse预览中测试我的布局。这可以为大多数设备(包括ICS和JB)提供相当准确的结果。

11
这对我没有用,因为我正在使用应该覆盖整个屏幕的MapView。我只需添加一个空白TextView,并使用android:layout_alignParentBottom="true"设置所需的高度,在上面放置所需的对象(在本例中是Button)。 - cosmincalistru
5
如果TextView/Button有背景,这个解决方案就不适用了,因为它们的大小会受到paddingBottom的影响,看起来会很糟糕。更好的办法是在底部放置一个不可见的View。 - voghDev
没错,@voghDev。我想最好的建议是在应用任何随机填充或边距之前先“考虑”布局,因为它们本质上是不同的,尽管它们经常产生非常相似的输出。这里有一篇关于边距和填充差异的好文章,可以在Stackoverflow上找到:https://dev59.com/u2025IYBdhLWcg3whGWx。虽然它涵盖了CSS,但同样的原则也适用于Android的布局引擎。 - André
设置视图的填充与设置视图的边距不同。填充定义视图边界和视图内部内容之间的空间,而边距定义围绕视图边界的空间。这个区别对于如按钮和文本视图这样的视图非常重要,如果仅设置填充而不是边距,则可能导致视图内部的文本被裁剪。这在上面定义的 Button 中尤其明显,因为 layout_height 定义了内容高度 + 填充。更多信息请参见:https://dev59.com/x2445IYBdhLWcg3w7urD#4619943 - Jin
谢谢您!虽然就 Android 源代码而言,这似乎更像是一种变通方法而非解决方案。 - Chucky

34

您可以做的另一件事是放置一个View,将其对齐到RelativeLayout的底部,并将其高度设置为您想要使用的底部边距(或仅指定layout_marginBottom的值),如下所示:

 <RelativeLayout
    android:layout_width="wrap_content"
    android:layout_height="wrap_content"        
    > 
    <ImageView
        android:layout_width="match_parent"
        android:layout_height="match_parent"
        android:src="@drawable/some_image"
        android:adjustViewBounds="true"

         />
    <TextView
        android:layout_width="match_parent"
        android:layout_height="wrap_content"
        android:text="Some Overlay"
        android:padding="3dip"
        android:gravity="center_vertical|center_horizontal"

        android:layout_above="@+id/empty_view"
        android:layout_marginBottom="35dip"
        />
    <View 
        android:id = "@+id/empty_view"
        android:layout_height = "30dip"
        android:layout_width = "match_parent"
        android:visibility="invisible"
        android:layout_alignParentBottom="true"
        />

    </RelativeLayout>

这个例子使用RelativeLayout填充ImageView,并将一个TextView定位在ImageView上方。


1
不要在一个+上列出多个id。在XML文件中只应该在第一个实例上使用@+id,然后在其他地方只使用@id。因此,在填充View的开头之后出现android:id="@+id/empty_view"的地方,不应该有+ - SDJMcHattie
5
使用 Space 替代不可见的 View。 - saiyancoder
同时还发布了支持包:http://developer.android.com/tools/support-library/index.html - saiyancoder
@DaveHaigh 目前我能提供的只有这个问题的答案:https://dev59.com/Ymgu5IYBdhLWcg3wrYwl + 的意思有点像 Java 关键字 new。如果在 XML 中使用了多次 +,你实际上是在告诉系统创建另一个新 ID。我认为系统足够聪明,不会真正创建另一个新 ID,但这不是重点;如果系统在将来发生更改,则您的代码将中断。我认为如果您以正确的设置打开它,lint 也会将其提取出来。 - SDJMcHattie

23

你可以使用translateY属性。

translateY="-16dp"

最终代码

<?xml version="1.0" encoding="utf-8"?>
<RelativeLayout xmlns:android="http://schemas.android.com/apk/res/android"
    android:layout_width="match_parent"
    android:layout_height="match_parent"
    android:layout_marginBottom="0dp"
    android:background="@drawable/background">

    <Button
        android:id="@+id/confirm_mobile_button_next"
        android:layout_width="fill_parent"
        android:layout_height="40dip"
        android:layout_alignParentBottom="true"
        android:layout_alignParentLeft="false"
        android:layout_centerHorizontal="false"
        android:layout_centerInParent="false"
        android:layout_margin="15dp"
        android:background="@drawable/button_shape_selector"
        android:paddingLeft="10dip"
        android:paddingRight="10dip"
        android:text="@string/confirm_mobile_no_continue"
        android:textColor="@color/white"
        android:textStyle="bold"
        android:translateY="-16dp" />

</RelativeLayout>

4

@franny zhao提出的唯一可行的解决方案如下。

<?xml version="1.0" encoding="utf-8"?>
<RelativeLayout
    android:layout_width="match_parent"
    android:layout_height="wrap_content">

    <FrameLayout
        android:id="@+id/fl_layout"
        android:layout_alignParentBottom="true"
        android:layout_width="wrap_content"
        android:layout_height="wrap_content">
        <TextView
            android:id="@+id/tv_layout"
            android:text="hello world"
            android:layout_marginBottom="50dp"
            android:layout_width="wrap_content"
            android:layout_height="wrap_content" />
    </FrameLayout>
</RelativeLayout>

如果你按照其他人建议的给底部对齐的视图添加填充,那么视图背景也会扩展。如果你有彩色背景,那么视图看起来就像粘在底部一样。填充和边距是完全不同的,填充是视图的一部分,但边距留下了视图之间的空间。


2
我认为最好的方法是在XML中设置android:layout_alignParentBottom,然后在Java代码中使用:
Button confirm_mobile_button_next = (Button)findViewById(R.id.confirm_mobile_button_next)

并且

confirm_mobile_button_next.setTransitionY(-THE_VALUE) or setTransitionX(-THE_VALUE)

2
我认为最好的方法是设置:

```

```

<...
android:layout_alignParentBottom="true" />

然后在Java代码中:

Button confirm_mobile_button_next = (Button)findViewById(R.id.confirm_mobile_button_next)
confirm_mobile_button_next.setTransitionY(-THE_VALUE) or setTransitionX(-THE_VALUE)

2
您可以使用一个ViewGroup(例如FrameLayout或LinearLayout)来包裹视图。在外部ViewGroup中设置alignParentBottom,然后在内部View中设置marginBottom将会生效。
<?xml version="1.0" encoding="utf-8"?>
<RelativeLayout
    android:layout_width="match_parent"
    android:layout_height="wrap_content">

    <FrameLayout
        android:id="@+id/fl_layout"
        android:layout_alignParentBottom="true"
        android:layout_width="wrap_content"
        android:layout_height="wrap_content">
        <TextView
            android:id="@+id/tv_layout"
            android:text="hello world"
            android:layout_marginBottom="50dp"
            android:layout_width="wrap_content"
            android:layout_height="wrap_content" />
    </FrameLayout>
</RelativeLayout>

1

因为我遇到了这个问题,并且没有找到适合我情况的答案,所以我思考了半秒钟,并通过在RelativeLayout示例中设置视图的负边距来解决了它:

<RelativeLayout
    android:layout_width="match_parent"
    android:layout_height="match_parent">
    <ImageView
    android:layout_width="48dp"
    android:layout_height="48dp"
        android:layout_marginTop="-8dp"
        android:layout_marginStart="-8dp">
</RelativeLayout>

这对一些人来说应该是有用的。

0

虽然已经到了2022年,但如果你仍然没有使用ConstraintLayout,比如我正在修复的一个遗留项目代码,可以使用这个属性来实现底部边距类型的视觉效果。

android:translationY="-8dp"

在我的情况下,这是相对布局中的FAB,你的代码应该像这样:

<com.google.android.material.floatingactionbutton.ExtendedFloatingActionButton
    android:id="@+id/cart_check_out_btn"
    style="@style/FABThemeDark"
    android:layout_width="match_parent"
    android:layout_height="wrap_content"
    android:layout_alignParentBottom="true"
    android:layout_marginHorizontal="16dp"
    android:layout_marginVertical="16dp"
    android:text="@string/cart_check_out_btn"
    android:textAllCaps="false"
    android:translationY="-8dp" />

它将像这样工作

enter image description here


-1
尝试这种方式:
<RelativeLayout xmlns:android="http://schemas.android.com/apk/res/android"
         xmlns:tools="http://schemas.android.com/tools"
         android:layout_width="fill_parent"
         android:layout_height="fill_parent" >

<Button
    android:id="@+id/button1"
    android:layout_width="wrap_content"
    android:layout_height="wrap_content"
    android:layout_alignParentBottom="true"
    android:layout_centerHorizontal="true"
    android:layout_marginBottom="17dp"
    android:text="Button" />


网页内容由stack overflow 提供, 点击上面的
可以查看英文原文,
原文链接