如何在React Native中自动缩放SVG元素?

51
我想把一个react-native-svg元素放在一个View里,以一定的比例渲染出来,然后尽量缩放到最大,但限制在包含视图的范围内。 Svg元素(来自react-native-svg)似乎只接受绝对的widthheight属性(我尝试过使用百分比,但什么都没有渲染出来,并且调试证实百分比值在传递到本地视图时为NSNull)。我不确定如何实现所需的效果。这是我迄今为止尝试过的:
// I have a component defined like this:
export default class MySvgCircle extends React.Component {
    render() {
        return (
            <View style={[this.props.style, {alignItems: 'center', justifyContent: 'center'}]} ref="containingView">
                <View style={{flex: 1, justifyContent: 'center', alignItems: 'center', aspectRatio: 1.0}}>
                    <Svg.Svg width="100" height="100">
                        <Svg.Circle cx="50" cy="50" r="40" stroke="blue" strokeWidth="1.0" fill="transparent" />
                        <Svg.Circle cx="50" cy="50" r="37" stroke="red" strokeWidth="6.0" fill="transparent" />
                    </Svg.Svg>
                </View>
            </View>
        );
    }
}

// And then consumed like this:
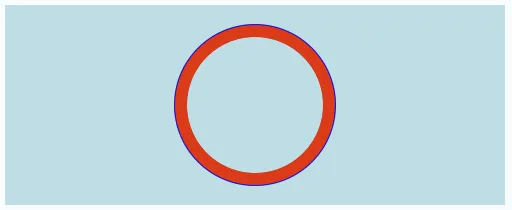
<MySvgCircle style={{height: 200, width: 200, backgroundColor: "powderblue"}}/>
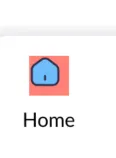
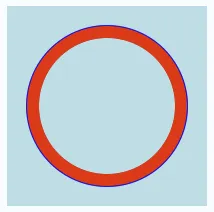
这是渲染后我所看到的内容。

这是我看到的

我希望红色和蓝色圆圈能够被缩放以填满200x200的区域(如果包含视图不是正方形而是矩形,则保持圆形),而不需要预先知道组件的使用者希望的尺寸。

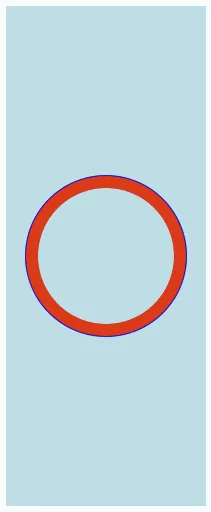
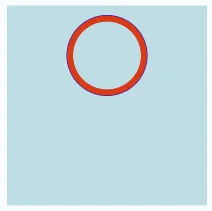
如前所述,我试过使用百分比,像这样(其余部分相同):

<Svg.Svg width="100%" height="100%">

但是SVG部分根本没有绘制。像这样:

no SVG rendering

在控制台日志中没有错误消息或其他指示说明为什么不起作用。

RN中测量UI元素布局后的方法似乎是异步的,这似乎与我要做的事情不太匹配。是否有一些缩放或变换魔术可以使用?

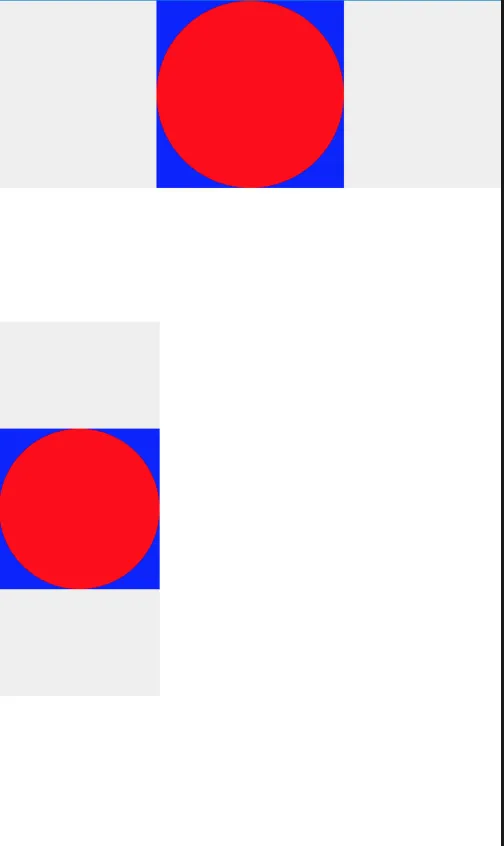
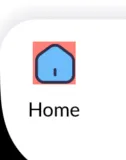
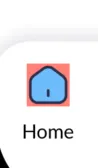
所需的输出应如下所示(通过硬编码值获得):

desired output

当包含视图不是完美正方形时,我希望它像这样工作:

horizontal rectangle behavior vertical rectangle behavior


你尝试过用百分号给出值吗? - Aniruddh Agarwal
2
是的,就像我在问题中明确表述的那样。 - ipmcc
我能看到使用百分号的SVG示例吗? - Aniruddh Agarwal
1
你找到这个问题的解决方案了吗? - Larney
8个回答

50

以下是一个类似于您的图片行为的组件:

import React from 'react';
import { View } from 'react-native';

import Svg, { Circle } from 'react-native-svg';

const WrappedSvg = () =>
  (
    <View style={{ aspectRatio: 1, backgroundColor: 'blue' }}>
      <Svg height="100%" width="100%" viewBox="0 0 100 100">
        <Circle r="50" cx="50" cy="50" fill="red" />
      </Svg>
    </View>
  );

在上下文中:

const WrappedSvgTest = () => (
  <View>
    <View style={{
      width: '100%',
      height: 140,
      alignItems: 'center',
      backgroundColor: '#eeeeee'
    }}
    >
      <WrappedSvg />
    </View>

    {/* spacer */}
    <View style={{ height: 100 }} />

    <View style={{
      width: 120,
      height: 280,
      justifyContent: 'space-around',
      backgroundColor: '#eeeeee'
    }}
    >
      <WrappedSvg />
    </View>
  </View>
);

关键在于将SVG元素包裹在保持其纵横比的视图中,然后将SVG大小设置为100%的宽度和高度。
我相信SVG元素大小和视图框大小之间存在一些复杂的交互作用,使得SVG呈现的尺寸比您预期的要小,或者在某些情况下根本不呈现。您可以通过保持<View>标签的固定纵横比并将<Svg>标签设置为100%的宽度和高度来避免这种情况,以便视图框的纵横比始终与元素纵横比匹配。
请确保将aspectRatio设置为viewbox.width / viewbox.height

1
非常好的回答!我最近一直在阅读SVG规范,感觉这种行为,即“占用整个宽度同时保持纵横比”,似乎在preserveAspectRatio属性中缺失,也许这是有意为之的,但这是一个相当常见的用例。 - Nader Ghanbari
如果我想让父容器调整大小,以便svg占据容器的全部宽度而不再多(同时保持纵横比),该怎么办? - Sameer Ingavale

46

在里面的技巧

  preserveAspectRatio="xMinYMin slice"

你应该这样做

<Svg 
 height="100%" 
 preserveAspectRatio="xMinYMin slice" 
 width="100%" 
 viewBox="0 0 100 100"
>


5
您需要同时调整视口(viewBox)的宽度和高度。通常情况下,视口应该放置所需形状的原始尺寸。通过根据您的需要定义宽度/高度,您的形状将被适当地缩小/放大。
请查看此教程,其中这些概念已经解释得非常清楚。 https://www.sarasoueidan.com/blog/svg-coordinate-systems/

5

我使用的SVG来自https://material.io/resources/icons

对于我的问题,解决方案是确保不要更改Paths中给定的viewBox或值(就像我所做的那样),而仅更改heightwidth以填充并像其他答案一样使用容器:

<View style={{
    height: 100, display: 'flex',
}}>
    <TouchableOpacity style={{
        display: 'flex', justifyContent: 'center',
        alignItems: 'center', aspectRatio: 1,
    }}>
        <Svg fill="white" height="100%"
             width="100%" viewBox="0 0 24 24">
            <Path d="M0 0h24v24H0z" fill="none"/>
            <Path d="M6 19h4V5H6v14zm8-14v14h4V5h-4z"/>
        </Svg>
    </TouchableOpacity>
</View>

1
你会需要这些变量。
const originalWidth = 744; 
const originalHeight = 539.286; 
const aspectRatio = originalWidth / originalHeight;

使用以下属性将您的SVG包装在视图中:

<View style={{ width: '100%', aspectRatio }}></View>

或者

<View style={{ width: Dimensions.get('window').width, aspectRatio }}>
</View>

使用内部的SVG,并具有以下属性:

<Svg
  width='100%'
  height='100%'
  viewBox={`0 0 ${originalWidth} ${originalHeight}`}
>

你应该没问题了!


1

1

我使用react-native-svg-transformer而不使用react-native-svg,因为它的大小很重,所以我可以调整大小并更改描边颜色和填充颜色,但是只需传递颜色而不是传递填充属性,如下所示即可完美工作。

import React from 'react';
import {
  View,
  Text,
  StyleSheet,
  TouchableOpacity,
} from 'react-native';
import { StatusBar } from 'expo-status-bar';
import Logo from "../../assets/profile.svg";

function FirstScreen(props) {
  return (
    <View style={styles.container}>
      <TouchableOpacity
        onPress={() => { props.navigation.navigate('SecondScreen'); }}
      >
        <Text>Welcome</Text>
        <View style={{ aspectRatio: 1,justifyContent:"center",alignItems:"center", backgroundColor: 'blue',width:200,height:200 }}>
        <Logo color="white" stroke="black" height={50} width={50} />
        </View>
      </TouchableOpacity>
      <StatusBar style="auto" />
    </View>
  );
}
const styles = StyleSheet.create({
  container: {
    flex: 1,
    backgroundColor: '#fff',
    alignItems: 'center',
    justifyContent: 'center',
  },
});
export default FirstScreen;

SVG 代码
<svg xmlns="http://www.w3.org/2000/svg" viewBox="0 0 64 64"><title>profile</title><g fill="currentColor" class="nc-icon-wrapper"><path d="M38,37H26A19.021,19.021,0,0,0,7,56a1,1,0,0,0,.594.914C7.97,57.081,16.961,61,32,61s24.03-3.919,24.406-4.086A1,1,0,0,0,57,56,19.021,19.021,0,0,0,38,37Z"></path><path data-color="color-2" d="M32,32c8.013,0,14-8.412,14-15.933a14,14,0,1,0-28,0C18,23.588,23.987,32,32,32Z"></path></g></svg>

依赖项

  "dependencies": {
    "@expo/webpack-config": "~0.16.2",
    "@react-navigation/native": "^6.0.10",
    "@react-navigation/native-stack": "^6.6.2",
    "expo": "~45.0.0",
    "expo-font": "^10.1.0",
    "expo-status-bar": "~1.3.0",
    "react": "17.0.2",
    "react-dom": "17.0.2",
    "react-native": "0.68.2",
    "react-native-svg-transformer": "^1.0.0",
  },

在根目录中添加metro.config.js文件

const { getDefaultConfig } = require('expo/metro-config');

module.exports = (() => {
  const config = getDefaultConfig(__dirname);

  const { transformer, resolver } = config;

  config.transformer = {
    ...transformer,
    babelTransformerPath: require.resolve('react-native-svg-transformer'),
  };
  config.resolver = {
    ...resolver,
    assetExts: resolver.assetExts.filter((ext) => ext !== 'svg'),
    sourceExts: [...resolver.sourceExts, 'svg'],
  };

  return config;
})();

0
在我的情况下,我需要根据设备大小缩放SVG图标,并且它使用<G><Path>来绘制图标。经过数小时的试错方法,我找到了一个解决方案 - 给Svg组件的内部组件(即<G>)提供动态比例值(基于设备大小)。
<Svg width={RfH(24)} height={RfH(24)} style={{backgroundColor: 'salmon'}}>
<G
  scale={RfH(1)} // Scaling added to the inner component
  fill="none"
  fillRule="evenodd">
  <G
    stroke={props?.isFocused ? '#302F4C' : '#8B8B88'}
    strokeLinecap="round"
    strokeLinejoin="round"
    strokeWidth={1.5}>
    <Path
      d="M9.393 2.792 3.63 7.022c-.9.7-1.63 2.19-1.63 3.32v7.41c0 2.32 1.89 4.22 4.21 4.22h11.58c2.32 0 4.21-1.9 4.21-4.21v-7.28c0-1.21-.81-2.76-1.8-3.45l-5.807-4.36c-1.4-.98-3.65-.93-5 .12Z"
      fill={props?.isFocused ? '#7BBDFF' : 'none'}
      fillRule="nonzero"
    />
    <Path fill="#FFF" d="M12 17.993v-2.924" />
  </G>
</G>

带缩放的iPad主页图标 - 带缩放的iPad主页图标

不带缩放的iPad主页图标 - 不带缩放的iPad主页图标

带缩放的iPhone主页图标 - 带缩放的iPhone主页图标

不带缩放的iPhone主页图标 - 不带缩放的iPhone主页图标

Rfh 只是将输入值转换为当前设备的等效值。

import {Dimensions} from 'react-native';

const STANDARD_SCREEN_DIMENSIONS = {height: 812, width: 375};

const RfH = (value) => {
      const dim = Dimensions.get('window');
      return dim.height * (value / STANDARD_SCREEN_DIMENSIONS.height);
};

网页内容由stack overflow 提供, 点击上面的
可以查看英文原文,
原文链接