使用PIL将RGB图像转换为纯黑白图像

93

我正在使用Python图像处理库进行一些非常简单的图像处理,但是我在将灰度图像转换为单色(黑白)图像时遇到了问题。如果我在将图像转换为灰度(convert('L'))后保存,那么图像会像预期的那样呈现。然而,如果我将图像转换为单色、单通道图像,它只会给我噪声,如下面的图像所示。是否有一种简单的方法可以使用PIL/Python将彩色PNG图像转换为纯黑白图像?

from PIL import Image 
import ImageEnhance
import ImageFilter
from scipy.misc import imsave
image_file = Image.open("convert_image.png") # open colour image
image_file= image_file.convert('L') # convert image to monochrome - this works
image_file= image_file.convert('1') # convert image to black and white
imsave('result_col.png', image_file)

原始图片 转换后的图片


PIL文档中得知:"""当转换为双色图像(模式“1”)时,源图像首先被转换为黑白。然后将大于127的结果值设置为白色,并进行抖动处理。要使用其他阈值,请使用点方法。"""这听起来与图像处理有关,但我不熟悉PIL和图像操作。 - Casey Kuball
6个回答

114
from PIL import Image 
image_file = Image.open("convert_image.png") # open colour image
image_file = image_file.convert('1') # convert image to black and white
image_file.save('result.png')

产出

enter image description here


非常糟糕的输出。文本无法识别。 - Yaroslav Dukal
3
这是一张灰度图像,而不是黑白图像。 - progyammer
7
@程序员,这绝对是纯黑白的图像。抖动不同于灰度;该图像每像素只使用1位表示。相比之下,灰度通常使用8位每像素来呈现从白色(关闭)到黑色(开启)之间的各种不同阴影。 - Martijn Pieters
1
@MartijnPieters 你说得对!这是一张黑白图像。因为缩小时看起来是灰色的,所以我没有注意到它 :P - progyammer

89

使用PIL库创建自定义阈值的双色(黑白)图像的解决方案:

from PIL import Image
img = Image.open('mB96s.png')
thresh = 200
fn = lambda x : 255 if x > thresh else 0
r = img.convert('L').point(fn, mode='1')
r.save('foo.png')

仅需

r = img.convert('1')
r.save('foo.png')

您将获得一张抖动的图像。

从左到右是输入图像、黑白转换结果和抖动结果:

输入图像 黑白转换结果 抖动结果

您可以单击图像查看未缩放版本。


12
这可能应该成为被接受的答案——它在不使用额外库的情况下经济地实现了所需的结果。 - Jose Nario
1
如果我们希望白色像素变为透明,会怎么样呢? - Shmack
@ShanerM13 一张黑白图像每个像素的颜色值只有一个比特:它可以是1或0。这留下了黑色和白色的空间,但没有第三个选项,如透明(除非您负责处理图像并可以在应用程序中定义其中一个选项表示透明)。 - user2616155
@user2616155 或许现在问我一个更好的问题是,如何将“背景”从黑色改为白色作为默认颜色? - Shmack

29

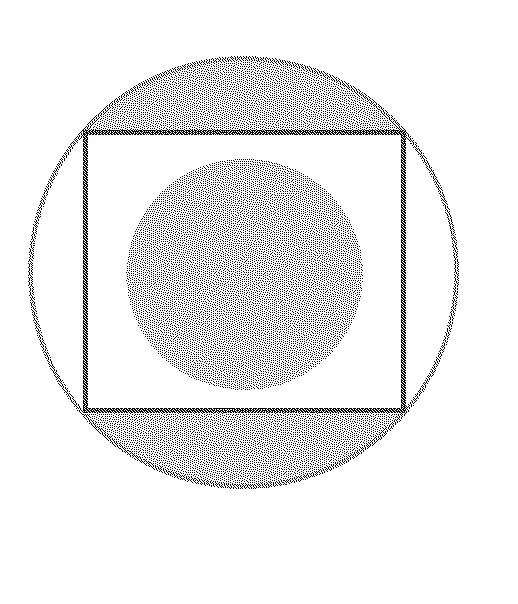
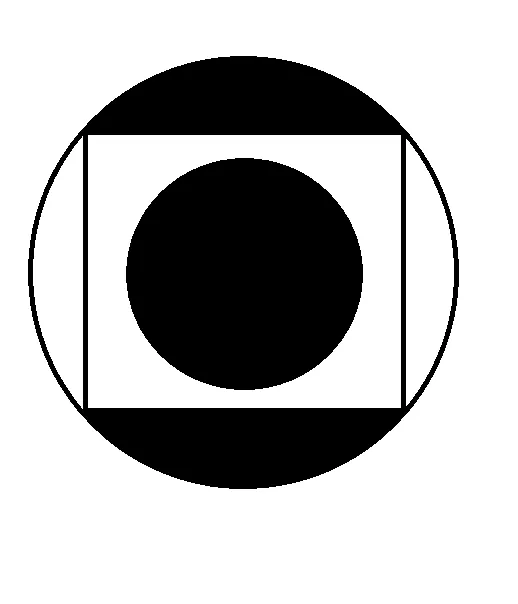
另一种选择(例如在需要使用分割掩模进行科学研究时很有用)是简单地应用阈值:

#!/usr/bin/env python
# -*- coding: utf-8 -*-

"""Binarize (make it black and white) an image with Python."""

from PIL import Image
from scipy.misc import imsave
import numpy


def binarize_image(img_path, target_path, threshold):
    """Binarize an image."""
    image_file = Image.open(img_path)
    image = image_file.convert('L')  # convert image to monochrome
    image = numpy.array(image)
    image = binarize_array(image, threshold)
    imsave(target_path, image)


def binarize_array(numpy_array, threshold=200):
    """Binarize a numpy array."""
    for i in range(len(numpy_array)):
        for j in range(len(numpy_array[0])):
            if numpy_array[i][j] > threshold:
                numpy_array[i][j] = 255
            else:
                numpy_array[i][j] = 0
    return numpy_array


def get_parser():
    """Get parser object for script xy.py."""
    from argparse import ArgumentParser, ArgumentDefaultsHelpFormatter
    parser = ArgumentParser(description=__doc__,
                            formatter_class=ArgumentDefaultsHelpFormatter)
    parser.add_argument("-i", "--input",
                        dest="input",
                        help="read this file",
                        metavar="FILE",
                        required=True)
    parser.add_argument("-o", "--output",
                        dest="output",
                        help="write binarized file hre",
                        metavar="FILE",
                        required=True)
    parser.add_argument("--threshold",
                        dest="threshold",
                        default=200,
                        type=int,
                        help="Threshold when to show white")
    return parser


if __name__ == "__main__":
    args = get_parser().parse_args()
    binarize_image(args.input, args.output, args.threshold)

对于./binarize.py -i convert_image.png -o result_bin.png --threshold 200,显示效果如下:

图片描述


7
binarize_array 的一行代码(也更快,我猜): numpy.where(numpy_array > threshold=200, 255, 0) - Jacquot
这对我谷歌搜索将图像转换为黑白的需求非常完美...谢谢! - LampShade
2
你不需要numpy来进行二值化 - PIL已经足够了 - maxschlepzig
这是处理大型数据集非常缓慢的解决方案。 - Alberto Ursino

7

如Martin Thoma所说,通常需要使用二值化处理。但是您可以使用简单的向量化操作来实现,这比在回答中使用的for循环运行速度要快得多。

以下代码将图像的像素转换为0(黑色)和1(白色)。

from PIL import Image
import numpy as np
import matplotlib.pyplot as plt

#Pixels higher than this will be 1. Otherwise 0.
THRESHOLD_VALUE = 200

#Load image and convert to greyscale
img = Image.open("photo.png")
img = img.convert("L")

imgData = np.asarray(img)
thresholdedData = (imgData > THRESHOLD_VALUE) * 1.0

plt.imshow(thresholdedData)
plt.show()

1
thresholdedData给我返回了一张黑色的图像。我将其替换为:thresholdedData = np.where(imgData > THRESHOLD_VALUE, 255, 0)。然后,您可以使用Image.fromarray()(我想是这样)在PIL中加载图像,然后执行<your pil object>.save("<name of file>.bmp")将其保存到文件系统中。因此,不需要使用matplotlib。 - Shmack

2
用Python实现的简单方法:

使用Python可以轻松实现:

Python
import numpy as np
import imageio

image = imageio.imread(r'[image-path]', as_gray=True)

# getting the threshold value
thresholdValue = np.mean(image)

# getting the dimensions of the image
xDim, yDim = image.shape

# turn the image into a black and white image
for i in range(xDim):
    for j in range(yDim):
        if (image[i][j] > thresholdValue):
            image[i][j] = 255
        else:
            image[i][j] = 0


1

这是我做的方法,它可以获得更好的结果,就像灰色滤镜一样。

from PIL import Image
img = Image.open("profile.png")
BaW = img.convert("L")
BaW.save("profileBaW.png")
BaW.show()

网页内容由stack overflow 提供, 点击上面的
可以查看英文原文,
原文链接