核心图形 CGImage 掩码未生效。

15

我想要做的基本上是让文本标签通过视图“切割”一个文本形状的空洞。我尝试使用 self.mask = uiLabel,但它们无法正确定位文本,所以我正在通过 Core Graphics 来实现。

这里是不起作用的代码(在 draw(_ rect: CGRect) 中):

    let context = (UIGraphicsGetCurrentContext())!

    // Set mask background color
    context.setFillColor(UIColor.black.cgColor)
    context.fill(rect)

    context.saveGState()


    let paragraphStyle = NSMutableParagraphStyle()
    paragraphStyle.alignment = .center

    let attributes = [
        NSParagraphStyleAttributeName: paragraphStyle,
        NSFontAttributeName: UIFont.systemFont(ofSize: 16, weight: UIFontWeightMedium),
        NSForegroundColorAttributeName: UIColor.white
    ]

    let string = NSString(string: "LOGIN")

    // This wouldn't vertically align so we calculate the string size and create a new rect in which it is vertically aligned
    let size = string.size(attributes: attributes)
    let position = CGRect(
        x: rect.origin.x,
        y: rect.origin.y + (rect.size.height - size.height) / 2,
        width: rect.size.width,
        height: size.height
    )

    context.translateBy(x: 0, y: rect.size.height)
    context.scaleBy(x: 1, y: -1)
    string.draw(
        in: position,
        withAttributes: attributes
    )

    let mask = (context.makeImage())!

    context.restoreGState()

    // Redraw with created mask
    context.clear(rect)

    context.saveGState()
    // !!!! Below line is the problem
    context.clip(to: rect, mask: mask)
    context.restoreGState()

本质上,我已成功创建了用于应用于整个图像的蒙版CGImage(命名为mask)的代码。

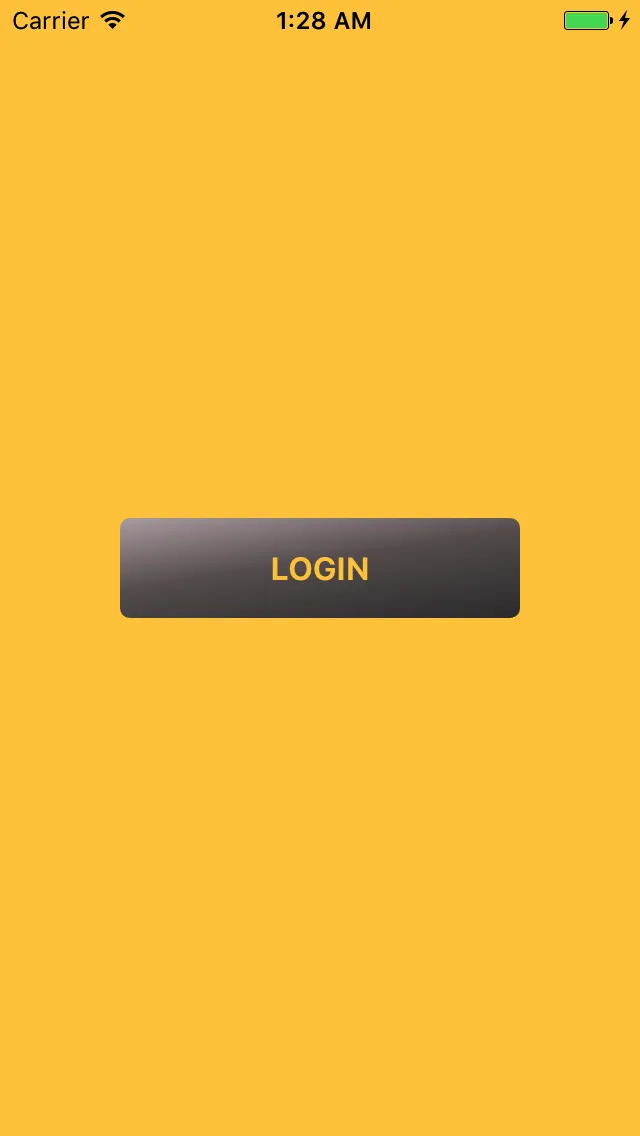
当将标记行替换为context.draw(mask, in: rect)(以查看蒙版)时,正确显示。正确显示的蒙版如下:

enter image description here

但是,一旦尝试使用context.clip(to: rect, mask: mask)应用此蒙版,则没有任何变化!实际结果:

Nothing changing

期望结果是:

Desired result

但由于某种原因,蒙版未被正确应用。


这段代码似乎应该工作,因为我反复阅读了文档。我还尝试在单独的CGContext中创建蒙版,但没有成功。当我尝试使用.copy(colorSpace:)将CGImage(mask)转换为CGColorSpaceCreateDeviceGray()时,它返回了nil。我已经在这个问题上花了两天时间,所以感谢任何帮助。


我曾经遇到过类似的问题,但我的设置略有不同:一个带有UILabel子视图的UIControl自定义子类。 - Nicolas Miari
在我的情况下,在渲染之前调用标签子视图上的 setNeedsDisplay() 方法解决了问题。 - Nicolas Miari
3个回答

2
如果您希望标签具有完全透明的文本,您可以使用混合模式而不是蒙版。
public class KnockoutLabel: UILabel {
    public override func draw(_ rect: CGRect) {
        let context = UIGraphicsGetCurrentContext()!
        context.setBlendMode(.clear)

        self.drawText(in: rect)
    }
}

请确保将isOpaque设置为false;默认情况下,视图会假定其为不透明的,因为您使用了不透明的背景颜色。

不确定是什么,但这似乎与“UIVisualEffectView”不兼容。其他混合模式也是如此。 - Downgoat
@Downgoat,你想要实现什么目标?有什么问题吗? - Christian Schnorr
与问题相同,当设置混合模式时,按钮似乎没有改变。这只是一个UI效果。 - Downgoat
@Downgoat,我发布的代码在视觉效果视图之外肯定是有效的。您能否提供一个示例项目,说明您想要如何使用它以及您想要实现的效果图? - Christian Schnorr
这是一个示例项目,链接为 https://drive.google.com/file/d/0B8EWIfgtRkyhTmk2V0VDZFhVWGM/view?usp=sharing。其中的 VibrantButton.swiftdraw() 函数绘制了黑色文本(不透明),但当我添加混合模式后,它看起来就像我根本没有添加文本一样。 - Downgoat
@Downgoat 在你的示例项目中,您制作了多个嵌套在一起的可视化效果视图。这不可能是一个好的做法。我仍然不明白你试图实现什么样的效果。在你的例子中,你有一个模糊的背景和一个清晰的按钮;那么你希望文本看起来如何? - Christian Schnorr

1
我不确定你是否会喜欢下面的代码。它是使用PaintCode制作的。文本将始终位于圆角矩形中心。希望能对您有所帮助。
代码,请将其放入draw(_ rect: CGRect)中:
    //// General Declarations
    let context = UIGraphicsGetCurrentContext()

    //// Color Declarations - just to make a gradient same as your button have
    let gradientColor = UIColor(red: 0.220, green: 0.220, blue: 0.223, alpha: 1.000)
    let gradientColor2 = UIColor(red: 0.718, green: 0.666, blue: 0.681, alpha: 1.000)
    let gradientColor3 = UIColor(red: 0.401, green: 0.365, blue: 0.365, alpha: 1.000)

    //// Gradient Declarations
    let gradient = CGGradient(colorsSpace: nil, colors: [gradientColor.cgColor, gradientColor3.cgColor, gradientColor2.cgColor] as CFArray, locations: [0, 0.55, 1])!


    //// Subframes
    let group: CGRect = CGRect(x: rect.minX, y: rect.minY, width: rect.width, height: rect.height)


    //// Group
    context.saveGState()
    context.beginTransparencyLayer(auxiliaryInfo: nil)


    //// Rectangle Drawing
    let rectanglePath = UIBezierPath(roundedRect: group, cornerRadius: 5)
    context.saveGState()
    rectanglePath.addClip()
    let rectangleRotatedPath = UIBezierPath()
    rectangleRotatedPath.append(rectanglePath)
    var rectangleTransform = CGAffineTransform(rotationAngle: -99 * -CGFloat.pi/180)
    rectangleRotatedPath.apply(rectangleTransform)
    let rectangleBounds = rectangleRotatedPath.cgPath.boundingBoxOfPath
    rectangleTransform = rectangleTransform.inverted()
    context.drawLinearGradient(gradient,
                               start: CGPoint(x: rectangleBounds.minX, y: rectangleBounds.midY).applying(rectangleTransform),
                               end: CGPoint(x: rectangleBounds.maxX, y: rectangleBounds.midY).applying(rectangleTransform),
                               options: [])
    context.restoreGState()


    //// Text Drawing
    context.saveGState()
    context.setBlendMode(.destinationOut)

    let textRect = group
    let textTextContent = "LOGIN"
    let textStyle = NSMutableParagraphStyle()
    textStyle.alignment = .center
    let textFontAttributes = [
        NSFontAttributeName: UIFont.systemFont(ofSize: 16, weight: UIFontWeightBold),
        NSForegroundColorAttributeName: UIColor.black,
        NSParagraphStyleAttributeName: textStyle,
        ]

    let textTextHeight: CGFloat = textTextContent.boundingRect(with: CGSize(width: textRect.width, height: CGFloat.infinity), options: .usesLineFragmentOrigin, attributes: textFontAttributes, context: nil).height
    context.saveGState()
    context.clip(to: textRect)
    textTextContent.draw(in: CGRect(x: textRect.minX, y: textRect.minY + (textRect.height - textTextHeight) / 2, width: textRect.width, height: textTextHeight), withAttributes: textFontAttributes)
    context.restoreGState()

    context.restoreGState()


    context.endTransparencyLayer()
    context.restoreGState()

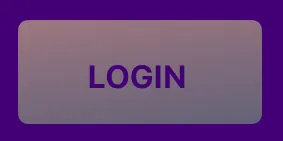
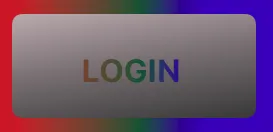
结果:

enter image description here

enter image description here

enter image description here


1

将图像裁剪成矩形

受到@Woof的答案启发

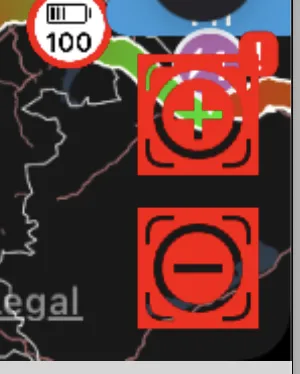
有点不同,但我需要类似的功能。我想把图像的形状切割到背景中。基本上这也可以用来反转图像。

我尝试过使用.PNG图像,因为它们具有清晰的背景。

我绘制了一个有颜色的矩形,然后使用混合模式和剪辑将图像的形状切割到矩形中。为此,我必须将UIImage转换为CGImage,并将colorSpace设置为linearGray

func cutImageIntoRectangle(_ image: UIImage) -> UIImage {
        let rect = CGRect(x: 0, y: 0, width: 100, height: 100)
        let renderer = UIGraphicsImageRenderer(size: rect.size)
        let img = renderer.image { ctx in
            let context = ctx.cgContext
            context.setFillColor(UIColor.red.cgColor)
            context.addRect(rect)
            context.fillPath()
            context.setBlendMode(.destinationOut)
            context.clip(to: rect)
            let cgImage = image.cgImage?.copy(colorSpace: CGColorSpace(name: CGColorSpace.linearGray)!)
            context.drawFlipped(cgImage!, in: rect)
        }
        return img
    }

由于某种原因,当复制到CGImage时,图像会翻转。为此,我使用了扩展方法drawFlipped,该方法是从这里复制的:https://dev59.com/RnRB5IYBdhLWcg3wz6QJ#58470440
extension CGContext {
    /// Draw `image` flipped vertically, positioned and scaled inside `rect`.
    public func drawFlipped(_ image: CGImage, in rect: CGRect) {
        self.saveGState()
        self.translateBy(x: 0, y: rect.origin.y + rect.height)
        self.scaleBy(x: 1.0, y: -1.0)
        self.draw(image, in: CGRect(origin: CGPoint(x: rect.origin.x, y: 0), size: rect.size))
        self.restoreGState()
    }
}

enter image description here


网页内容由stack overflow 提供, 点击上面的
可以查看英文原文,
原文链接