我试图在Android Studio中使用自定义字体,就像我们在Eclipse中所做的那样。但是不幸的是,我无法找到放置“assets”文件夹的位置!
如何在使用Android Studio编写的项目中使用自定义字体
271
- Asim Roy
1
这是官方指南,您可以查看。https://developer.android.com/guide/topics/ui/look-and-feel/fonts-in-xml - subrata sharma
22个回答
504
更新 2023:
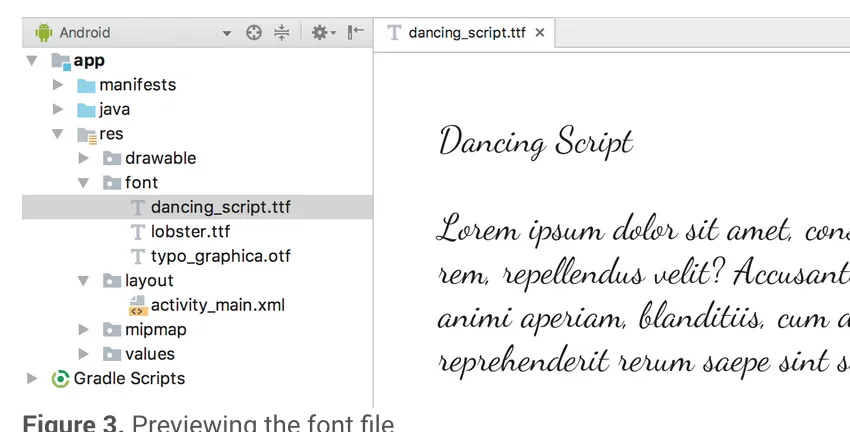
在res文件夹内创建一个名为font的文件夹,并复制你的字体
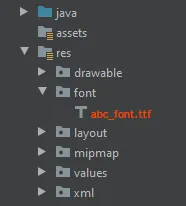
<TextView
        android:layout_width="match_parent"
        android:layout_height="wrap_content"
        android:fontFamily="@font/abc_font" />
用于编程的目的:
textView.setTypeface(ResourcesCompat.getFont(context, R.font.abc_font))
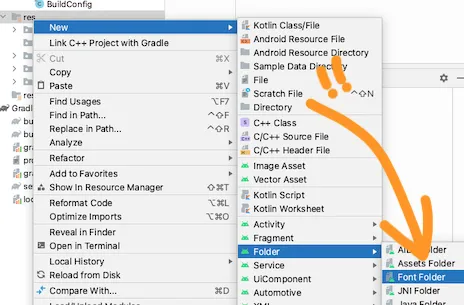
对于Android Studio 4.2+,现在甚至有一个菜单选项:
- Asim Roy
8
13从资源中加载自定义字体的人应该注意,Android 5.0中存在一个错误,导致某些字体无法加载。虽然这个问题在 Android 5.1 中得到了修复,但支持 5.0 的解决方法是重新编写ttf字体。有关更多信息,请参见此问题https://dev59.com/Yl4d5IYBdhLWcg3wCOuC。 - BrentM
第二个选项对我来说完美地起作用了。谢谢你! - Emzor
2我使用了 this.getContext().getApplicationContext().getAssets() 来查找目录(Android Studio 2.1)。 - kuzdu
1@kuthue onCreate() 没问题。如果您想在用户使用应用程序时更改字体,则可以将其放置在希望更改的位置。这也适用于按钮。 - rockhammer
2我如何设置整个项目的默认字体为我添加的自定义字体?第一个代码示例是在做这件事吗? - CodeMonkey
显示剩余3条评论
106
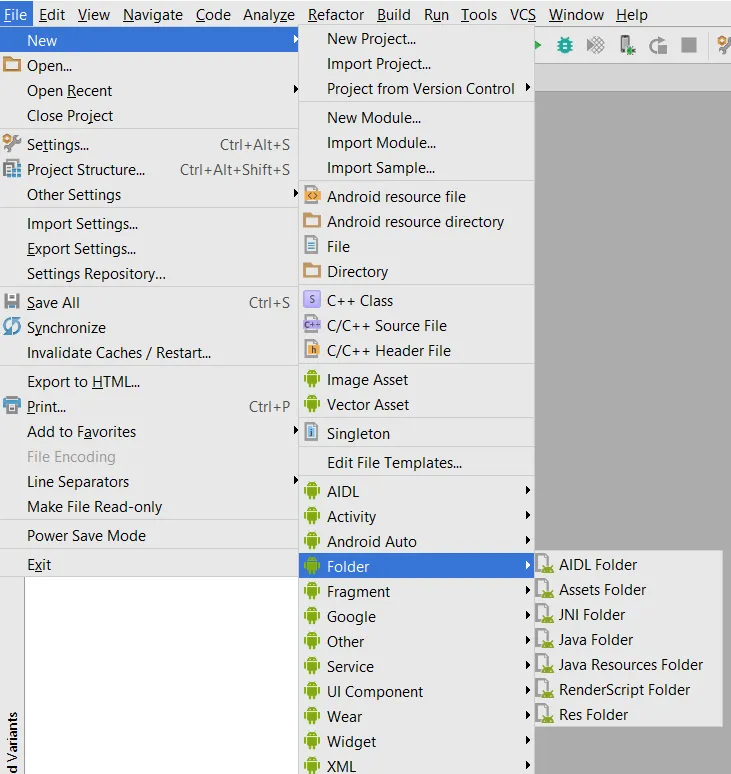
选择文件 > 新建 > 文件夹 > 资源文件夹。
点击 完成。
右键单击 assets 并创建名为 fonts 的文件夹。
将字体文件放置在 assets > fonts 中。
使用下面的代码更改您的 TextView 字体:
TextView textView = (TextView) findViewById(R.id.textView);
Typeface typeface = Typeface.createFromAsset(getAssets(), "fonts/yourfont.ttf");
textView.setTypeface(typeface);
- Ehsan.R
2
16如何在XML中使用这个? - Suisse
72
在字段上设置自定义字体族有许多方法,我使用了以下方式。
要将字体添加为资源,请在Android Studio中执行以下步骤:
1)右键单击res文件夹,然后转到New > Android resource directory。将出现New Resource Directory窗口。
2)在资源类型列表中选择font,然后单击OK。
注意:资源目录的名称必须为font。
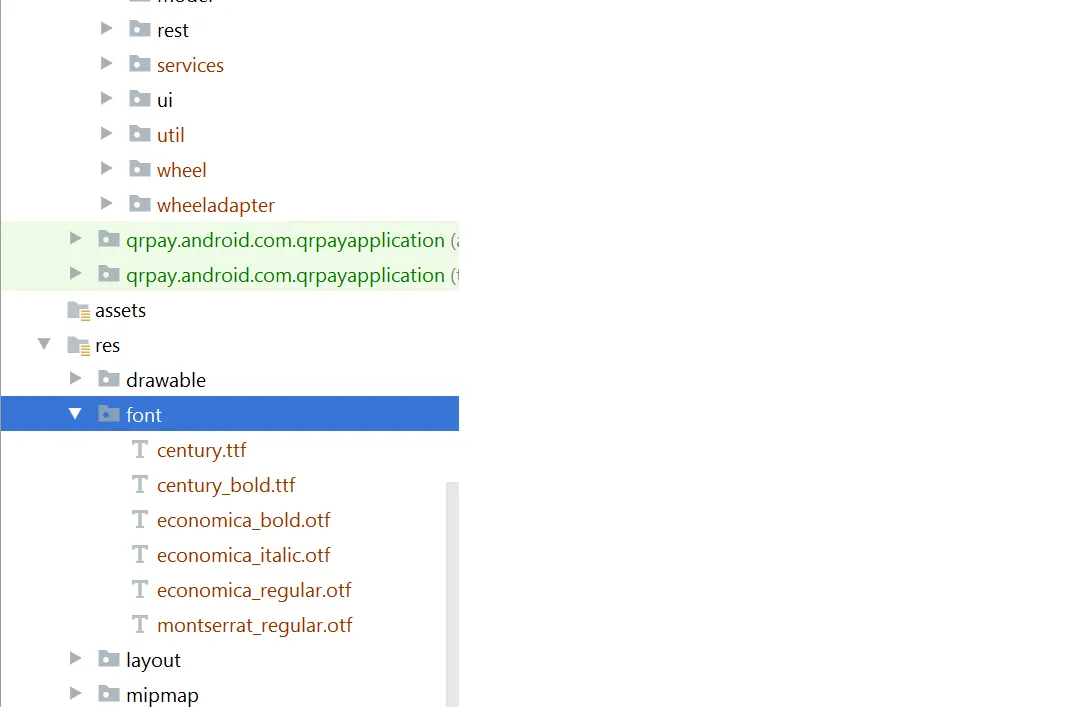
3)将字体文件添加到font文件夹中。
在xml文件中的所需视图中添加字体:
注意:但是,您需要以下内容:
Android Studio版本应为3.0 canary以上。
您的Activity应扩展AppCompatActivity。
更新Gradle文件如下:
    compileSdkVersion 26
    buildToolsVersion "26.0.1"
    defaultConfig {
        minSdkVersion 19
        targetSdkVersion 26
        versionCode 1
        versionName "1.0"
        testInstrumentationRunner "android.support.test.runner.AndroidJUnitRunner"
    }
将 buildtoolsVersion 升级至 26 及以上,最低 targetSdkVersion 要求为 26。
在 build.gradle 文件中添加依赖项:
classpath 'com.android.tools.build:gradle:3.0.0-beta4'
- gradle-wrapper.properties:
distributionUrl=https\://services.gradle.org/distributions/gradle-4.1-all.zip
- Vinod Makode
50
我认为我们可以使用Google字体,而不是下载.ttf文件。这很容易实现。只需按照以下步骤操作即可。
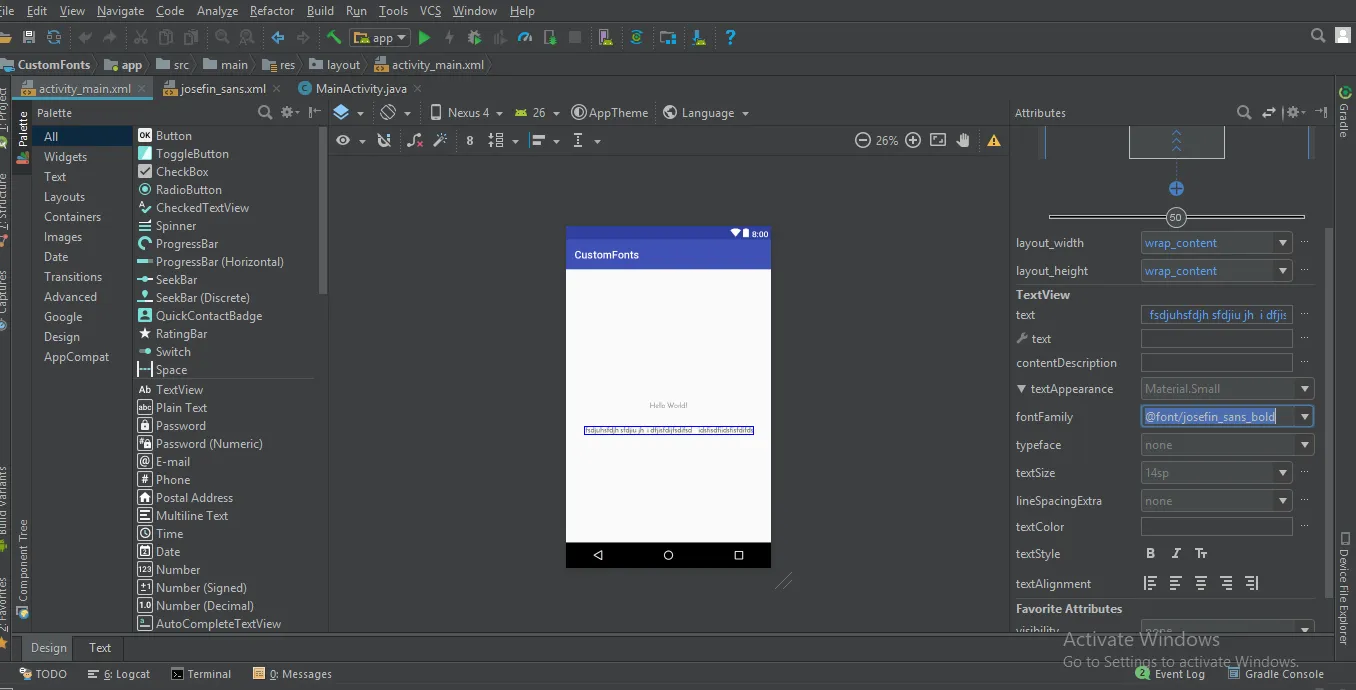
第一步:打开您项目中的layout.xml,并在属性中选择文本视图的字体系列(请参考屏幕截图)
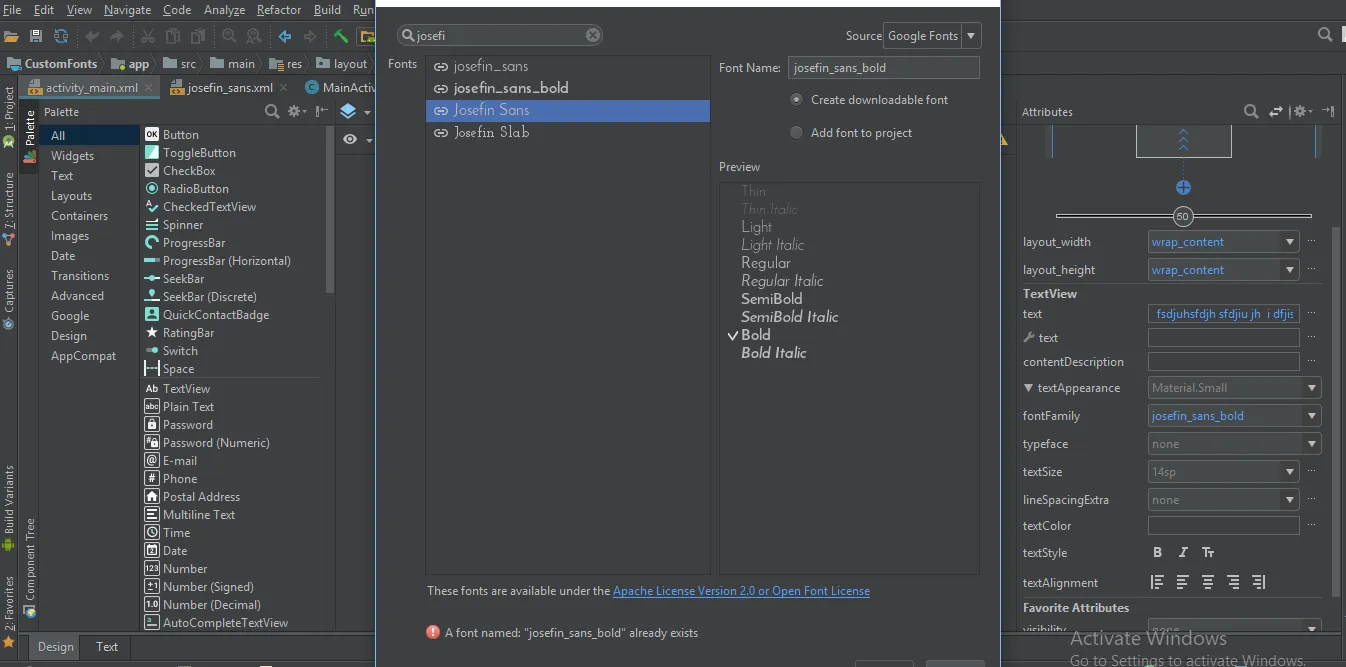
第二步:如果您的字体不在其中,请在字体系列中选择“更多字体”选项。然后会打开一个新窗口,在那里,您可以输入所需的字体并从列表中选择所需的字体,例如:Regular,Bold,Italic 等,如下图所示。
第三步:然后您会发现/res文件夹中会自动生成一个包含所选字体xml文件的字体文件夹。
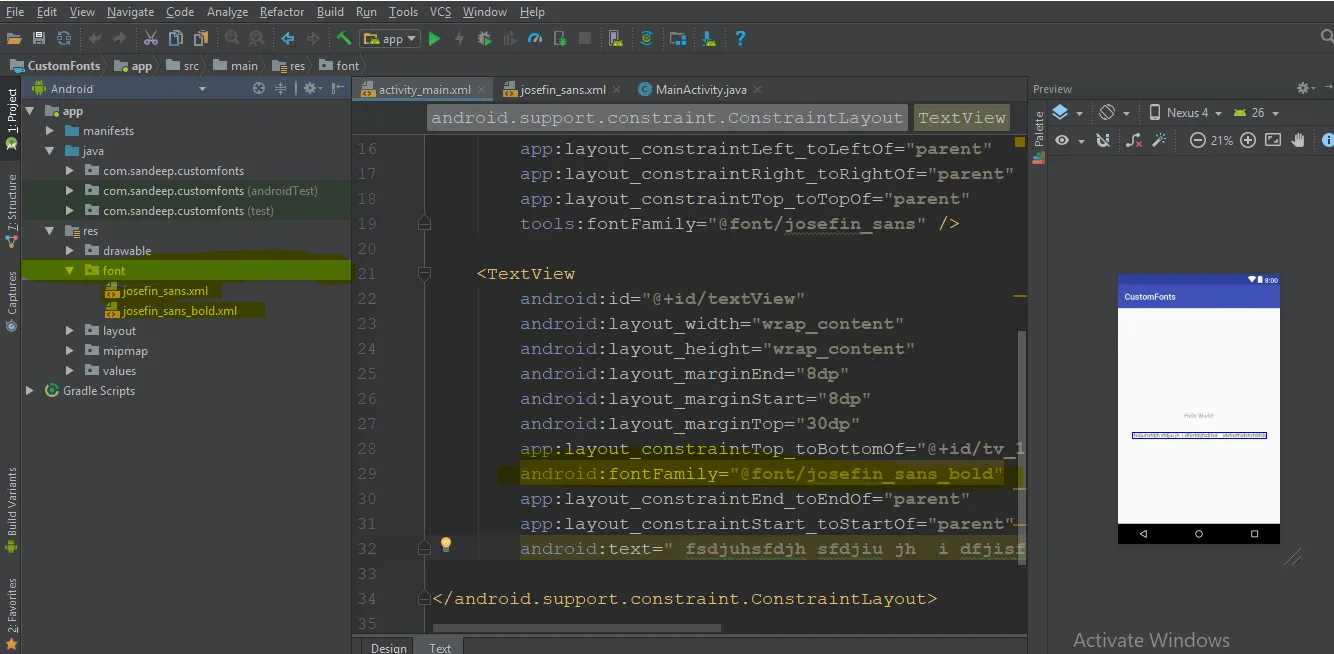
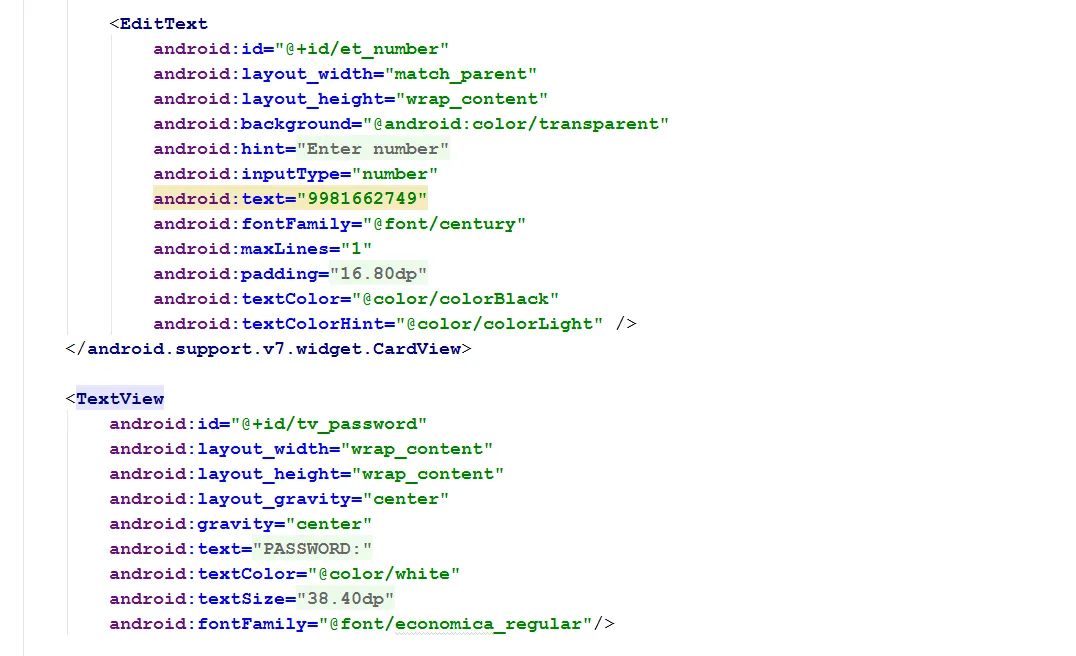
然后,您可以直接在xml中使用此字体系列:
android:fontFamily="@font/josefin_sans_bold"
或者你可以通过编程的方式来实现这一点,使用
  Typeface typeface = ResourcesCompat.getFont(this, R.font.app_font);
  fontText.setTypeface(typeface);
- Sandeep Sankla
2
1这不是问题的答案。并非所有字体都可以在Google Fonts上找到。 - Matt Fletcher
2很好的回答!如果你在列表中找不到你的字体 - 就将它加载到资产文件夹中,或者通过XML定义它。 - Edhar Khimich
22
大家好,我们有一种更好的方法来同时应用于Android上EditText和TextView上的字体,并将其应用于整个项目。
首先,您需要创建一个“fonts”文件夹。以下是步骤。
1:进入(项目文件夹)然后app>src>main
2:在主文件夹中创建名为“assets / fonts”的文件夹。
3:将您的字体放入字体文件夹中,这里我有“MavenPro-Regular.ttf”。
以下是应用自定义字体到EditText并使用此方法应用字体到每个输入的步骤。
1:创建一个名为MyEditText的类(您喜欢的名称...)
2:它扩展EditText
3:应用您的字体
以下是代码示例;
public class MyEditText extends EditText {

    public MyEditText(Context context, AttributeSet attrs, int defStyle) {
        super(context, attrs, defStyle);
        init();
    }

    public MyEditText(Context context, AttributeSet attrs) {
        super(context, attrs);
        init();
    }

    public MyEditText(Context context) {
        super(context);
        init();
    }

    private void init() {
        if (!isInEditMode()) {
            Typeface tf = Typeface.createFromAsset(getContext().getAssets(), "fonts/MavenPro-Regular.ttf");
            setTypeface(tf);
        }
    }

}
这里是如何使用它的代码。
MyEditText editText = (MyEditText) findViewById(R.id.editText);

editText.setText("Hello");
或者在您的xml文件中
   <MyEditText
    android:layout_width="match_parent"
    android:layout_height="match_parent"
    android:gravity="center"
    android:textColor="#fff"
    android:textSize="16dp"
    android:id="@+id/editText"
    />
- Mohammad Naim Dahee
4
那个类在运行时给了我这个错误:Error inflating class MyEditText。 - GMX
请参考此链接,您可能会找到一些解决错误的提示。 - Mohammad Naim Dahee
https://dev59.com/YG865IYBdhLWcg3wlvqq - Mohammad Naim Dahee
使用当前版本,我认为您需要将其更改为“extends AppCompatEditText”。 - Diesel
11
我想为Android-O和Android Studio 2.4添加我的答案。
在res文件夹下创建名为font的文件夹。下载你想要添加到项目中的各种字体,例如Google字体
在你的xml文件中使用自定义字体族
例如:
<TextView
    android:fontFamily="@font/indie_flower"
    android:layout_width="wrap_content"
    android:layout_height="wrap_content"
    android:padding="10dp"
    android:text="@string/sample_text" />
3. 如果您想以编程方式实现,请使用以下代码
Typeface typeface = getResources().getFont(R.font.indie_flower);
textView.setTypeface(typeface);
了解更多信息,请访问我的博客文章链接:使用Android Studio 2.4为Android添加字体样式
- Suresh Maidaragi
2
6请注意,如果您想推广自己的产品/博客,必须披露您的关联性,否则您的回答可能会被标记为垃圾邮件。请阅读《如何避免成为垃圾邮件发送者》(How to not be a spammer)。 - DavidPostill
是的 @PetterFriberg - Suresh Maidaragi
9
根据Android O中提供的新功能,XML字体资源是一项新功能。
要将字体添加为资源,请在Android Studio中执行以下步骤:
1)右键单击res文件夹,然后转到New > Android resource directory。出现新资源目录窗口。
2)在资源类型列表中,选择font,然后单击确定。 注意:资源目录的名称必须为font。 3)将字体文件添加到font文件夹中。
您可以使用新的资源类型font来访问字体资源。例如,要访问字体资源,请使用@font/myfont或R.font.myfont。
例如:
要将字体添加为资源,请在Android Studio中执行以下步骤:
1)右键单击res文件夹,然后转到New > Android resource directory。出现新资源目录窗口。
2)在资源类型列表中,选择font,然后单击确定。 注意:资源目录的名称必须为font。 3)将字体文件添加到font文件夹中。
您可以使用新的资源类型font来访问字体资源。例如,要访问字体资源,请使用@font/myfont或R.font.myfont。
例如:
Typeface typeface = getResources().getFont(R.font.myfont);
textView.setTypeface(typeface);
- Dharmishtha
1
2应该使用ResourcesCompat.getFont(context, R.font.your_font)获取字体资源。 - Trung Le
8
您可以使用易用且简单的第三方库EasyFonts来为您的
TextView设置各种自定义字体。使用此库,您无需担心下载并将字体添加到assets / fonts文件夹中,也无需创建Typeface对象或asset文件夹。TextView myTextView = (TextView)findViewById(R.id.myTextView);
myTextView.setTypeface(EasyFonts.robotoThin(this));
这个库提供了许多种字体类型。
- Vijay Vankhede
6
- 在项目 -> app(或您的应用程序名称) -> src -> main 中右键单击,新建文件夹assets。
- 然后在 assets 文件夹中创建一个名为“fonts”的新文件夹。
将字体分配给 textView:
TextView textView = (TextView) findViewById(R.id.your_textView);

final Typeface font = Typeface.createFromAsset(context.getAssets(), "fonts/your_font_name");
你的字体名称包含字体扩展。
- GmloMalo
网页内容由stack overflow 提供, 点击上面的可以查看英文原文,
原文链接
原文链接
- 相关问题
- 10 如何在Android Studio项目中使用最新的FFMPEG?
- 6 如何在Android Studio中使用自定义的Android SDK?
- 5 使用自定义字体在Android Studio编辑器中
- 26 如何在Android Studio中使用库项目
- 3 Android Studio中自定义字体
- 3 如何在Android Studio中创建自定义字体
- 9 如何在Android Studio中预览自定义字体(使用Calligraphy)
- 26 如何在Android XML中使用自定义字体?
- 17 如何在Android Studio中创建自定义项目模板
- 57 如何在Android项目中使用Roboto字体