点击按钮后,在ListView中添加选定行的删除线

3
我正在尝试弄清楚如何在单击按钮时划掉ListView中所选行。其中包含一个具有多列的GridView,这些列绑定到我创建的类中的字段,该类被发送到ObservableCollection中,以填充ListView中的数据。

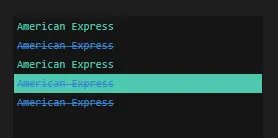
最好在单击按钮后,整个选定的行都会有一条红线划过,尽管此时即使只有每个单元格的文本被划掉我也会很高兴。

我已经尝试了各种方法。我最接近的是,我能够通过将我的预订类中的Notes字段更改为TextBlock并添加TextDecoration来显示带有删除线的文本,如下所示:

Reservation selected = (Reservation)shuttleView.SelectedItem;
TextDecoration td = new TextDecoration(TextDecorationLocation.Strikethrough, new Pen(Brushes.Black, 1), 0, TextDecorationUnit.FontRecommended, TextDecorationUnit.FontRecommended);
selected.Notes.TextDecorations.Add(td);

然而,这只会将装饰放在工具提示上,而不是ListView中... 我在下面发布了我的listview和class:
<ListView Height="287" HorizontalAlignment="Left" Margin="148,12,0,0" Name="shuttleView" VerticalAlignment="Top" Width="720" >
        <ListView.ItemContainerStyle>
            <Style TargetType="{x:Type ListViewItem}">
                <Setter Property="ToolTip" Value="{Binding Notes}" />
            </Style>
        </ListView.ItemContainerStyle>
        <ListView.View>
            <GridView>
                <GridViewColumn Width="50" Header="Time"
                                DisplayMemberBinding="{Binding Time}" />
                <GridViewColumn Width="50" Header="DO/PU"
                                DisplayMemberBinding="{Binding DropPickup}" />
                <GridViewColumn Width="100" Header="# People"
                                DisplayMemberBinding="{Binding People}" />
                <GridViewColumn Width="100" Header="Room #"
                                DisplayMemberBinding="{Binding Room}" />
                <GridViewColumn Width="100" Header="Hotel"
                                DisplayMemberBinding="{Binding Hotel}" />
                <GridViewColumn Width="112" Header="Location"
                                DisplayMemberBinding="{Binding Location}" />
                <GridViewColumn Width="198" Header="Notes"
                                DisplayMemberBinding="{Binding Notes}" />
            </GridView>
        </ListView.View>
    </ListView>


class Reservation
{
    public string ResID { get; set; }
    public string Time { get; set; }
    public string DropPickup { get; set; }
    public string People { get; set; }
    public string Room { get; set; }
    public string Hotel { get; set; }
    public string Location { get; set; }
    public string Notes { get; set; }

    public Reservation(string ResID, string Time, string DropPickup, string People, string Room, string Hotel, string Location, string Notes)
    {
        this.ResID = ResID;
        this.Time = Time;
        this.DropPickup = DropPickup;
        this.People = People;
        this.Room = Room;
        this.Hotel = Hotel;
        this.Location = Location;
        this.Notes = Notes;
    }
}
2个回答

4
你可以修改这个ListViewItem控件模板示例,并添加一个细矩形,用于划掉整个列表项:
<ListView>
    <ListView.ItemContainerStyle>
        <Style TargetType="ListViewItem">
            <Setter Property="Template">
                <Setter.Value>
                    <ControlTemplate TargetType="ListViewItem">
                        <Grid>
                            <Border Name="Border" Padding="2" SnapsToDevicePixels="true" Background="Transparent">
                                <GridViewRowPresenter VerticalAlignment="{TemplateBinding VerticalContentAlignment}"/>
                            </Border>
                            <Rectangle Name="StrikeThrough" HorizontalAlignment="Stretch" VerticalAlignment="Center"
                                       Height="1" StrokeThickness="1" Stroke="Transparent"/>
                        </Grid>
                        <ControlTemplate.Triggers>
                            <Trigger Property="IsSelected" Value="true">
                                <Setter TargetName="Border" Property="Background" Value="LightBlue"/>
                                <Setter TargetName="StrikeThrough" Property="Stroke" Value="Red"/>
                            </Trigger>
                        </ControlTemplate.Triggers>
                    </ControlTemplate>
                </Setter.Value>
            </Setter>
        </Style>
    </ListView.ItemContainerStyle>
    ...
</ListView>

这真的非常有帮助。它让我朝着正确的方向前进,找到了我需要的信息,使一切都能按照我想要的方式正常工作。谢谢! - fishapples
我尝试了,但这是我的第一篇帖子,我还没有足够的声望来点赞:( - fishapples

0

这里有一个对我有效的示例。TextDecoration是数据绑定的,因此它取决于IValueConverter返回“Strikethrough”。

<Style  x:Key="z3r0_Style_ListBoxItem_Default" TargetType="{x:Type ListBoxItem}">
<Setter Property="FocusVisualStyle" Value="{x:Null}"/>
<Setter Property="SnapsToDevicePixels" Value="true"/>
<Setter Property="OverridesDefaultStyle" Value="true"/>
<Setter Property="FontSize" Value="11"/>
<Setter Property="FontFamily" Value="Consolas"/>                        
<Setter Property="Template">
    <Setter.Value>
        <ControlTemplate TargetType="{x:Type ListBoxItem}">
            <Grid>
                <Border Name="Border" Padding="2" SnapsToDevicePixels="true" Background="Transparent">                                
                </Border>
                <TextBlock Name ="_Text" Padding ="3"  IsHitTestVisible="false" TextDecorations="None" Text="{Binding}"/>                                                    
            </Grid>

            <ControlTemplate.Triggers>
                <Trigger Property="IsSelected" Value="true">
                    <Setter TargetName="_Text" Property="Foreground" Value= "{Binding Converter={StaticResource m_Converter_ListBoxItem_Foreground_Selected}}"/>
                    <Setter TargetName="_Text" Property="TextDecorations" Value = "{Binding Converter={StaticResource m_Converter_ListBoxItem_TextDecoration}}"/>
                    <Setter TargetName="Border" Property="Background" Value="{StaticResource z3r0_SolidColorBrush_Green}"/>
                </Trigger>
                <Trigger Property="IsSelected" Value="false">
                    <Setter TargetName="_Text" Property="Foreground" Value= "{Binding Converter={StaticResource m_Converter_ListBoxItem_Foreground_Unselected}}"/>
                    <Setter TargetName="_Text" Property="TextDecorations" Value = "{Binding Converter={StaticResource m_Converter_ListBoxItem_TextDecoration}}"/>                                
                    <Setter TargetName="Border" Property="Background" Value="Transparent"/>
                </Trigger>
            </ControlTemplate.Triggers>
        </ControlTemplate>
    </Setter.Value>
</Setter>

enter image description here


网页内容由stack overflow 提供, 点击上面的
可以查看英文原文,
原文链接