我已经按照如何在本地主机上使用https / SSL?的步骤进行了操作,但是这为我的机器名称设置了自签名证书,并且通过https:// localhost 浏览时,我会收到IE警告。
有没有一种方法可以为“localhost”创建自签名证书,以避免此警告?
我已经按照如何在本地主机上使用https / SSL?的步骤进行了操作,但是这为我的机器名称设置了自签名证书,并且通过https:// localhost 浏览时,我会收到IE警告。
有没有一种方法可以为“localhost”创建自签名证书,以避免此警告?
由于这个问题标记了IIS,我找不到一个好的答案来获取可信证书,所以我会发表我的意见:
首先,在管理员PowerShell中使用@AuriRahimzadeh的命令:
New-SelfSignedCertificate -DnsName "localhost" -CertStoreLocation "cert:\LocalMachine\My" -NotAfter (Get-Date).AddYears(100)
将证书的有效期限增加到100年,这样本地主机的证书就不会过期了。如果您想要24个月或其他任何值,可以使用-NotAfter (Get-Date).AddMonths(24)。
这很好,但是证书不受信任,会导致以下错误。这是因为它未安装在“Trusted Root Certification Authorities”中。

通过启动mmc.exe来解决此问题。
然后转到:
文件 -> 添加或删除单独管理器 -> 证书 -> 添加 -> 计算机帐户 -> 本地计算机。点击完成。
展开“个人”文件夹,您将看到自己的“localhost”证书:
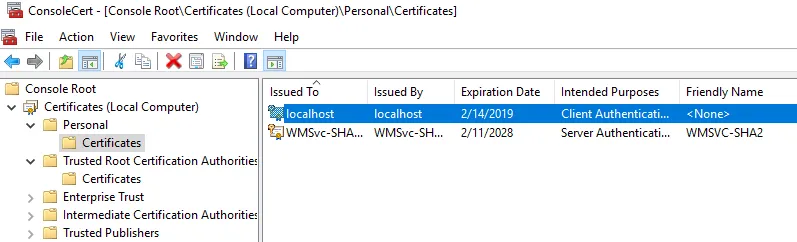
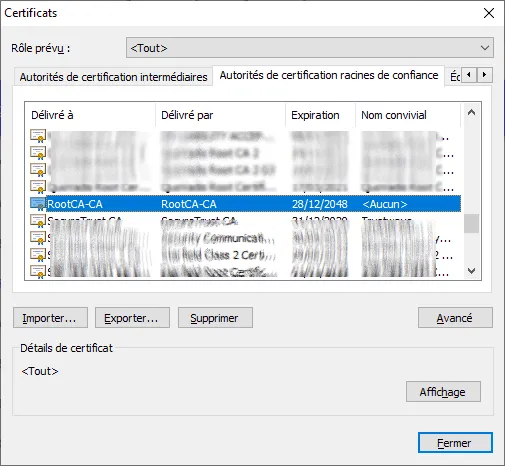
将证书复制到“Trusted Root Certification Authorities - Certificates”文件夹中。
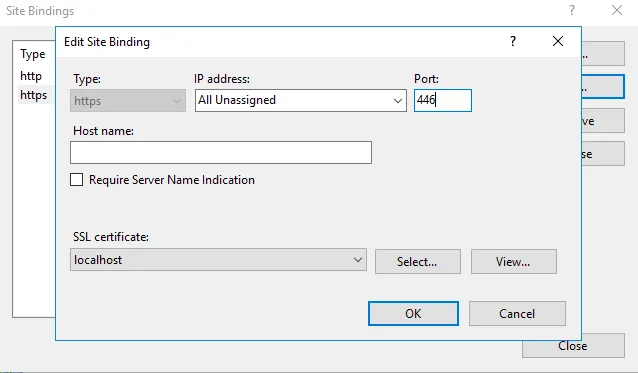
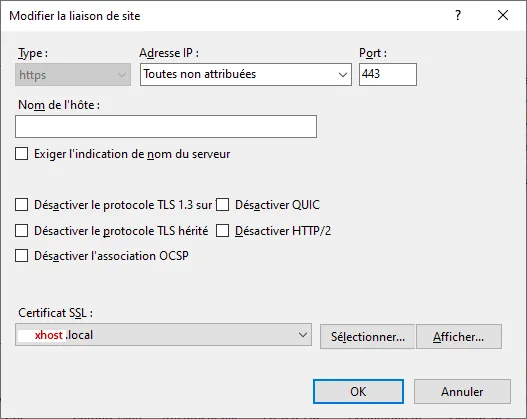
最后一步是打开Internet Information Services(IIS)管理器或简单的inetmgr.exe。从那里转到您的站点,选择“绑定...”和“添加...”或“编辑...”。设置https并从下拉列表中选择您的证书。
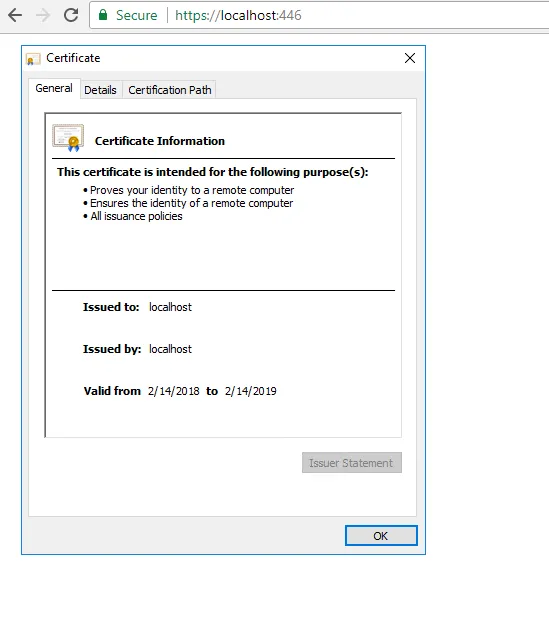
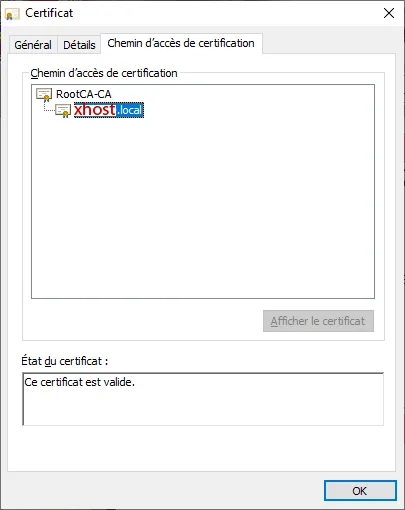
现在您的证书是受信任的:
尽管此帖子标记为 Windows,但这是关于 OS X 的相关问题,我在其他地方没有看到答案。以下是在 OS X 上为本地主机创建自签名证书的步骤:
# Use 'localhost' for the 'Common name'
openssl req -x509 -sha256 -nodes -newkey rsa:2048 -days 365 -keyout localhost.key -out localhost.crt

# Add the cert to your keychain
open localhost.crt
Keychain Access 中,双击此新的本地主机证书。展开“信任”旁边的箭头,并选择“始终信任”。现在,Chrome 和 Safari 应该信任这个证书。例如,如果您想在 node.js 中使用此证书:var options = {
key: fs.readFileSync('/path/to/localhost.key').toString(),
cert: fs.readFileSync('/path/to/localhost.crt').toString(),
ciphers: 'ECDHE-RSA-AES256-GCM-SHA384:ECDHE-RSA-AES128-GCM-SHA256:ECDHE-RSA-AES128-SHA:ECDHE-RSA-AES128-SHA256:ECDHE-RSA-AES256-SHA:ECDHE-RSA-AES256-SHA384',
honorCipherOrder: true,
secureProtocol: 'TLSv1_2_method'
};
var server = require('https').createServer(options, app);
ssh-keygen 是不必要的,因为 openssl 命令也会创建一个新的密钥(并覆盖 ssh 创建的密钥)。 - Félix Saparellisudo security add-trusted-cert -p ssl -d -r trustRoot -k ~/Library/Keychains/login.keychain localhost.crt。 - philfreoNew-SelfSignedCertificate -DnsName "localhost" -CertStoreLocation "cert:\LocalMachine\My"
注意:makecert.exe 已被弃用。
-KeyLocation 标志,您可以指定位置。@woojoo666 - hamid如果您想创建一个自签名证书,让您可以访问 http://localhost/mysite,以下是一种创建方式
makecert -r -n "CN=localhost" -b 01/01/2000 -e 01/01/2099 -eku 1.3.6.1.5.5.7.3.1 -sv localhost.pvk localhost.cer
cert2spc localhost.cer localhost.spc
pvk2pfx -pvk localhost.pvk -spc localhost.spc -pfx localhost.pfx
来自 http://social.msdn.microsoft.com/Forums/en-US/wcf/thread/32bc5a61-1f7b-4545-a514-a11652f11200
1.3.6.1.5.5.7.3.1。个人建议使用 -eku 1.3.6.1.5.5.7.3.1,1.3.6.1.5.5.7.3.2,1.3.6.1.5.5.7.3.3,这将为您提供客户端认证、服务器认证和代码签名。 - Scott Chamberlain生成本地主机证书的最快方式。
openssl req -x509 -out localhost.crt -keyout localhost.key \
  -newkey rsa:2048 -nodes -sha256 \
  -subj '/CN=localhost' -extensions EXT -config <( \
   printf "[dn]\nCN=localhost\n[req]\ndistinguished_name = dn\n[EXT]\nsubjectAltName=DNS:localhost\nkeyUsage=digitalSignature\nextendedKeyUsage=serverAuth")
~
https://localhost/
https://xhost/
https://xhost.local/
...
https://dev.example.org/
...
cd C:\users\so\crt
openssl req -x509 -nodes -new -sha256 -days 10240 -newkey rsa:2048 -keyout RootCA.key -out RootCA.pem -subj "/C=ZA/CN=RootCA-CA"
openssl x509 -outform pem -in RootCA.pem -out RootCA.crt
C: Country
ST: State
L: locality (city)
O: Organization Name
Organization Unit
CN: Common Name
openssl req -new -nodes -newkey rsa:2048 -keyout xhost.key -out xhost.csr -subj "/C=ZA/ST=FREE STATE/L=Golden Gate Highlands National Park/O=WWF4ME/OU=xhost.home/CN=xhost.local"
openssl x509 -req -sha256 -days 1024 -in xhost.csr -CA RootCA.pem -CAkey RootCA.key -CAcreateserial -extfile domains.ext -out xhost.crt
authorityKeyIdentifier=keyid,issuer
basicConstraints=CA:FALSE
keyUsage = digitalSignature, nonRepudiation, keyEncipherment, dataEncipherment
subjectAltName = @alt_names
[alt_names]
DNS.1 = localhost
DNS.2 = xhost
DNS.3 = xhost.local
DNS.4 = dev.example.org
DNS.5 = 192.168.1.2
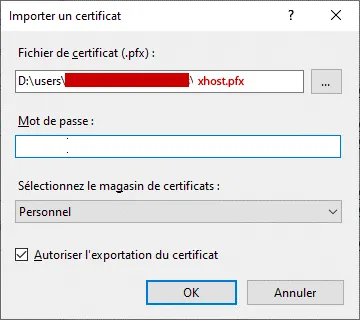
将私有密钥xhost.key和证书xhost.crt合并,以便导入到iis中。此步骤需要输入密码,请按[RETURN]键留空(不输入密码):
openssl pkcs12 -export -out xhost.pfx -inkey xhost.key -in xhost.crt
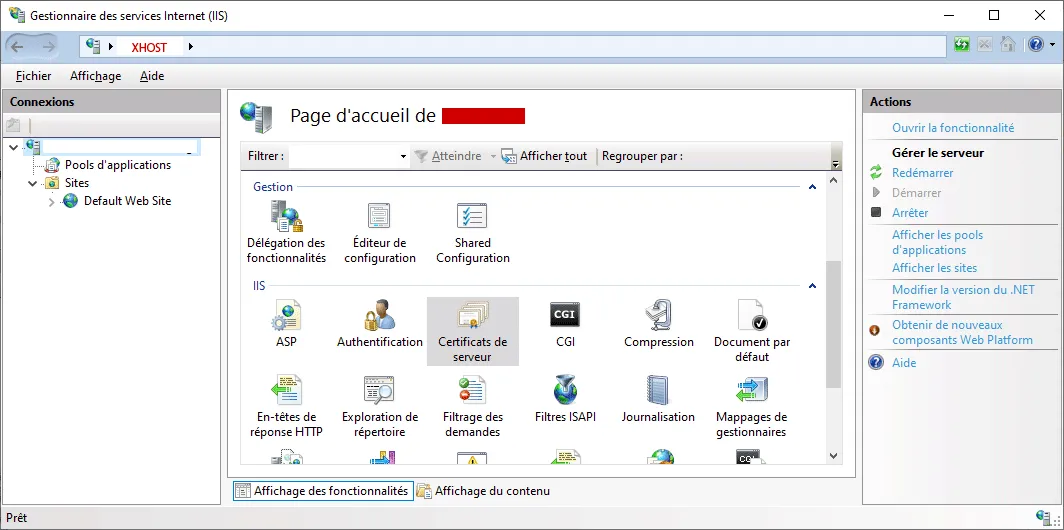
在xhost计算机(这里是本地主机)安装证书。然后重新启动IIS服务。
IIS10 Gestionnaire des services Internet (IIS) (%windir%\system32\inetsrv\InetMgr.exe)
RootCA-CA
  |_____ xhost.local
#
# Generate:
#   RootCA.pem, RootCA.key RootCA.crt
#
#   xhost.key xhost.csr xhost.crt
#   xhost.pfx
#
# created  15-EEC-2020
# modified 15-DEC-2020
#
#
# change to a safe directory:
#

cd C:\users\so\crt

#
# Generate RootCA.pem, RootCA.key & RootCA.crt as Certification Authority:
#
openssl req -x509 -nodes -new -sha256 -days 10240 -newkey rsa:2048 -keyout RootCA.key -out RootCA.pem -subj "/C=ZA/CN=RootCA-CA"
openssl x509 -outform pem -in RootCA.pem -out RootCA.crt

#
# get RootCA.pfx: permitting to import into iis10: not required.
#
#openssl pkcs12 -export -out RootCA.pfx -inkey RootCA.key -in RootCA.crt

#
# get xhost.key xhost.csr:
#   C: Country
#   ST: State
#   L: locality (city)
#   O: Organization Name
#   OU: Organization Unit
#   CN: Common Name
#
openssl req -new -nodes -newkey rsa:2048 -keyout xhost.key -out xhost.csr -subj "/C=ZA/ST=FREE STATE/L=Golden Gate Highlands National Park/O=WWF4ME/OU=xhost.home/CN=xhost.local"

#
# get xhost.crt certified by RootCA.pem:
# to show content:
#   openssl x509 -in xhost.crt -noout -text
#
openssl x509 -req -sha256 -days 1024 -in xhost.csr -CA RootCA.pem -CAkey RootCA.key -CAcreateserial -extfile domains.ext -out xhost.crt

#
# get xhost.pfx, permitting to import into iis:
#
openssl pkcs12 -export -out xhost.pfx -inkey xhost.key -in xhost.crt

#
# import xhost.pfx in iis10 installed in xhost computer (here localhost).
#
以下是我在 Windows 上获取本地主机有效证书所做的步骤: