将NV21字节数组转换为位图可读格式

8
嘿,我正在创建一个小型相机应用程序,我已经实现了所有功能,但我有一个问题,就是将NV21字节数组转换为jpeg格式。
我找到了很多方法,但它们全部都无法工作,或只适用于某些设备。
首先,我尝试了这个片段,它在Xperia z2 5.2上可以运行,但在galaxy s4 4.4.4上不行。
bitmap = BitmapFactory.decodeByteArray(data, 0, data.length);

同样的方式在一个设备上可以正常工作,但在另一个设备上却失败了。
 int pich = camera.getParameters().getPreviewSize().height;
        int picw = camera.getParameters().getPreviewSize().width;
        int[] pix = new int[picw * pich];
        bitmap.getPixels(pix, 0, picw, 0, 0, picw, pich);
                    //  int R, G, B, Y;
                    for (int y = 0; y < pich; y++) {
                        for (int x = 0; x < picw; x++) {
                            int index = y * picw + x;
                          int R = (pix[index] >> 16) & 0xff; 
                         int G = (pix[index] >> 8) & 0xff;     
                    int B = pix[index] & 0xff;
                   pix[index] = 0xff000000 | (R << 16) | (G << 8) | B;
                        }
                                  }

其次,我尝试了许多解决方案来转换解码NV21, 第一个是renderscript代码。

    public Bitmap convertYUV420_NV21toRGB8888_RenderScript(byte [] data,int W, int H, Fragment fragment) {
    // https://dev59.com/HmIj5IYBdhLWcg3wWT6c
    RenderScript rs;
    ScriptIntrinsicYuvToRGB yuvToRgbIntrinsic;
    rs = RenderScript.create(fragment.getActivity());
    yuvToRgbIntrinsic = ScriptIntrinsicYuvToRGB.create(rs, Element.U8_4(rs)); //Create an intrinsic for converting YUV to RGB.

    Type.Builder yuvType = new Type.Builder(rs, Element.U8(rs)).setX(data.length);
    Allocation in = Allocation.createTyped(rs, yuvType.create(), Allocation.USAGE_SCRIPT); //an Allocation will be populated with empty data when it is first created

    Type.Builder rgbaType = new Type.Builder(rs, Element.RGBA_8888(rs)).setX(W).setY(H);
    Allocation out = Allocation.createTyped(rs, rgbaType.create(), Allocation.USAGE_SCRIPT); //an Allocation will be populated with empty data when it is first created

    in.copyFrom(data);//Populate Allocations with data.

    yuvToRgbIntrinsic.setInput(in); //Set the input yuv allocation, must be U8(RenderScript).
    yuvToRgbIntrinsic.forEach(out); //Launch the appropriate kernels,Convert the image to RGB.


    Bitmap bmpout = Bitmap.createBitmap(W, H, Bitmap.Config.ARGB_8888);
    out.copyTo(bmpout); //Copy data out of Allocation objects.
    return bmpout;

}

同时还有这段代码

 void decodeYUV420SP(int[] rgb, byte[] yuv420sp, int width, int height) {

    final int frameSize = width * height;

    for (int j = 0, yp = 0; j < height; j++) {
        int uvp = frameSize + (j >> 1) * width, u = 0, v = 0;

        for (int i = 0; i < width; i++, yp++) {

            int y = (0xff & ((int) yuv420sp[yp])) - 16;

            if (y < 0)

                y = 0;

            if ((i & 1) == 0) {

                v = (0xff & yuv420sp[uvp++]) - 128;

                u = (0xff & yuv420sp[uvp++]) - 128;

            }

            int y1192 = 1192 * y;

            int r = (y1192 + 1634 * v);
            int g = (y1192 - 833 * v - 400 * u);
            int b = (y1192 + 2066 * u);

            if (r < 0)
                r = 0;
            else if (r > 262143)

                r = 262143;
            if (g < 0)
                g = 0;
            else if (g > 262143)

                g = 262143;

            if (b < 0)

                b = 0;

            else if (b > 262143)

                b = 262143;

            rgb[yp] = 0xff000000 | ((r << 6) & 0xff0000) | ((g >> 2) & 0xff00) | ((b >> 10) & 0xff);
        }

    }
}

最后,我尝试将图像保存到SD卡,然后重新打开它,但也失败了。

File pictureFile = new File(filename);
            int pich = camera.getParameters().getPreviewSize().height;
            int picw = camera.getParameters().getPreviewSize().width;
            Rect rect = new Rect(0, 0,picw, pich);
            YuvImage img = new YuvImage(data, ImageFormat.NV21, picw, picw, null);

            try {
                FileOutputStream fos = new FileOutputStream(pictureFile);
                img.compressToJpeg(rect, 100, fos);
                fos.write(data);
                fos.close();

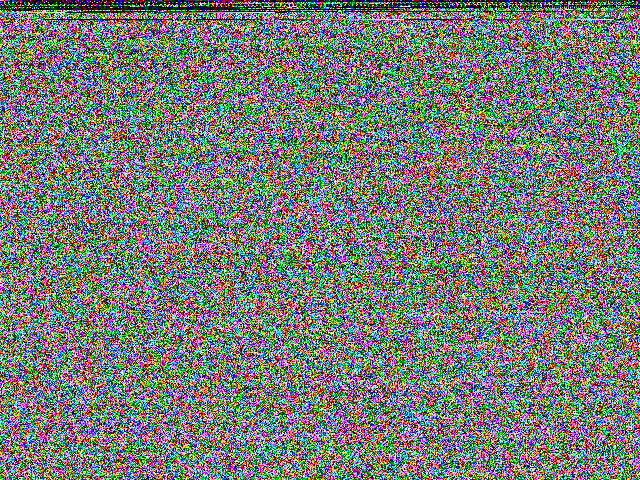
这是我之前尝试过的最后三种方法的结果: 在此输入图片描述
如果您想要接收Jpeg,请重新命名您的问题,因为看起来您想要将NV21转换为RGB,这是完全不同的任务。 - Alex Cohn
你是如何显示图片的?将Jpeg文件加载到ImageView中吗? - Alex Cohn
2个回答

23

有几种方法可以保存来自相机的NV21帧,最简单的方法是将其转换为YuvImage然后保存到Jpeg文件中:

FileOutputStream fos = new FileOutputStream(Environment.getExternalStorageDirectory() + "/imagename.jpg");
YuvImage yuvImage = new YuvImage(nv21bytearray, ImageFormat.NV21, width, height, null);
yuvImage.compressToJpeg(new Rect(0, 0, width, height), 100, fos);
fos.close();

或者,你也可以将它转换成 Android Bitmap 对象并将其保存为 PNG 或其他格式:

YuvImage yuvImage = new YuvImage(nv21bytearray, ImageFormat.NV21, width, height, null);
ByteArrayOutputStream os = new ByteArrayOutputStream();
yuvImage.compressToJpeg(new Rect(0, 0, width, height), 100, os);
byte[] jpegByteArray = os.toByteArray();
Bitmap bitmap = BitmapFactory.decodeByteArray(jpegByteArray, 0, jpegByteArray.length);
FileOutputStream fos = new FileOutputStream(Environment.getExternalStorageDirectory() + "/imagename.png");
bitmap.compress(Bitmap.CompressFormat.PNG, 100, fos);
fos.close();
请注意,最后一个选项执行了NV21 -> JPEG -> Bitmap Object -> PNG file 的过程,因此请记住,如果需要高性能保存相机预览图像,则这不是非常有效的方法。
更新:我厌倦了这个转换需要多长时间,所以我编写了一个库(easyRS),使用 RenderScript 可以轻松地在一行代码中完成此操作。
Bitmap outputBitmap = Nv21Image.nv21ToBitmap(rs, nv21ByteArray, width, height);

在 Moto G 2nd 上处理一张2000x2000的图片时,它的速度大约比JPEG过程快五倍。


如何将NV21帧转换为.mp4格式? - Diego
由于谷歌应用商店不再接受不支持64位的构建版本,我不得不放弃使用easyRS库,除非有错设置导致了缺少64位支持。 - Rowan Gontier
使用那个库给我带来了问题,安装失败,原因是空值。 - Abhinav Chauhan

5
你的第二次尝试(使用ScriptIntrinsicYuvToRGB)看起来很有前途。在JellyBean 4.3(API18)或更高版本中,请执行以下操作(相机预览格式必须为NV21):
首先,请不要在方法或循环中创建rs、yuvToRgbIntrinsic和allocations,因为这会极大地减慢应用程序,并可能导致内存不足错误。将它们放在onCreate()方法中:
rs = RenderScript.create(this);  // create rs object only once and use it as long as possible
yuvToRgbIntrinsic = ScriptIntrinsicYuvToRGB.create(rs, Element.U8_4(rs)); // ditto.

从Api18+开始,分配内存变得更加容易(您不需要Type.Builder对象!)。使用您的cameraPreviewWidth和cameraPreviewHeight创建allocation aIn:

int yuvDatalength = cameraPreviewWidth*cameraPreviewHeight*3/2; // this is 12 bit per pixel
aIn = Allocation.createSized(rs, Element.U8(rs), yuvDatalength);  

您需要一张位图来输出:
bmpout = Bitmap.createBitmap(cameraPreviewWidth, cameraPreviewHeight, Bitmap.Config.ARGB_8888);

并且可以从这个位图简单地创建aOut分配:

aOut = Allocation.createFromBitmap(rs, bmpout);

将脚本的内分配设置(仅一次,在循环之外):

yuvToRgbIntrinsic.setInput(aIn); //Set the input yuv allocation, must be U8(RenderScript).

在“相机循环”中处理字节数组数据:
aIn.copyFrom(data); // or aIn.copyFromUnchecked(data);  // which is faster and safe with camera data

yuvToRgbIntrinsic.forEach(aOut); //Launch the appropriate kernels,Convert the image to RGB.

aOut.copyTo(bmpout); // copy data from Allocation aOut to Bitmap bmpout

例如,在Nexus 7(2013版,JellyBean 4.3系统)上,全高清(1920x1080像素)相机预览转换大约需要7毫秒。

你好!如何从OnImageAvailableListener中的图像获取nv21byteArray? - user1884872
cameraPreviewWidth 是什么? - Someone Somewhere

网页内容由stack overflow 提供, 点击上面的
可以查看英文原文,
原文链接