我正在尝试从二进制日志文件中读取的图像创建视频。然而,输出视频质量较低,但输出文件属性在图像大小、fps和持续时间等设置相同的情况下看起来很好。以下是我的代码。
目前,在调整大小之前,图像的大小为:
我希望图片大小设置没有问题。
我使用以下命令创建文件:
data.astype('int16').tofile(r"data1.out")
一旦有了 data,我执行以下步骤获取 img,因为 data 表示为每像素12位。
我正在尝试从二进制日志文件中读取的图像创建视频。然而,输出视频质量较低,但输出文件属性在图像大小、fps和持续时间等设置相同的情况下看起来很好。以下是我的代码。
目前,在调整大小之前,图像的大小为:
我希望图片大小设置没有问题。
我使用以下命令创建文件:
data.astype('int16').tofile(r"data1.out")
一旦有了 data,我执行以下步骤获取 img,因为 data 表示为每像素12位。
Lower 4 bits of mid_uint8 are the upper 4 bits of fst_uint12 (and fst_uint8 are the lower 8 bits).
mid_uint8 ******** fst_uint8 ********
fst_uint12 |||| ||||||||
Code for unpacking fst_uint12:
fst_uint12 = fst_uint8 + ((mid_uint8 & 0xF) << 8)
Upper 4 bits of mid_uint8 are the lower 4 bits of snd_uint12 (and lst_uint8 are the upper 8 bits).
lst_uint8 ******** mid_uint8 ********
snd_uint12 |||||||| ||||
Code for unpacking snd_uint12:
snd_uint12 = (lst_uint8 << 4) + (mid_uint8 >> 4)
'data1.out',解包12位,并将其转换为BGR格式:import numpy as np
import cv2
width, height = 1824, 992 # Image width and height.
data = np.fromfile('data1.out', np.uint16) # Read data from file into 1D NumPy array as type uin16
data = data.astype(np.uint8) # np.max(data) is 255, so I have to assume data is actually uint8 - convert data to uint8.
# Separate data into low, mid and high bytes - before unpacking 12 bits elements.
fst_uint8 = data[0::3].astype(np.uint16) # Convert to uint16 (used at the next stage).
mid_uint8 = data[1::3].astype(np.uint16)
lst_uint8 = data[2::3].astype(np.uint16)
# Unpack first 12 bits:
# Lower 4 bits of mid_uint8 are the upper 4 bits of fst_uint12 (and fst_uint8 are the lower 8 bits).
# mid_uint8 ******** fst_uint8 ********
# fst_uint12 |||| ||||||||
fst_uint12 = fst_uint8 + ((mid_uint8 & 0xF) << 8)
# Unpack second 12 bits:
# Upper 4 bits of mid_uint8 are the lower 4 bits of snd_uint12 (and lst_uint8 are the upper 8 bits).
# lst_uint8 ******** mid_uint8 ********
# snd_uint12 |||||||| ||||
snd_uint12 = (lst_uint8 << 4) + (mid_uint8 >> 4)
# Interleave fst_uint12 and snd_uint12
data_uint12 = np.zeros(len(fst_uint12)*2)
data_uint12[0::2] = fst_uint12
data_uint12[1::2] = snd_uint12
# Reshape data_uint12 into img
img = np.reshape(data_uint12, (height, width))
# Convert to uint8 - simply divide by 16 (loose some accuracy, but its good enough for getting a sample).
img = (img//16).astype(np.uint8)
# Apply demosaic - not sure it is correct.
bgr_img = cv2.cvtColor(img, cv2.COLOR_BAYER_GB2BGR)
bgr_img = cv2.resize(bgr_img, (912, 496)) # Resize bgr_img
# Show images for testing
cv2.imshow('img', img)
cv2.imshow('bgr_img', bgr_img)
cv2.waitKey()
cv2.destroyAllWindows()
bgr_img:
由于OP的请求,图像已被移除。
img:
由于OP的请求,图像已被移除。
# Reshape data_uint12 into img
img = np.reshape(data_uint12, (height, width))

# Crop relevant ROI
img = img[40:978, 100:1714]

# Apply linear "stretch" - lo goes to 0, and hi goes to 1
lo, hi = np.percentile(img, (1, 99))  # 1% - Low percentile, 99% - High percentile
stretch_img = (img.astype(float) - lo) / (hi-lo)
stretch_img = np.maximum(np.minimum(stretch_img*255, 255), 0).astype(np.uint8)  # Multiply by 255, clamp range to [0, 255] and convert to uint8

# Apply demosaic - not sure it is correct.
stretch_bgr = cv2.cvtColor(stretch_img, cv2.COLOR_BAYER_GB2BGR)
stretch_bgr = cv2.resize(stretch_bgr, (912, 496)) # Resize bgr_img
CLAHE的示例(应用于灰度图像):
# Create a CLAHE object (Arguments are optional).
clahe = cv2.createCLAHE(clipLimit=2.0, tileGridSize=(8,8))
cl1 = clahe.apply(cv2.cvtColor(stretch_bgr, cv2.COLOR_BGR2GRAY))  # Convert BGR to gray-scale and apply contrast enhancement.
stretch_bgr:
由于 OP 请求,图片已被删除。
cl1:
由于 OP 请求,图片已被删除。
正在处理RCCC彩色滤镜阵列:
正如Dan Mašek所评论的,原始图像格式应用RCCC彩色滤镜阵列。
CRCC# Reshape data_uint12 into img
img = np.reshape(data_uint12, (height, width))
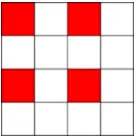
# The CFA is RCCC
# Color Filter Array ordering:
# CR
# CC
img = np.reshape(data_uint12, (height, width)).astype(np.uint16)
img = img[40:978, 100:1714] # Crop relevant ROI
# Reconstruct C (clear pixel value), in position of red pixels.
# Apply convolution as described here:
# https://www.analog.com/media/en/technical-documentation/application-notes/EE358.pdf
k = np.array([[ 0, 0, -1, 0, 0],
[ 0, 0, 2, 0, 0],
[-1, 2, 4, 2, -1],
[ 0, 0, 2, 0, 0],
[ 0, 0, -1, 0, 0]], float) * (1.0/8.0)
tmp_img = cv2.filter2D(img, -1, k) # Convolve image with kernel k
tmp_img = np.minimum(tmp_img, 4095) # Limit result to valid range of 12 bits.
# Image of "clear" pixels - replace original "red" pixels with values of red pixels after filter2D.
c_img = img.copy()
c_img[0::2, 1::2] = tmp_img[0::2, 1::2]
cv2.imshow('c_img', c_img*16) # Show image for testing
cv2.waitKey()
cv2.imwrite('c_img.png', cv2.resize((c_img//16).astype(np.uint8), (912, 496)))
# Extract red color channel by resizing - assume it's good enough.
r_img = cv2.resize(img[0::2, 1::2], (img.shape[1], img.shape[0]))


# In YUV color space: Y = 0.2126*R + 0.7152*G + 0.0722*B
# We know Y (Y applies clear channel) and R, but we don't know G and B.
# For simplicity, assume G = B.
# Y = 0.2126*R + (0.7152+0.0722)*G ==> G = (Y - 0.2126*R)/(0.7152+0.0722) and B = G
g_img = c_img - 0.2126*r_img / (0.7152+0.0722)
b_img = g_img
tmp_bgr_img = (np.dstack((b_img, g_img, r_img))//16).astype(np.uint8)  # Merge channels and convert to uint8

# Convert BGR to YCrCb
ycrcb_img = cv2.cvtColor(tmp_bgr_img, cv2.COLOR_BGR2YCrCb)

# Cr approximates red color hue
# Cb approximates blue color hue
# Place 128 in Cb, because there is no blue color (keep only Cr)
ycrcb_img[:, :, 2] = 128

# Apply CLAHE enhancement on Y channel - remark: the conventional way is converting BGR to LAB and apply CLAHE on L.
clahe = cv2.createCLAHE(clipLimit=2.0, tileGridSize=(8,8))
ycrcb_img[:, :, 0] = clahe.apply(ycrcb_img[:, :, 0])

# Convert back to BGR - build image with gray and red colors:
reddish_bgr_img = cv2.cvtColor(ycrcb_img, cv2.COLOR_YCrCb2BGR)

cv2.imshow('reddish_bgr_img', reddish_bgr_img)  # Show image for testing
cv2.waitKey()

cv2.imwrite('reddish_bgr_img.png', cv2.resize(reddish_bgr_img, (912, 496)))
图片已因发帖人请求而被删除。
.svg)