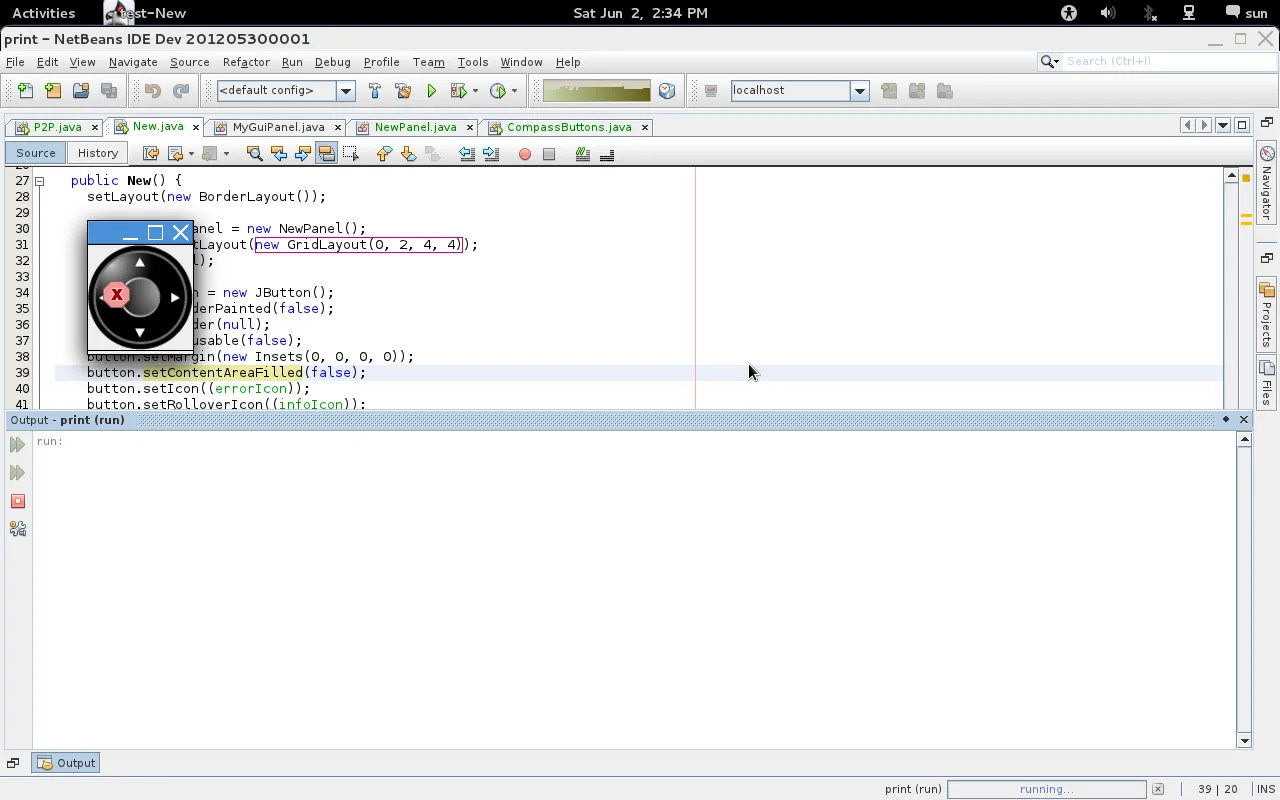
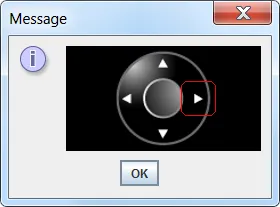
在一个自定义的用户界面中添加一个复杂的图片,周围带有按钮。

21
我该如何将下面的这张图片放到slavePanel中,并且位于那个JPanel的顶部,同时调整JButtons使其像图片一样正确地包裹在按钮周围?(现在它们排列成1行4列)

enter image description here

  //
  // Shot Gun mover up/down/left/right, middle on is for zoom
  //
  public void GunMover(JPanel configPanel) throws IOException {

    // Master Panel - holds everything
    JPanel masterPanel = new Panel();
    masterPanel.setLayout(new SpringLayout());

    // Slave Panel - with image background 
    JPanel slavePanel = new Panel();
    slavePanel.setLayout(new SpringLayout());

    // Row 1
    final JButton ptzLeft = new JButton("<");       
    masterPanel.add(ptzLeft, BorderLayout.WEST);

    // Row 2
    final JButton ptzRight = new JButton(">");   
    masterPanel.add(ptzRight, BorderLayout.CENTER);    

    // Row 3
    final JButton ptzUp = new JButton("^");   
    masterPanel.add(ptzUp, BorderLayout.WEST);    

    // Row 4
    final JButton ptzDown = new JButton("down");   
    masterPanel.add(ptzDown, BorderLayout.CENTER);    

    // How do i add slavePanel this background and add all the JButtons 
    // According to that image shape?

    // Layout the panel.
    SpringUtilities.makeCompactGrid(masterPanel,
                                1, 4, //rows, cols
                                6, 6, //initX, initY
                                6, 6);        

    configPanel.setLayout(new GridLayout(0,1));
    configPanel.add(masterPanel);   
  }

跟进:来自Andrew Thompson的绝佳建议 + 至少我的错误方法

enter image description here

package test;

import java.awt.*;
import java.awt.font.FontRenderContext;
import java.awt.font.TextLayout;
import javax.swing.*;

public class New extends JFrame {

  private static final long serialVersionUID = 1L;
  private ImageIcon errorIcon =
          (ImageIcon) UIManager.getIcon("OptionPane.errorIcon");
  private Icon infoIcon =
          UIManager.getIcon("OptionPane.informationIcon");
  private Icon warnIcon =
          UIManager.getIcon("OptionPane.warningIcon");

  public static void main(String[] args) {
    SwingUtilities.invokeLater(new Runnable() {
      @Override
      public void run() {
        New t = new New();
      }
    });
  }

  public New() {
    setLayout(new BorderLayout());

    JPanel slavePanel = new NewPanel();
    slavePanel.setLayout(new GridLayout(0, 2, 4, 4));
    add(slavePanel);    

    JButton button = new JButton();
    button.setBorderPainted(false);
    button.setBorder(null);
    button.setFocusable(false);
    button.setMargin(new Insets(0, 0, 0, 0));
    button.setContentAreaFilled(false);
    button.setIcon((errorIcon));
    button.setRolloverIcon((infoIcon));
    button.setPressedIcon(warnIcon);
    button.setDisabledIcon(warnIcon);
    slavePanel.add(button);    

    setDefaultCloseOperation(JFrame.EXIT_ON_CLOSE);
    pack();
    setVisible(true);
  }
}


package test;

import java.awt.*;
import java.io.IOException;
import java.io.InputStream;
import javax.imageio.ImageIO;
import javax.swing.*;
import javax.swing.border.Border;

public class NewPanel extends JPanel {

  private Image imageGui;
  private static Dimension screen;

  public NewPanel() {
    try {
      imageGui =
              ImageIO.read(
              (InputStream) NewPanel.class.getResourceAsStream(
              "/image/ptz.png"));
    } catch (IOException e) {
      e.printStackTrace(System.err);
    }

    Border border = BorderFactory.createEmptyBorder(11, 11, 11, 11);
    setOpaque(true);
    setBorder(border);
    setFocusable(true);
    setSize(getPreferredSize());
    revalidate();
    repaint();
    setVisible(true);
  }

  public void paintComponent(Graphics g) {
    super.paintComponent(g);
    g.drawImage(imageGui, 0, 0,
            imageGui.getWidth(null), imageGui.getHeight(null), null);
    revalidate();
    repaint();
  }

  @Override
  public Dimension getPreferredSize() {
    return new Dimension(imageGui.getWidth(null), imageGui.getHeight(null));
  }
}
3个回答

20
  1. 使用一个3x3的GridLayout
  2. 对于每个9个单元格,获取一个子图像:
  • 对于每个第二个组件,添加一个带有子图像的标签。
  • 对于每个其他组件,添加一个JButton,其中空间被移除。使用子图像作为图标,但您需要备用图标来指示焦点、激活等等。此示例在“按下”图标周围放置了红色边框。

指南针按钮

import java.awt.*;
import java.awt.event.*;
import java.awt.image.BufferedImage;
import javax.swing.*;
import java.net.URL;
import javax.imageio.ImageIO;

public class CompassButtons {

    public CompassButtons(BufferedImage bi) {
        int w = bi.getWidth();
        int h = bi.getHeight();
        int step = w / 3;
        JPanel p = new JPanel(new GridLayout(3, 3));
        p.setBackground(Color.BLACK);
        int count = 0;
        for (int ii = 0; ii < w; ii += step) {
            for (int jj = 0; jj < h; jj += step) {
                // This is it - GET THE SUB IMAGE
                Image icon = bi.getSubimage(jj, ii, step, step);
                if (count % 2 == 1) {
                    JButton button = new JButton(new ImageIcon(icon));

                    // make it transparent
                    button.setContentAreaFilled(false);

                    // remove border, indicate press using different icon
                    button.setBorder(null);

                    // make a 'pressed' icon..
                    BufferedImage iconPressed = new BufferedImage(
                            step, step, BufferedImage.TYPE_INT_ARGB);
                    Graphics g = iconPressed.getGraphics();
                    g.drawImage(icon, 0, 0, p);
                    g.setColor(Color.RED);
                    g.drawRoundRect(
                            0, 0,
                            iconPressed.getWidth(p) - 1, 
                            iconPressed.getHeight(p) - 1,
                            12, 12);
                    g.dispose();
                    button.setPressedIcon(new ImageIcon(iconPressed));

                    button.setActionCommand("" + count);
                    button.addActionListener((ActionEvent ae) -> {
                        System.out.println(ae.getActionCommand());
                    });

                    p.add(button);
                } else {
                    JLabel label = new JLabel(new ImageIcon(icon));
                    p.add(label);
                }
                count++;
            }
        }
        JPanel center = new JPanel(new GridBagLayout());
        center.setBackground(Color.BLACK);
        center.add(p);
        JOptionPane.showMessageDialog(null, center);
    }

    public static void main(String[] args) throws Exception {
        URL url = new URL("http://i.stack.imgur.com/SNN04.png");
        final BufferedImage bi = ImageIO.read(url);
        SwingUtilities.invokeLater(() -> {
            new CompassButtons(bi);
        });
    }
}

1
这个真的很酷。我可以问一下button.setActionCommand(""+count);是什么意思吗?Oracle Java文档只是解释:设置此按钮的操作命令。但现在我不知道操作命令是什么意思...... - jian
@JianHe 它被传递到创建的 ActionEvent 中,并且可以通过 ActionEvent.getActionCommand() 访问。我们也可以使用 ActionEvent.getSource() 来查找源组件(如 JButton)。但更常见的是为特定控件(或控件 - 如按钮和菜单)创建一个 ActionListener(或 Action - 例如 saveEditsAction),然后获取操作命令或源组件变得无关紧要。在该示例中,我在单个操作侦听器中使用操作命令使代码更短并在控制台中显示按钮“编号”。 - Andrew Thompson
1
通过这个链接(https://dev59.com/yGsy5IYBdhLWcg3w8Shc#8215194),我明白了。谢谢。现在我完全理解了。 - jian

3

1
“每5个JButton” 5个按钮?我得到了N/S/E/W四个 - 但第五个按钮是哪一个? - Andrew Thompson
1
@Andrew Thompson:“第五个按钮是哪个?” 嗯,中间的回车键在中心区域(松下遥控器有类似的设计)。 - mKorbel
谢谢。已编辑上面的内容,中间那个不重要,很难找到上下左右,现在已经正常工作了。 - user285594
1
@YumYumYum 呵呵,这个帖子里有很多伟大的回答者(不包括我),没有什么复杂的问题。 - mKorbel

3

从这个例子开始,我通过将MoveButton更改为以下内容来入手:

this.setBorderPainted(false);

你可以为ControlPanel添加一个自定义布局管理器。我还会添加一个背景图片和一些基于ButtonModel状态的视觉反馈,如此处所建议的那样。

网页内容由stack overflow 提供, 点击上面的
可以查看英文原文,
原文链接