需要在汇编/编译/链接时构建静态IDT和GDT的解决方案

7
这个问题源于多年来许多人遇到的问题,特别是在x86操作系统开发中。最近有一个相关NASM问题被编辑推上来了。在那种情况下,使用NASM的人在汇编时会出现以下错误:

shift operator may only be applied to scalar values

另一个相关问题询问了GCC代码生成静态IDT时的问题,导致出现以下错误:

initializer element is not constant

在这两种情况下,问题与IDT条目需要指向异常处理程序的地址以及GDT可能需要指向另一个结构(如任务段结构(TSS))的基址有关。通常这不是问题,因为链接过程可以通过重定位修复解决这些地址。在IDT entryGDT Entry的情况下,字段分离了基地址/函数地址。没有重定位类型可以告诉链接器移动位并将它们按照GDT / IDT条目中的布局放置在内存中。Peter Cordes在this answer中对此进行了很好的解释。 我的问题不是在询问问题是什么,而是请求对问题的功能性实际的解决方案。虽然我自己回答了这个问题,但这只是众多可能解决方案之一。我只要求提出的解决方案符合以下要求:
  • GDT和IDT的地址不应固定在特定的物理或线性地址上。
  • 至少,该解决方案应能够与ELF对象和ELF可执行文件一起工作。如果它适用于其他格式,那就更好了!
  • 无论解决方案是否是构建最终可执行文件/二进制文件的过程的一部分都没有关系。如果一个解决方案需要在生成可执行文件/二进制文件后进行构建时处理,那也是可以接受的。
  • 当加载到内存中时,GDT(或IDT)需要显示为完全已解析。解决方案不得需要运行时修复。

不起作用的示例代码

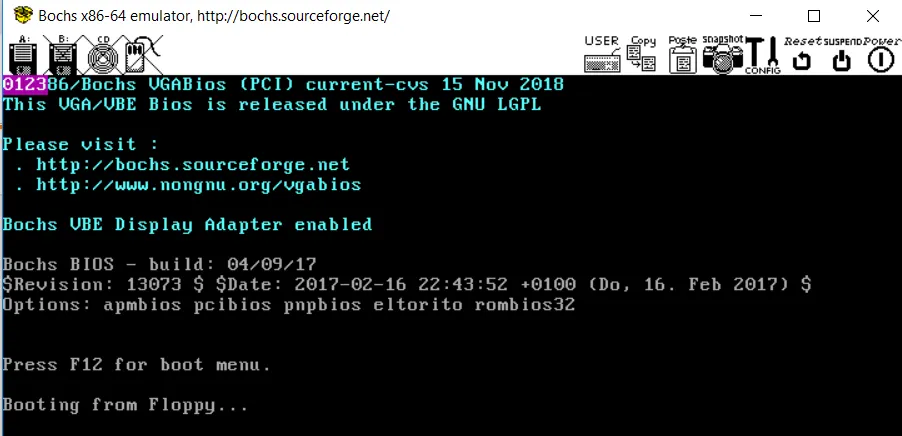
我提供了一些样本代码,以遗留引导程序1的形式,试图在汇编时创建静态IDT和GDT,但在使用nasm -f elf32 -o boot.o boot.asm进行汇编时失败并出现以下错误:

boot.asm:78: error: `&' operator may only be applied to scalar values
boot.asm:79: error: `&' operator may only be applied to scalar values
boot.asm:80: error: `&' operator may only be applied to scalar values
boot.asm:81: error: `&' operator may only be applied to scalar values

代码如下:

macros.inc

; Macro to build a GDT descriptor entry
%define MAKE_GDT_DESC(base, limit, access, flags) \
    (((base & 0x00FFFFFF) << 16) | \
    ((base & 0xFF000000) << 32) | \
    (limit & 0x0000FFFF) | \
    ((limit & 0x000F0000) << 32) | \
    ((access & 0xFF) << 40) | \
    ((flags & 0x0F) << 52))

; Macro to build a IDT descriptor entry
%define MAKE_IDT_DESC(offset, selector, access) \
    ((offset & 0x0000FFFF) | \
    ((offset & 0xFFFF0000) << 32) | \
    ((selector & 0x0000FFFF) << 16) | \
    ((access & 0xFF) << 40))

boot.asm:

%include "macros.inc"

PM_MODE_STACK EQU 0x10000

global _start

bits 16

_start:
    xor ax, ax
    mov ds, ax
    mov es, ax
    mov ss, ax
    mov sp, ax                  ; Stack grows down from physical address 0x00010000
                                ; SS:SP = 0x0000:0x0000 wraps to top of 64KiB segment
    cli
    cld
    lgdt [gdtr]                 ; Load our GDT
    mov eax, cr0
    or eax, 1
    mov cr0, eax                ; Set protected mode flag
    jmp CODE32_SEL:start32      ; FAR JMP to set CS

bits 32
start32:
    mov ax, DATA32_SEL          ; Setup the segment registers with data selector
    mov ds, ax
    mov es, ax
    mov ss, ax
    mov esp, PM_MODE_STACK      ; Set protected mode stack pointer

    mov fs, ax                  ; Not currently using FS and GS
    mov gs, ax

    lidt [idtr]                 ; Load our IDT

    ; Test the first 4 exception handlers
    int 0
    int 1
    int 2
    int 3

.loop:
    hlt
    jmp .loop

exc0:
    iret
exc1:
    iret
exc2:
    iret
exc3:
    iret

align 4
gdt:
    dq MAKE_GDT_DESC(0, 0, 0, 0)   ; null descriptor
.code32:
    dq MAKE_GDT_DESC(0, 0x000fffff, 10011010b, 1100b)
                                ; 32-bit code, 4kb gran, limit 0xffffffff bytes, base=0
.data32:
    dq MAKE_GDT_DESC(0, 0x000fffff, 10010010b, 1100b)
                                ; 32-bit data, 4kb gran, limit 0xffffffff bytes, base=0
.end:

CODE32_SEL equ gdt.code32 - gdt
DATA32_SEL equ gdt.data32 - gdt

align 4
gdtr:
    dw gdt.end - gdt - 1        ; limit (Size of GDT - 1)
    dd gdt                      ; base of GDT

align 4
; Create an IDT which handles the first 4 exceptions
idt:
    dq MAKE_IDT_DESC(exc0, CODE32_SEL, 10001110b)
    dq MAKE_IDT_DESC(exc1, CODE32_SEL, 10001110b)
    dq MAKE_IDT_DESC(exc2, CODE32_SEL, 10001110b)
    dq MAKE_IDT_DESC(exc3, CODE32_SEL, 10001110b)
.end:

align 4
idtr:
    dw idt.end - idt - 1        ; limit (Size of IDT - 1)
    dd idt                      ; base of IDT

脚注

  • 1我选择引导加载程序作为示例,因为最小完整可验证示例更容易生成。虽然代码在引导加载程序中,但类似的代码通常作为内核或其他非引导加载程序代码的一部分编写。该代码通常可以使用其他语言编写,如C/C++等。

  • 由于遗留的引导加载程序始终由BIOS加载到物理地址0x7c00处,因此对于这种情况可以在汇编时进行其他特定的解决方案。这些特定的解决方案会破坏操作系统开发中更一般的用例,其中开发人员通常不希望将IDT或GDT地址硬编码到特定的线性/物理地址,而是更倾向于让链接器为他们完成这项工作。

1个回答

7
我通常使用的一种解决方案是使用GNU链接器(ld)来为我构建IDT和GDT。这个答案不是关于编写GNU链接器脚本的入门指南,但它确实利用了BYTESHORTLONG链接器脚本指令来构建IDT、GDT、IDT记录和GDT记录。链接器可以使用涉及<<>>&|等表达式,并在它最终解析的符号的虚拟内存地址(VMA)上执行这些操作。
问题是链接器脚本比较简单。它们没有宏语言,所以你最终会像这样编写IDT和GDT条目:
. = ALIGN(4);
gdt = .;
NULL_SEL = ABSOLUTE(. - gdt);
SHORT(0);
SHORT(0);
BYTE(0 >> 16);
BYTE(0);
BYTE((0 >> 16 & 0x0f) | (0 << 4)); BYTE(0 >> 24);

CODE32_SEL = ABSOLUTE(. - gdt);
SHORT(0x000fffff);
SHORT(0);
BYTE(0 >> 16);
BYTE(10011010b);
BYTE((0x000fffff >> 16 & 0x0f) | (1100b << 4));
BYTE(0 >> 24);

DATA32_SEL = ABSOLUTE(. - gdt);
SHORT(0x000fffff);
SHORT(0);
BYTE(0 >> 16);
BYTE(10010010b);
BYTE((0x000fffff >> 16 & 0x0f) | (1100b << 4));
BYTE(0 >> 24);
gdt_size = ABSOLUTE(. - gdt);

. = ALIGN(4);
idt = .;
SHORT(exc0 & 0x0000ffff);
SHORT(CODE32_SEL);
BYTE(0x00);
BYTE(10001110b);
SHORT(exc0 >> 16);
SHORT(exc1 & 0x0000ffff);
SHORT(CODE32_SEL);
BYTE(0x00);
BYTE(10001110b);
SHORT(exc1 >> 16);
SHORT(exc2 & 0x0000ffff);
SHORT(CODE32_SEL);
BYTE(0x00);
BYTE(10001110b);
SHORT(exc2 >> 16);
SHORT(exc3 & 0x0000ffff);
SHORT(CODE32_SEL);
BYTE(0x00);
BYTE(10001110b);
SHORT(exc3 >> 16);
idt_size = ABSOLUTE(. - idt);

exc0exc1exc2exc3 是从对象文件定义并导出的异常函数。您可以看到 IDT 条目正在使用 CODE32_SEL 作为代码段选择器。在构建 GDT 时,链接器会计算选择器编号。显然,这非常混乱,并且随着 GDT 和尤其是 IDT 的增长而变得更加笨重。

您可以使用类似于m4的宏处理器来简化操作,但我更喜欢使用C 预处理器 (cpp),因为它对许多开发人员来说更为熟悉。虽然 C 预处理器通常用于预处理 C/C++ 文件,但它并不仅限于这些文件。您可以将其用于包括链接器脚本在内的任何类型的文本文件。

您可以创建一个宏文件并定义几个宏,例如 MAKE_IDT_DESCMAKE_GDT_DESC 以创建 GDT 和 IDT 描述符条目。我使用了一种扩展命名约定,其中 ldh 代表 (Linker Header),但您可以将这些文件命名为任何其他名称:

macros.ldh:

#ifndef MACROS_LDH
#define MACROS_LDH

/* Linker script C pre-processor macros */

/* Macro to build a IDT descriptor entry */
#define MAKE_IDT_DESC(offset, selector, access) \
    SHORT(offset & 0x0000ffff); \
    SHORT(selector); \
    BYTE(0x00); \
    BYTE(access); \
    SHORT(offset >> 16);

/* Macro to build a GDT descriptor entry */
#define MAKE_GDT_DESC(base, limit, access, flags) \
    SHORT(limit); \
    SHORT(base); \
    BYTE(base >> 16); \
    BYTE(access); \
    BYTE((limit >> 16 & 0x0f) | (flags << 4));\
    BYTE(base >> 24);
#endif

为了简化主链接脚本中的混乱,您可以创建另一个头文件来构建GDT和IDT(以及相关记录):
gdtidt.ldh
#ifndef GDTIDT_LDH
#define GDTIDT_LDH

#include "macros.ldh"

/* GDT table */
. = ALIGN(4);
gdt = .;
    NULL_SEL   = ABSOLUTE(. - gdt); MAKE_GDT_DESC(0, 0, 0, 0);
    CODE32_SEL = ABSOLUTE(. - gdt); MAKE_GDT_DESC(0, 0x000fffff, 10011010b, 1100b);
    DATA32_SEL = ABSOLUTE(. - gdt); MAKE_GDT_DESC(0, 0x000fffff, 10010010b, 1100b);
    /* TSS structure tss_entry and TSS_SIZE are exported from an object file */
    TSS32_SEL  = ABSOLUTE(. - gdt); MAKE_GDT_DESC(tss_entry, TSS_SIZE - 1, \
                                                  10001001b, 0000b);
gdt_size = ABSOLUTE(. - gdt);

/* GDT record */
. = ALIGN(4);
SHORT(0);                      /* These 2 bytes align LONG(gdt) on 4 byte boundary */
gdtr = .;
    SHORT(gdt_size - 1);
    LONG(gdt);

/* IDT table */
. = ALIGN(4);
idt = .;
    MAKE_IDT_DESC(exc0, CODE32_SEL, 10001110b);
    MAKE_IDT_DESC(exc1, CODE32_SEL, 10001110b);
    MAKE_IDT_DESC(exc2, CODE32_SEL, 10001110b);
    MAKE_IDT_DESC(exc3, CODE32_SEL, 10001110b);
idt_size = ABSOLUTE(. - idt);

/* IDT record */
. = ALIGN(4);
SHORT(0);                      /* These 2 bytes align LONG(idt) on 4 byte boundary */
idtr = .;
    SHORT(idt_size - 1);
    LONG(idt);

#endif

现在,您只需要在链接脚本中的某个点(在一个部分内)包含 gdtidt.ldh ,即可放置结构体:

link.ld.pp

OUTPUT_FORMAT("elf32-i386");
ENTRY(_start);

REAL_BASE = 0x00007c00;

SECTIONS
{
    . = REAL_BASE;

    .text : SUBALIGN(4) {
        *(.text*);
    }

    .rodata : SUBALIGN(4) {
        *(.rodata*);
    }

    .data : SUBALIGN(4) {
        *(.data);
/* Place the IDT and GDT structures here */
#include "gdtidt.ldh"
    }

    /* Disk boot signature */
    .bootsig : AT(0x7dfe) {
        SHORT (0xaa55);
    }

    .bss : SUBALIGN(4) {
        *(COMMON);
        *(.bss)
    }

    /DISCARD/ : {
        *(.note.gnu.property)
        *(.comment);
    }
}

这个链接脚本是我用来引导扇区的典型脚本,但我所做的只是包含文件,以使链接器生成结构。 唯一剩下要做的就是对文件进行预处理。 我使用<.pp>扩展名表示预处理器文件,但您可以使用任何扩展名。 要从创建,您可以使用以下命令:
cpp -P link.ld.pp >link.ld

生成的 link.ld 文件如下所示:
OUTPUT_FORMAT("elf32-i386");
ENTRY(_start);
REAL_BASE = 0x00007c00;
SECTIONS
{
    . = REAL_BASE;
    .text : SUBALIGN(4) {
        *(.text*);
    }
    .rodata : SUBALIGN(4) {
        *(.rodata*);
    }
    .data : SUBALIGN(4) {
        *(.data);
. = ALIGN(4);
gdt = .;
    NULL_SEL = ABSOLUTE(. - gdt); SHORT(0); SHORT(0); BYTE(0 >> 16); BYTE(0); BYTE((0 >> 16 & 0x0f) | (0 << 4)); BYTE(0 >> 24);;
    CODE32_SEL = ABSOLUTE(. - gdt); SHORT(0x000fffff); SHORT(0); BYTE(0 >> 16); BYTE(10011010b); BYTE((0x000fffff >> 16 & 0x0f) | (1100b << 4)); BYTE(0 >> 24);;
    DATA32_SEL = ABSOLUTE(. - gdt); SHORT(0x000fffff); SHORT(0); BYTE(0 >> 16); BYTE(10010010b); BYTE((0x000fffff >> 16 & 0x0f) | (1100b << 4)); BYTE(0 >> 24);;
    TSS32_SEL = ABSOLUTE(. - gdt); SHORT(TSS_SIZE - 1); SHORT(tss_entry); BYTE(tss_entry >> 16); BYTE(10001001b); BYTE((TSS_SIZE - 1 >> 16 & 0x0f) | (0000b << 4)); BYTE(tss_entry >> 24);;
gdt_size = ABSOLUTE(. - gdt);
. = ALIGN(4);
SHORT(0);
gdtr = .;
    SHORT(gdt_size - 1);
    LONG(gdt);
. = ALIGN(4);
idt = .;
    SHORT(exc0 & 0x0000ffff); SHORT(CODE32_SEL); BYTE(0x00); BYTE(10001110b); SHORT(exc0 >> 16);;
    SHORT(exc1 & 0x0000ffff); SHORT(CODE32_SEL); BYTE(0x00); BYTE(10001110b); SHORT(exc1 >> 16);;
    SHORT(exc2 & 0x0000ffff); SHORT(CODE32_SEL); BYTE(0x00); BYTE(10001110b); SHORT(exc2 >> 16);;
    SHORT(exc3 & 0x0000ffff); SHORT(CODE32_SEL); BYTE(0x00); BYTE(10001110b); SHORT(exc3 >> 16);;
idt_size = ABSOLUTE(. - idt);
. = ALIGN(4);
SHORT(0);
idtr = .;
    SHORT(idt_size - 1);
    LONG(idt);
    }
    .bootsig : AT(0x7dfe) {
        SHORT (0xaa55);
    }
    .bss : SUBALIGN(4) {
        *(COMMON);
        *(.bss)
    }
    /DISCARD/ : {
        *(.note.gnu.property)
        *(.comment);
    }
}

对于问题中样例的boot.asm文件进行轻微修改,我们得到:

boot.asm

PM_MODE_STACK      EQU 0x10000 ; Protected mode stack address
RING0_STACK        EQU 0x11000 ; Stack address for transitions to ring0
TSS_IO_BITMAP_SIZE EQU 0       ; Size 0 disables IO port bitmap (no permission)

global _start
; Export the exception handler addresses so the linker can access them
global exc0
global exc1
global exc2
global exc3

; Export the TSS size and address of the TSS so the linker can access them
global TSS_SIZE
global tss_entry

; Import the IDT/GDT and selector values generated by the linker
extern idtr
extern gdtr
extern CODE32_SEL
extern DATA32_SEL
extern TSS32_SEL

bits 16

section .text
_start:
    xor ax, ax
    mov ds, ax
    mov es, ax
    mov ss, ax
    mov sp, ax                  ; Stack grows down from physical address 0x00010000
                                ; SS:SP = 0x0000:0x0000 wraps to top of 64KiB segment

    cli
    cld
    lgdt [gdtr]                 ; Load our GDT
    mov eax, cr0
    or eax, 1
    mov cr0, eax                ; Set protected mode flag
    jmp CODE32_SEL:start32      ; FAR JMP to set CS

bits 32
start32:
    mov ax, DATA32_SEL          ; Setup the segment registers with data selector
    mov ds, ax
    mov es, ax
    mov ss, ax
    mov esp, PM_MODE_STACK      ; Set protected mode stack pointer

    mov fs, ax                  ; Not currently using FS and GS
    mov gs, ax

    lidt [idtr]                 ; Load our IDT

    ; This TSS isn't used in this code since everything is running at ring 0.
    ; Loading a TSS is for demonstration purposes in this case.
    mov eax, TSS32_SEL
    ltr ax                      ; Load default TSS (used for exceptions, interrupts, etc)

    ; xchg bx, bx                 ; Bochs magic breakpoint

    ; Test the first 4 exception handlers
    int 0
    int 1
    int 2
    int 3

.loop:
    hlt
    jmp .loop

exc0:
    mov word [0xb8000], 0x5f << 8 | '0'   ; Print '0'
    iretd
exc1:
    mov word [0xb8002], 0x5f << 8 | '1'   ; Print '1'
    iretd
exc2:
    mov word [0xb8004], 0x5f << 8 | '2'   ; Print '2'
    iretd
exc3:
    mov word [0xb8006], 0x5f << 8 | '3'   ; Print '3'
    iretd

section .data
; Generate a functional TSS structure
ALIGN 4
tss_entry:
.back_link: dd 0
.esp0:      dd RING0_STACK     ; Kernel stack pointer used on ring0 transitions
.ss0:       dd DATA32_SEL      ; Kernel stack selector used on ring0 transitions
.esp1:      dd 0
.ss1:       dd 0
.esp2:      dd 0
.ss2:       dd 0
.cr3:       dd 0
.eip:       dd 0
.eflags:    dd 0
.eax:       dd 0
.ecx:       dd 0
.edx:       dd 0
.ebx:       dd 0
.esp:       dd 0
.ebp:       dd 0
.esi:       dd 0
.edi:       dd 0
.es:        dd 0
.cs:        dd 0
.ss:        dd 0
.ds:        dd 0
.fs:        dd 0
.gs:        dd 0
.ldt:       dd 0
.trap:      dw 0
.iomap_base:dw .iomap          ; IOPB offset
.iomap: TIMES TSS_IO_BITMAP_SIZE db 0x00
                               ; IO bitmap (IOPB) size 8192 (8*8192=65536) representing
                               ; all ports. An IO bitmap size of 0 would fault all IO
                               ; port access if IOPL < CPL (CPL=3 with v8086)
%if TSS_IO_BITMAP_SIZE > 0
.iomap_pad: db 0xff            ; Padding byte that has to be filled with 0xff
                               ; To deal with issues on some CPUs when using an IOPB
%endif
TSS_SIZE EQU $-tss_entry

新的boot.asm还创建了一个TSS表(tss_entry),在链接器脚本中用于构建与该TSS相关联的GDT条目。
为预处理链接器脚本;汇编;链接并生成一个可作为引导扇区的二进制文件,可以使用以下命令:
cpp -P link.ld.pp >link.ld
nasm -f elf32 -gdwarf -o boot.o boot.asm
ld -melf_i386 -Tlink.ld -o boot.elf boot.o
objcopy -O binary boot.elf boot.bin

为了在QEMU中运行boot.bin软盘映像,您可以使用以下命令:
qemu-system-i386 -drive format=raw,index=0,if=floppy,file=boot.bin

如果您想使用BOCHS运行它,可以使用以下命令:

bochs -qf /dev/null \
        'floppya: type=1_44, 1_44="boot.bin", status=inserted, write_protected=0' \
        'boot: floppy' \
        'magic_break: enabled=0'

该代码执行以下操作:
  • 使用lgdt指令加载GDT记录。
  • 将处理器置于禁用A20的32位保护模式。演示中的所有代码都位于物理地址0x100000(1MiB)以下,因此不需要启用A20。
  • 使用lidt加载IDT记录。
  • 使用ltr将TSS选择符加载到任务寄存器中。
  • 调用每个异常处理程序(exc0exc1exc2exc3)。
  • 每个异常处理程序在显示屏左上角打印一个数字(0、1、2、3)。
如果在BOCHS中正确运行,输出应如下图所示:

enter image description here


网页内容由stack overflow 提供, 点击上面的
可以查看英文原文,
原文链接