1个回答
3
要进行直方图均衡化,您需要使用hist_equal。
主要文档在此处:
https://libvips.github.io/libvips/API/current/libvips-histogram.html
但是,对于大型幻灯片图像,这样做会非常缓慢。它需要扫描整个幻灯片一次以构建直方图,然后再次扫描以执行均衡化。如果可以先找到低分辨率层的直方图,然后使用该直方图来均衡化高分辨率层,则速度会快得多。
例如:
#!/usr/bin/env python3

import sys
import pyvips

# open the slide image and get the number of layers ... we are not fetching
# pixels, so this is quick
x = pyvips.Image.new_from_file(sys.argv[1])
levels = int(x.get("openslide.level-count"))

# find the histogram of the highest level ... again, this should be quick
x = pyvips.Image.new_from_file(sys.argv[1],
                               level=levels - 1)
hist = x.hist_find()

# from that, compute the transform for histogram equalisation
equalise = hist.hist_cum().hist_norm()

# and use that on the full-res image
x = pyvips.Image.new_from_file(sys.argv[1])

x = x.maplut(equalise)

x.write_to_file(sys.argv[2])
另一个因素是直方图均衡化是非线性的,这会扭曲亮度关系。它也可能扭曲颜色关系,并使噪声和压缩伪影看起来很疯狂。我在这里有一张图片,我尝试了那个程序:
$ ~/try/equal.py bild.ndpi[level=7] y.jpg
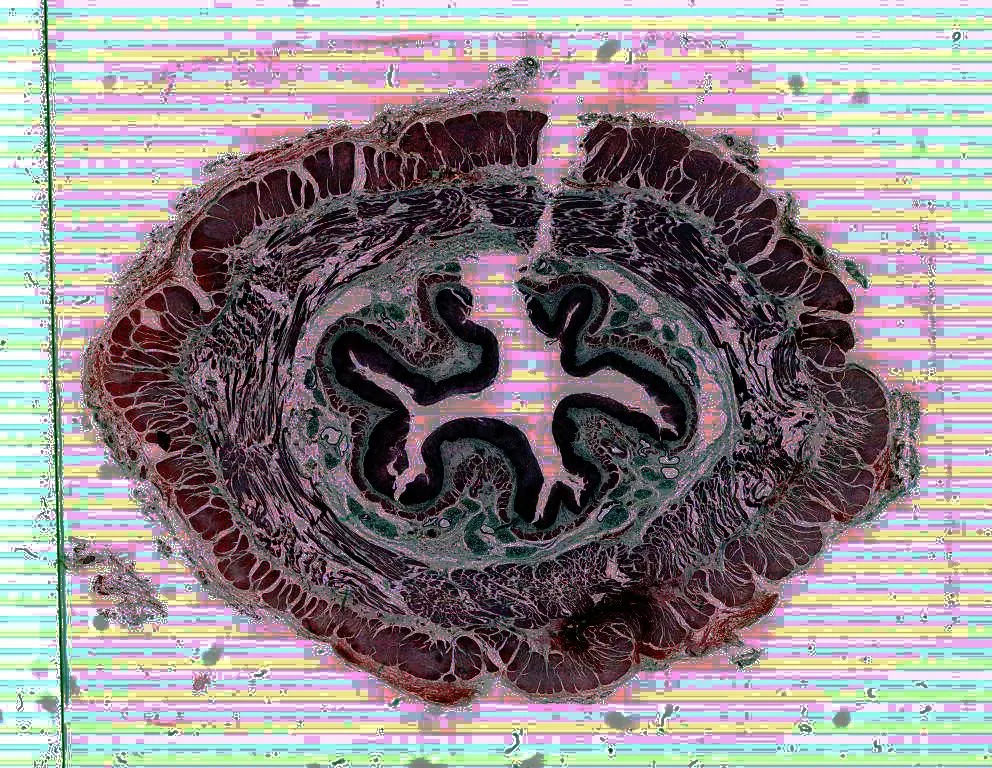
这些条纹来自幻灯片扫描仪,难看的边缘来自压缩。
我认为我会从低分辨率级别中找到图像的最大值和最小值,然后使用它们来进行简单的线性拉伸以增强像素值。
例如:
x = pyvips.Image.new_from_file(sys.argv[1])
levels = int(x.get("openslide.level-count"))
x = pyvips.Image.new_from_file(sys.argv[1],
                               level=levels - 1)
mn = x.min()
mx = x.max()
x = pyvips.Image.new_from_file(sys.argv[1])
x = (x - mn) * (256 / (mx - mn))
x.write_to_file(sys.argv[2])
你是否发现了pyvips的新功能Region?它可以使得生成训练补丁变得更快,有些情况下提高了速度达到100倍:
https://github.com/libvips/pyvips/issues/100#issuecomment-493960943
- jcupitt
4
网页内容由stack overflow 提供, 点击上面的可以查看英文原文,
原文链接
原文链接
new_from_memory将图像包装在字节值数组周围。 - jcupitt