我需要在表单中添加复选框控件。我知道iOS SDK中没有这样的控件。我应该如何处理?
15个回答
32
我也曾经被这个问题困扰,但我找到了一个不需要使用图像且适用于我的解决方案。
- 在Interface Builder中添加一个新的标签对象。
- 在Xcode中创建一个IBOutlet属性并将其连接到该标签对象上。在下面的代码中,我将其称为“fullyPaid”,因为我想知道某人是否完全支付了一笔款项。
- 添加下面的两个函数。 'touchesBegan'函数检查您是否在'fullyPaid'标签对象内部触摸了某个位置,如果是,则调用'togglePaidStatus'函数。 'togglePaidStatus'函数设置了两个字符串,它们分别代表空框(\u2610)和已选框(\u2611)的Unicode字符。然后它将当前的'fullyPaid'对象与另一个字符串进行比较并切换。
您可能希望在viewDidLoad函数中调用togglePaidStatus函数,以便最初将其设置为空字符串。
显然,您可以增加额外的检查以防止用户在标签未启用时切换复选框,但以下内容未显示。
-(void)touchesBegan:(NSSet *)touches withEvent:(UIEvent *)event
{
UITouch *touch = [touches anyObject];
    if (CGRectContainsPoint([fullyPaid frame], [touch locationInView:self.view]))
    {
        [self togglePaidStatus];
    }
}
-(void) togglePaidStatus
{
    NSString *untickedBoxStr = [[NSString alloc] initWithString:@"\u2610"];
    NSString *tickedBoxStr = [[NSString alloc] initWithString:@"\u2611"];

    if ([fullyPaid.text isEqualToString:tickedBoxStr])
    {
        fullyPaid.text = untickedBoxStr;
    }
    else
    {
        fullyPaid.text = tickedBoxStr;
    }

    [tickedBoxStr release];
    [untickedBoxStr release];
}
- Adrian
1
1我真的非常喜欢这种方法。不使用图形很棒。但是空白和选中的框看起来并不相似,实际上有些不匹配。有没有办法解决这个问题? - JohnK
25
通常,您会使用UISwitch来实现类似复选框的功能。
但是,您也可以通过使用带有两个图像(选中/未选中)的图像控件,并在触摸控件时切换图像来自己创建。
- Eric P
5
你能详细说明如何进行图像切换吗?谢谢! - JWD
3给 yar 的虚拟 -1 分,表示“+1 但没有详细解释”;
给 vladimir mitrovic 的虚拟 -1 分,表示“-1 但没有详细解释”。 :) - LolaRun
26对于LolaRun的虚拟化,将+(1-i)赋值。 - Simon
1详细说明:使用UIButton并根据用户的触摸切换图像和“selected”状态。或者使用UILabel并根据用户触摸切换文本。等等。 - Olie
我完全同意使用UISwitch来实现复选框是最好的选择。 - Septronic
14
如果您正在展示一组选项,用户可以选择其中之一,请使用带有勾选标记附件和选定行不同文本颜色的表格视图。
如果您只有一个选项,最好使用开关。如果不能或不想使用开关,请使用按钮,将正常图像设置为空框,将选定图像设置为已选框。您需要自己制作这两个图像或找到要使用的库存图形。
- Brent Royal-Gordon
9
继承Adrean的想法,我使用了一种非常简单的方法来实现这个。
我的想法是根据按钮的状态更改按钮(假设为checkBtn)文本,然后在其IBAction中更改按钮的状态。
以下是我实现的代码:
- (void)viewDidLoad
{
    [super viewDidLoad];

    [checkBtn setTitle:@"\u2610" forState:UIControlStateNormal];    // uncheck the button in normal state
    [checkBtn setTitle:@"\u2611" forState:UIControlStateSelected];  // check the button in selected state
}

- (IBAction)checkButtonTapped:(UIButton*)sender {
    sender.selected = !sender.selected;    // toggle button's selected state

    if (sender.state == UIControlStateSelected) {
        // do something when button is checked
    } else {
        // do something when button is unchecked
    }
}
- S1LENT WARRIOR
1
不幸的是,正如Adrian的想法中提到的那样,离线状态的字符看起来相当不正常 :-/ - hnh
6
这是我为iPhone设计的复选框版本。
它是一个继承自UIButton的单一类。由于它很简单,所以我会将它粘贴在这里。
CheckBoxButton.h文件的内容:
#import <UIKit/UIKit.h>

@interface CheckBoxButton : UIButton

@property(nonatomic,assign)IBInspectable BOOL isChecked;

@end
CheckBoxButton.m文件内容:
#import "CheckBoxButton.h"

@interface CheckBoxButton()

@property(nonatomic,strong)IBInspectable UIImage* checkedStateImage;
@property(nonatomic,strong)IBInspectable UIImage* uncheckedStateImage;

@end

@implementation CheckBoxButton

-(id)init
{
    self = [super init];

    if(self)
    {
        [self addTarget:self action:@selector(switchState) forControlEvents:UIControlEventTouchUpInside];
    }

    return self;
}

-(id)initWithFrame:(CGRect)frame
{
    self = [super initWithFrame:frame];

    if(self)
    {
        [self addTarget:self action:@selector(switchState) forControlEvents:UIControlEventTouchUpInside];
    }

    return self;
}

-(id)initWithCoder:(NSCoder *)aDecoder
{
    self = [super initWithCoder:aDecoder];

    if(self)
    {
        [self addTarget:self action:@selector(switchState) forControlEvents:UIControlEventTouchUpInside];
    }

    return self;
}

-(void)setIsChecked:(BOOL)isChecked
{
    _isChecked = isChecked;

    if(isChecked)
    {
        [self setImage:self.checkedStateImage forState:UIControlStateNormal];
    }
    else
    {
        [self setImage:self.uncheckedStateImage forState:UIControlStateNormal];
    }
}

-(void)switchState
{
    self.isChecked = !self.isChecked;
    [self sendActionsForControlEvents:UIControlEventValueChanged];
}

@end
您可以在 Visual Studio 的属性检查器中设置选中/未选中的图像以及isChecked属性。
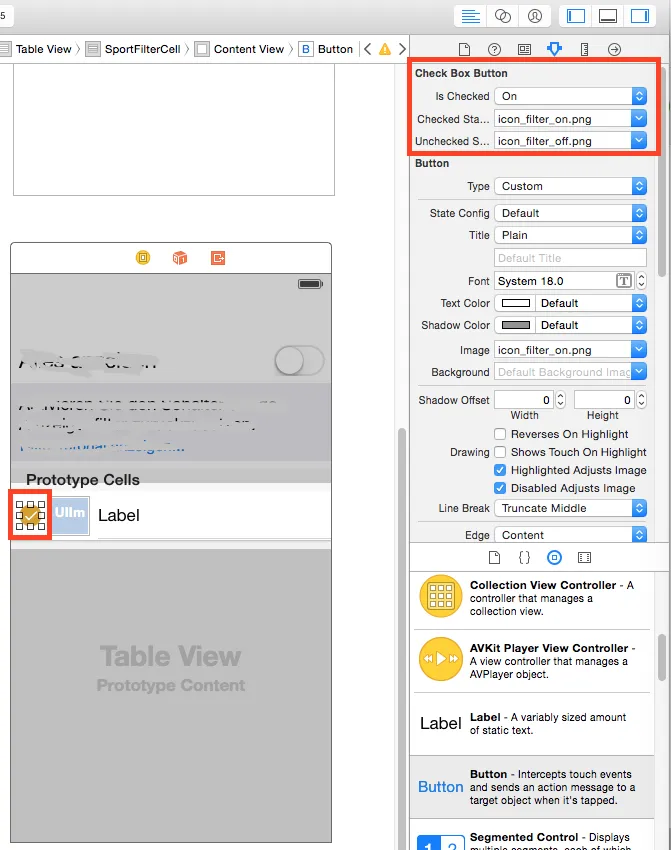
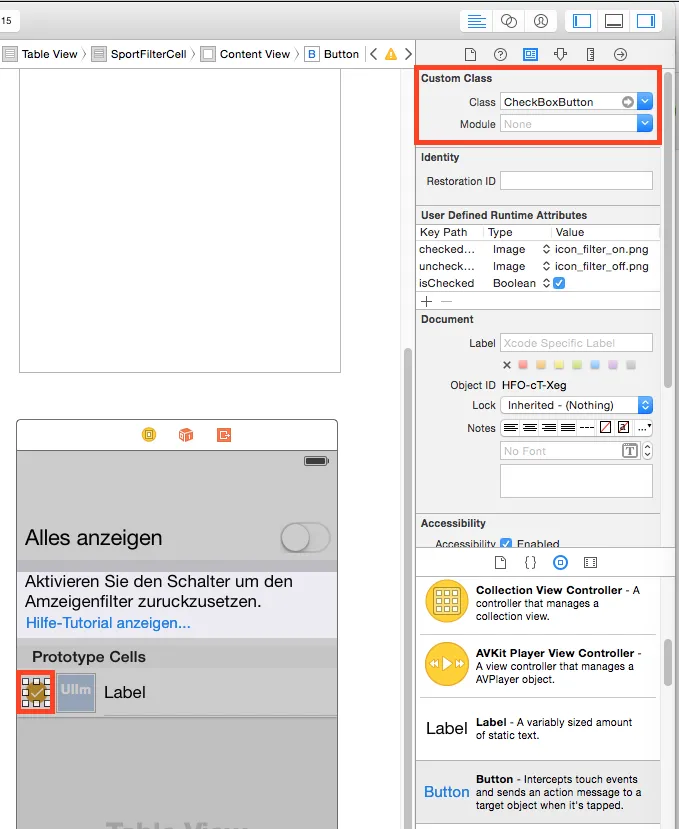
要在Storyboard或Xib中添加CheckBoxButton,只需添加UIButton并设置自定义类,如下图所示。
每当isChecked状态改变时,按钮将发送UIControlEventValueChanged事件。
- slobodans
3
这是一个很好的答案,因为它可以很好地与Storyboard配合使用,从而避免了大量的定位代码(只留下干净的代码),并且我能够使用自定义图像。此外,解释得非常清楚,对于像我这样的iOS新手来说,这很容易实现。现在要弄清楚为什么我的图像会像按钮上的文本一样呈蓝色... - ar34z
为了避免您的图像在 iOS 7+ 中变成蓝色,将属性类型设置为 Custom,如@slobodans回答的第一张截图所示,但我从这里得到了答案:https://dev59.com/OmMl5IYBdhLWcg3wyJYe#21313338 - ar34z
最佳答案!将按钮设置为IBDesignable是一个很好的奖励! - valeCocoa
6
我希望以编程方式完成此操作,并解决点击区域过小的问题。这是从多个来源(包括Mike和Mike的评论者Agha)进行调整的。
在您的头文件中
@interface YourViewController : UIViewController {
    BOOL checkboxSelected;
    UIButton *checkboxButton;
}

@property BOOL checkboxSelected;;
@property (nonatomic, retain) UIButton *checkboxButton;

-(void)toggleButton:(id)sender;
在你的实现中
// put this in your viewDidLoad method. if you put it somewhere else, you'll probably have to change the self.view to something else
// create the checkbox. the width and height are larger than actual image, because we are creating the hit area which also covers the label
UIButton* checkBox = [[UIButton alloc] initWithFrame:CGRectMake(100, 60,120, 44)];
[checkBox setImage:[UIImage imageNamed:@"checkbox.png"] forState:UIControlStateNormal];
// uncomment below to see the hit area
// [checkBox setBackgroundColor:[UIColor redColor]];
[checkBox addTarget:self action:@selector(toggleButton:) forControlEvents: UIControlEventTouchUpInside];
// make the button's image flush left, and then push the image 20px left
[checkBox setContentHorizontalAlignment:UIControlContentHorizontalAlignmentLeft];
[checkBox setImageEdgeInsets:UIEdgeInsetsMake(0.0, 20.0, 0.0, 0.0)];
[self.view addSubview:checkBox];

// add checkbox text text
UILabel *checkBoxLabel = [[UILabel alloc] initWithFrame:CGRectMake(140, 74,200, 16)];
[checkBoxLabel setFont:[UIFont boldSystemFontOfSize:14]];
[checkBoxLabel setTextColor:[UIColor whiteColor]];
[checkBoxLabel setBackgroundColor:[UIColor clearColor]];
[checkBoxLabel setText:@"Checkbox"];
[self.view addSubview:checkBox];

// release the buttons
[checkBox release];
[checkBoxLabel release];
将这个方法也添加进来:
- (void)toggleButton: (id) sender
{
    checkboxSelected = !checkboxSelected;
    UIButton* check = (UIButton*) sender;
    if (checkboxSelected == NO)
        [check setImage:[UIImage imageNamed:@"checkbox.png"] forState:UIControlStateNormal];
    else
        [check setImage:[UIImage imageNamed:@"checkbox-checked.png"] forState:UIControlStateNormal];

}
- cannyboy
4
每个人的代码都很长,有点杂乱无章,可以更简单地完成。我在GitHub上有一个项目,它是子类化UIControl,你可以下载并检查,它可以给你一个几乎本地的复选框UI元素:
- Brayden
1
继承UIButton,将按钮拖到视图控制器中,选择它并在身份检查器中更改类名为CheckBox。
#import "CheckBox.h"

@implementation CheckBox

#define checked_icon @"checked_box_icon.png"
#define empty_icon @"empty_box_icon.png"

- (id)initWithCoder:(NSCoder *)aDecoder
{
    self = [super initWithCoder:aDecoder];
    if (self)
    {
        [self setImage:[UIImage imageNamed:empty_icon] forState:UIControlStateNormal];
        [self addTarget:self action:@selector(didTouchButton) forControlEvents:UIControlEventTouchUpInside];
    }
    return self;
}

- (void)didTouchButton {
    selected = !selected;
    if (selected)
        [self setImage:[UIImage imageNamed:checked_icon] forState:UIControlStateNormal];
    else
        [self setImage:[UIImage imageNamed:empty_icon] forState:UIControlStateNormal];
}

@end
- hasan
1
一个简单的
UIButton子类可以像Android中的复选框一样运作。import UIKit
class CheckedUIButton: UIButton {
var checked: Bool = false {
didSet {
if checked {
setImage(UIImage(systemName: "checkmark.circle"), for: .normal)
} else {
setImage(UIImage(systemName: "circle"), for: .normal)
}
}
}
//initWithFrame to init view from code
override init(frame: CGRect) {
super.init(frame: frame)
commonInit()
}
//initWithCode to init view from xib or storyboard
required init?(coder aDecoder: NSCoder) {
super.init(coder: aDecoder)
commonInit()
}
private func commonInit() {
addTarget(self, action: #selector(self.checkedTapped), for: .touchUpInside)
}
@objc
private func checkedTapped() {
self.checked.toggle()
}
}
输出
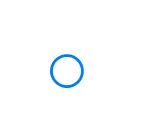
(未选中状态)
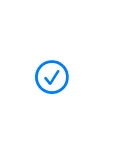
(选中状态)
- Cheok Yan Cheng
1
在 .h 文件中。
这会起作用...
#import <UIKit/UIKit.h>

@interface ViewController : UIViewController
{
    BOOL isChecked;
    UIImageView * checkBoxIV;
}
@end
And .m文件
- (void)viewDidLoad
{
    [super viewDidLoad];
    isChecked = NO;

    //change this property according to your need
    checkBoxIV = [[UIImageView alloc] initWithFrame:CGRectMake(10, 10, 15, 15)];
    checkBoxIV.image =[UIImage imageNamed:@"checkbox_unchecked.png"];

    checkBoxIV.userInteractionEnabled = YES;
    UITapGestureRecognizer *checkBoxIVTapGesture = [[UITapGestureRecognizer alloc] initWithTarget:self action:@selector(handlecheckBoxIVTapGestureTap:)];
    checkBoxIVTapGesture.numberOfTapsRequired = 1;
    [checkBoxIV addGestureRecognizer:checkBoxIVTapGesture];
}

- (void)handlecheckBoxIVTapGestureTap:(UITapGestureRecognizer *)recognizer {
    if (isChecked) {
        isChecked = NO;
        checkBoxIV.image =[UIImage imageNamed:@"checkbox_unchecked.png"];
    }else{
        isChecked = YES;
        checkBoxIV.image =[UIImage imageNamed:@"checkbox_checked.png"];
    }
}
这会起作用...
- Dilip Manek
网页内容由stack overflow 提供, 点击上面的可以查看英文原文,
原文链接
原文链接