针对这个问题,只需添加以下代码的
tableView:willDisplayCell:forRowAtIndexPath:委托方法(简单的复制/粘贴应该可以工作),它也适用于分组表格。我已经注释了你应该设置边框的宽度和颜色的位置。
- (void)tableView:(UITableView *)tableView willDisplayCell:(UITableViewCell *)cell forRowAtIndexPath:(NSIndexPath *)indexPath
{
if ([cell respondsToSelector:@selector(tintColor)]) {
CGFloat cornerRadius = 5.f;
cell.backgroundColor = UIColor.clearColor;
CAShapeLayer *layer = [[CAShapeLayer alloc] init];
CGMutablePathRef pathRef = CGPathCreateMutable();
CGRect bounds = CGRectInset(cell.bounds, 10, 0);
BOOL addLine = NO;
if (indexPath.row == 0 && indexPath.row == [tableView numberOfRowsInSection:indexPath.section]-1) {
CGPathAddRoundedRect(pathRef, nil, bounds, cornerRadius, cornerRadius);
} else if (indexPath.row == 0) {
CGPathMoveToPoint(pathRef, nil, CGRectGetMinX(bounds), CGRectGetMaxY(bounds));
CGPathAddArcToPoint(pathRef, nil, CGRectGetMinX(bounds), CGRectGetMinY(bounds), CGRectGetMidX(bounds), CGRectGetMinY(bounds), cornerRadius);
CGPathAddArcToPoint(pathRef, nil, CGRectGetMaxX(bounds), CGRectGetMinY(bounds), CGRectGetMaxX(bounds), CGRectGetMidY(bounds), cornerRadius);
CGPathAddLineToPoint(pathRef, nil, CGRectGetMaxX(bounds), CGRectGetMaxY(bounds));
addLine = YES;
} else if (indexPath.row == [tableView numberOfRowsInSection:indexPath.section]-1) {
CGPathMoveToPoint(pathRef, nil, CGRectGetMinX(bounds), CGRectGetMinY(bounds));
CGPathAddArcToPoint(pathRef, nil, CGRectGetMinX(bounds), CGRectGetMaxY(bounds), CGRectGetMidX(bounds), CGRectGetMaxY(bounds), cornerRadius);
CGPathAddArcToPoint(pathRef, nil, CGRectGetMaxX(bounds), CGRectGetMaxY(bounds), CGRectGetMaxX(bounds), CGRectGetMidY(bounds), cornerRadius);
CGPathAddLineToPoint(pathRef, nil, CGRectGetMaxX(bounds), CGRectGetMinY(bounds));
} else {
CGPathAddRect(pathRef, nil, bounds);
addLine = YES;
}
layer.path = pathRef;
CFRelease(pathRef);
layer.strokeColor = [UIColor lightGrayColor].CGColor;
layer.lineWidth = 1;
layer.fillColor = [UIColor colorWithWhite:1.f alpha:1.0f].CGColor;
if (addLine == YES) {
CALayer *lineLayer = [[CALayer alloc] init];
CGFloat lineHeight = (1.f / [UIScreen mainScreen].scale);
lineLayer.frame = CGRectMake(CGRectGetMinX(bounds), bounds.size.height-lineHeight, bounds.size.width, lineHeight);
lineLayer.backgroundColor = tableView.separatorColor.CGColor;
[layer addSublayer:lineLayer];
}
UIView *testView = [[UIView alloc] initWithFrame:bounds];
[testView.layer insertSublayer:layer atIndex:0];
testView.backgroundColor = UIColor.clearColor;
cell.backgroundView = testView;
}
}
此外,请记得在Interface Builder中将表格的分隔符属性设置为none(默认为单线),如果您是通过编程创建表格,则应该像这样设置属性。
tableView.separatorStyle = UITableViewCellSeparatorStyleNone
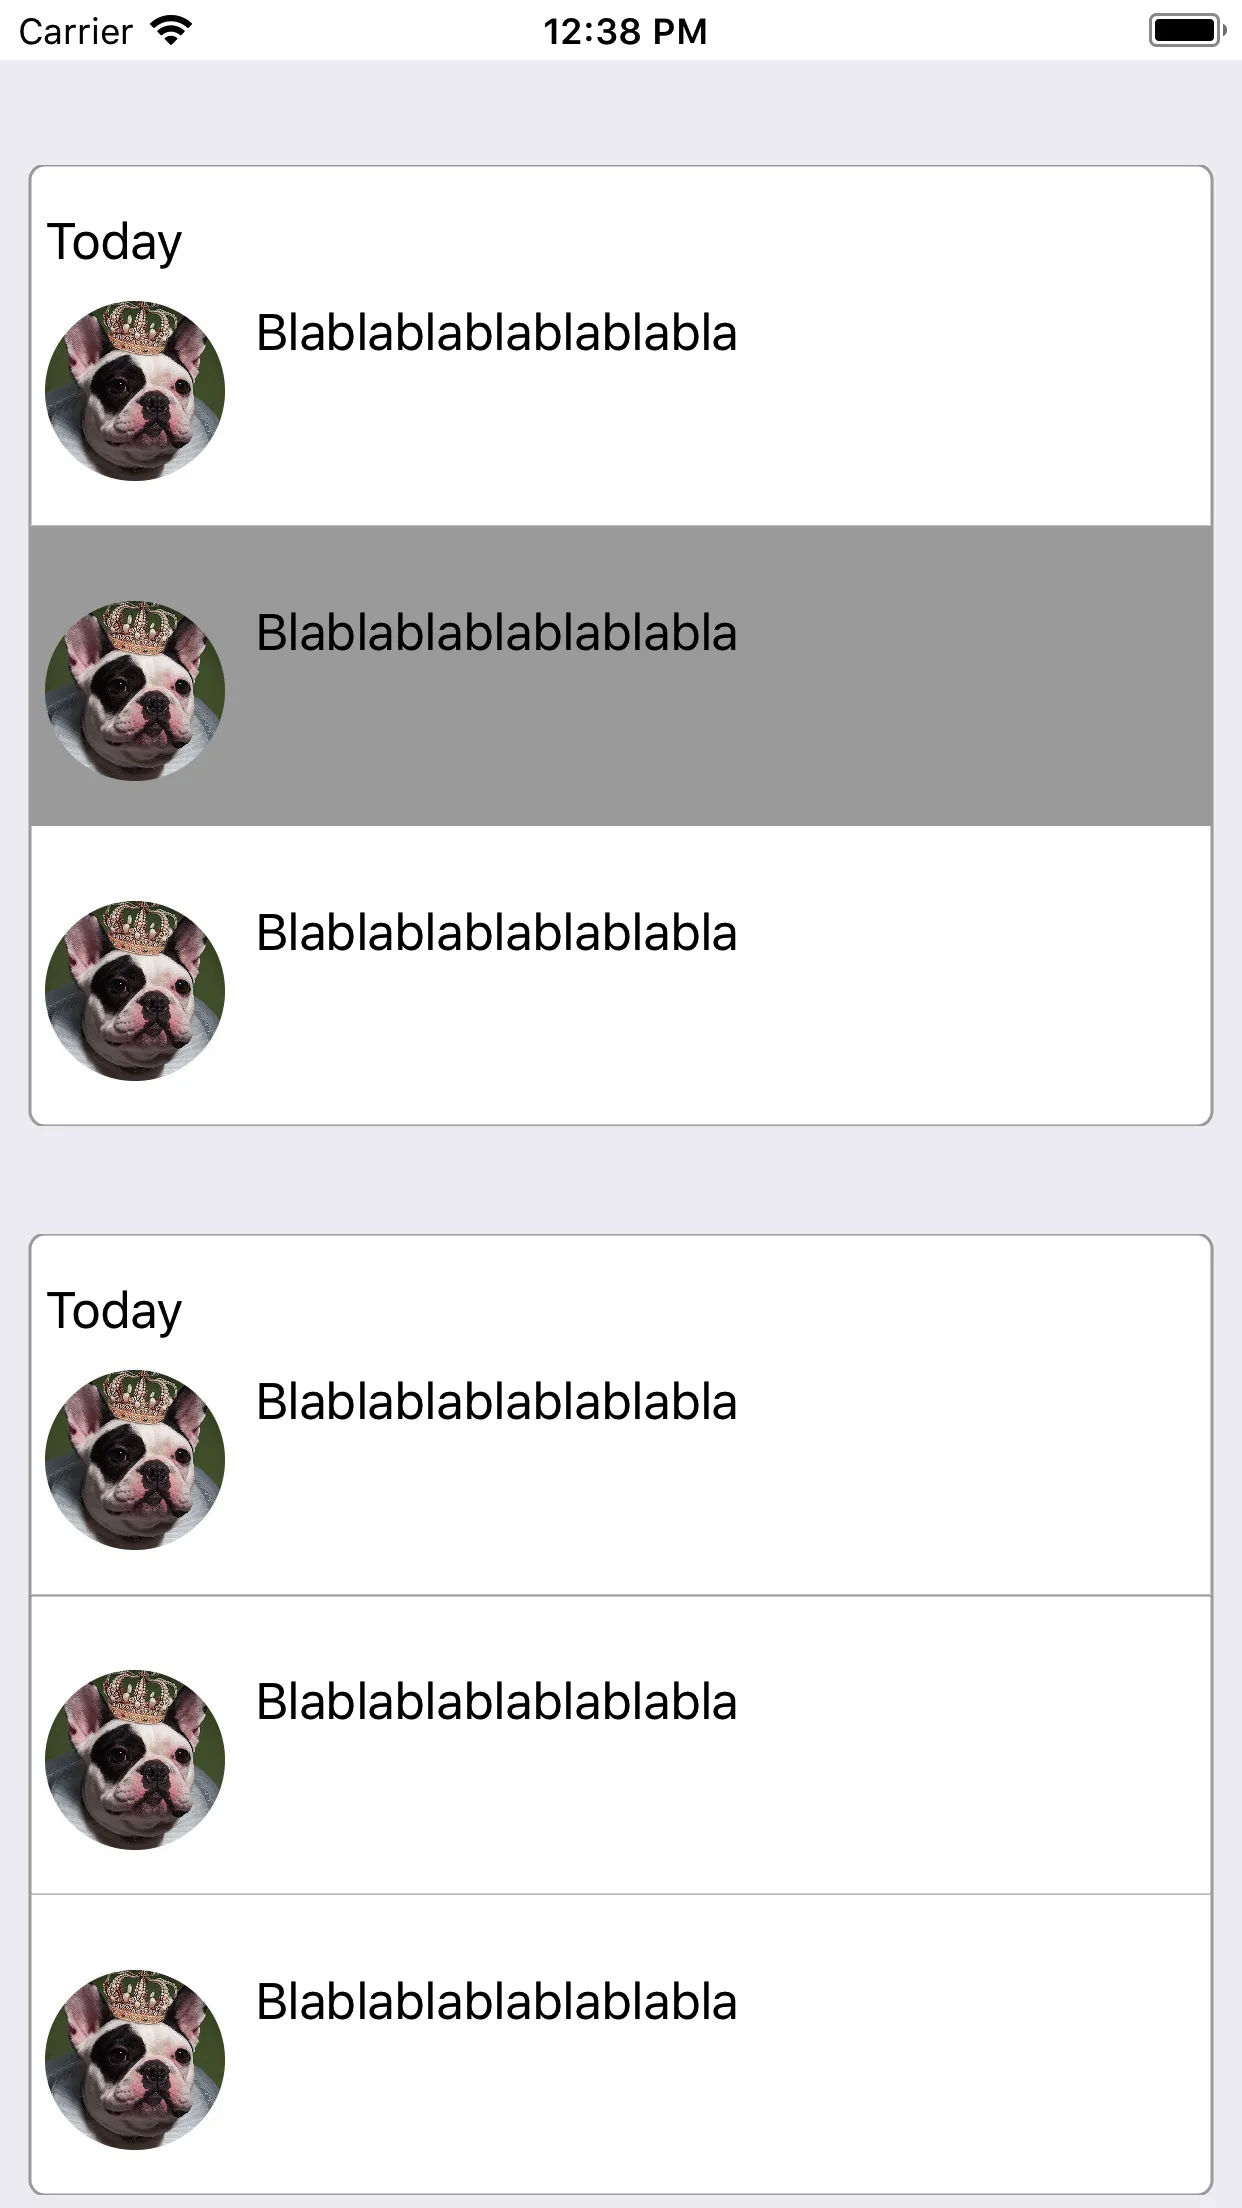
截图:
Code:
https://drive.google.com/file/d/0BwYZPQSG7kikbVpUZklGSWFwMTA/view?usp=sharing
 。我已经拥有了一个CardView类来创建带有阴影的卡片,但是我没有成功地使用它来达到我想要的效果。也许最好的方法是自定义sections并在它们上应用我的CardView。你能帮我吗?谢谢!